


Last updated: November 3, 2026
Driveway cleaning is the work of removing dirt, algae, tire marks, and stains from a driveway surface without damaging the material underneath, using the right cleaner and the right amount of pressure for concrete, asphalt, or pavers. It sounds simple, and the first half is. Sweep, wash, rinse, done. The second half is where driveways get ruined: the wrong cleaner on asphalt, too much pressure on pavers, or a strong acid on concrete that leaves a pale patch you will see every time you pull in.
I have seen all three mistakes, and they share one cause. People pick a method before they read the surface. This guide flips that order. First, figure out what your driveway is made of and what kind of stain you are looking at. Then match the method to both. The result is a driveway that looks clean without etched concrete, gouged asphalt, or pavers that rock underfoot because their joint sand is gone. If your main worry is the concrete slab itself, our concrete driveway maintenance guide covers the longer maintenance picture, while this guide is the cleaning job itself.
Contents
- Read your driveway first: the stain map
- Match the method to the material
- Cleaning a concrete driveway
- Cleaning an asphalt driveway
- Cleaning a paver driveway
- The step sequence that works on any driveway
- Stain by stain: oil, rust, green growth, and tire marks
- Mistakes that damage a driveway
- Runoff, plants, and neighbours: the part people skip
- DIY or hire it out
- After cleaning: seal, re-sand, and stay clean
- Frequently asked questions
- Sources
Read your driveway first: the stain map
Most driveway stains fall into four groups, and each one wants a different cleaner. Guessing wrong wastes an afternoon and can set the stain deeper, so spend five minutes reading the surface before you open a bottle or start a machine.
| What you see | Likely cause | First move |
|---|---|---|
| Dark, greasy patch where a car parks | Motor oil or transmission fluid | Absorbent first, then an alkaline degreaser |
| Orange or brown streaks near metal or fertilizer spills | Rust from metal furniture, tools, or fertilizer granules | An acid-based rust remover, used briefly and rinsed well |
| Green or black film, worst in shade | Algae, mold, or mildew feeding on dampness | A peroxide or diluted bleach-based wash, then a rinse |
| Black arcs where tires turn | Rubber and road film baked on by heat | A degreaser plus scrubbing, or a surface cleaner pass |
| White powder or crust on concrete or pavers | Efflorescence, mineral salts drawn out as water dries | A dry brush first, then a mild wash; chase the water source, not just the salt |
| General gray dullness, no single stain | Road film, dust, and age | A general wash with a mild detergent and a surface cleaner |
Two checks belong before any of that. First, walk the whole driveway and note cracks, loose pavers, crumbling edges, and soft spots in asphalt. Cleaning will not fix those, and pressure can make them worse, so mark them and work around them. Second, check whether the surface is sealed, stained, or colored. Sealed and decorative surfaces need gentler pressure and gentler chemistry than plain cured concrete, and a test patch in a hidden corner tells you more in ten minutes than any product label will.
Match the method to the material
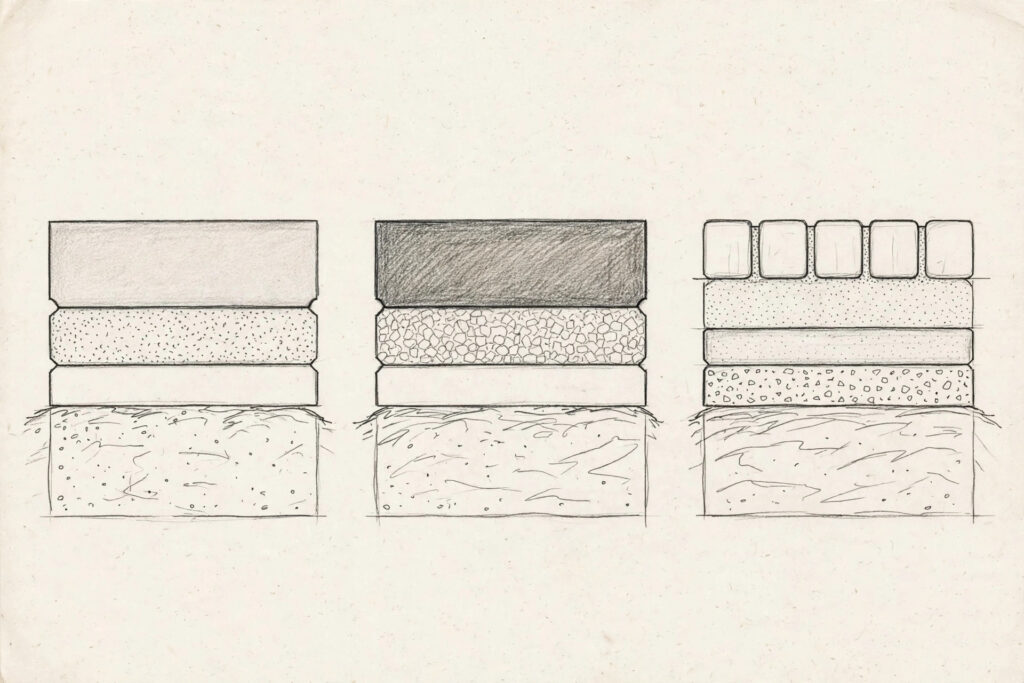
Concrete, asphalt, and pavers look alike from the street, but they fail in different ways. Concrete is hard and porous, so it tolerates the most pressure and the strongest degreasers, yet acids can etch its surface. Asphalt is held together by a petroleum binder, so solvents and high pressure can strip it. Pavers are individual units held by joint sand, so the risk is not the paver face, it is the joints washing out and the units shifting.
| Material | Safe pressure range | Best tip | Cleaner to start with | Main risk |
|---|---|---|---|---|
| Concrete, cured and unsealed | 2,000 to 3,000 PSI | 25-degree green tip or surface cleaner | Alkaline degreaser for oil, peroxide wash for growth | Etching from too much pressure or strong acid |
| Concrete, sealed, stamped, or colored | About 1,200 to 2,000 PSI | 40-degree white tip, held farther back | Mild detergent, or a cleaner rated for sealed concrete | Stripping the sealer or fading the color |
| Asphalt | 1,000 to 2,000 PSI, start low | Wide-angle tip, kept moving | Mild water-based detergent or an asphalt-rated degreaser | Gouging, raveling, and dissolving the binder with solvents |
| Pavers and brick | 1,200 to 2,000 PSI, start low | Wide-angle tip, never a pinpoint jet | Mild detergent or a paver-safe wash | Blasting joint sand out and loosening units |
Those ranges are starting points, not targets. Always begin at the low end, test a hidden corner, and only step up if the dirt is not moving and the surface still looks sound. Pressure is easy to add and impossible to take back once it has cut a stripe into concrete or a groove into asphalt. The same caution applies to chemistry: a cleaner that is right for concrete is not automatically right for asphalt, and a product that strips oil can also strip a sealer, so read the label for your exact surface before you pour.
Cleaning a concrete driveway
Concrete is the most forgiving driveway surface to clean, and the easiest to overdo. For cured, unsealed concrete, use 2,000 to 3,000 PSI with a 25-degree tip or a surface cleaner, pre-treat oil and growth first, keep the nozzle moving in overlapping passes, and rinse thoroughly so no cleaner dries on the slab. For the full concrete-only walkthrough, see how to clean concrete.
Start by sweeping, then pre-treat the stains you mapped earlier. Oil gets a degreaser, green film gets an organic wash, and general grime gets a mild detergent. Give each cleaner its dwell time, usually 5 to 15 minutes, and keep it wet. Cleaner that dries on concrete can leave its own mark, which is a frustrating way to finish a job. Then wash with the surface cleaner if you have one, since it covers evenly and avoids the stripes a wand leaves when your arm tires. Finish with a wide rinse, and let the slab dry fully before you judge the result. Concrete often looks patchy when wet and even once dry, so do not chase a damp patch with more pressure.
New concrete needs patience. Bob Vila’s guide to pressure washing a driveway reports a pro who will not pressure wash concrete until it is at least 3 years old, because early pressure can strip the cream layer off the surface and etch it for good. Other guides give a shorter curing window, so the safe rule is simple: if the slab is new, ask the installer or use a garden hose and a brush until you are sure it has cured. Sealed, stamped, or colored concrete also needs a lighter hand, roughly 1,200 to 2,000 PSI with a wide tip, and a cleaner rated for that finish. If you are not sure whether your slab is sealed, splash water on it. Water that beads and sits is a sign of a sealer. Water that soaks straight in means the slab is unsealed and thirsty.
Cleaning an asphalt driveway
Asphalt needs the gentlest approach of the three main materials. Wash it at low pressure, roughly 1,000 to 2,000 PSI with a wide-angle tip, use only mild water-based cleaners or products rated for asphalt, never let a solvent-based degreaser sit on it, and plan on resealing after a deep clean if the surface looks dry and gray.
The reason is the binder. Asphalt is aggregate held together by a petroleum-based binder, and harsh solvents can soften that binder while high pressure can displace loose aggregate and open up raveling. Nathan’s Paving guide to pressure washing asphalt puts the working range at 1,000 to 3,000 PSI and stresses starting at the lowest setting, checking for cracks and pitting first, and steering clear of damaged areas. I would stay at the low end of that range for a home driveway, and skip pressure entirely for light dirt. A stiff brush and a mild detergent solution will handle most asphalt grime without any risk to the surface, and a garden hose rinse finishes the job.
For oil on asphalt, use an absorbent first, then an asphalt-rated degreaser, and rinse well. Do not use gasoline, paint thinner, or a concrete degreaser that the label does not clear for asphalt. After washing, let the surface dry fully, then look at it honestly. If it looks faded, dry, and hungry, a compatible asphalt sealcoat is the next step, not another wash. Sealcoat is a separate job with its own drying time, and it is worth doing right rather than rushing it on the same afternoon.
Cleaning a paver driveway
Pavers clean up well, but the joints decide whether the job lasts. Wash paver faces at low pressure, roughly 1,200 to 2,000 PSI with a wide-angle tip, keep the spray off the joints as much as you can, and plan to sweep fresh joint sand back in after washing, because some sand loss is normal even with careful work.
Start the same way: sweep, inspect, and pre-treat stains with a paver-safe cleaner. Test a hidden area first, since some cleaners can change the color of certain pavers, and strong acids can etch or lighten them. When you wash, work at an angle that cleans the face without driving straight down into the joints, and keep moving. A pinpoint tip is the enemy here. It can cut a trench through joint sand in seconds, and once the sand is gone, pavers can shift, rock, and collect weeds.
After the rinse, let the pavers dry, then sweep dry joint sand into the joints and compact it lightly, repeating until the joints are full. Polymeric sand is the common choice for a driveway because it hardens and resists washout better than plain sand, but it needs a dry surface and the right curing conditions, so follow the product instructions rather than improvising. Finish by checking for any paver that still rocks. For the full relaying process, see our guide on how to lay pavers. A rocking paver after cleaning usually means sand loss or a base problem underneath, not a cleaning problem, and it is worth fixing before cars drive over it again. If a cracked paver needs replacing, the replacement often needs trimming to fit, see how to cut pavers.
The step sequence that works on any driveway
One order of work fits all three materials, with the pressure and cleaner changing by surface. Work top to bottom, meaning from the house toward the street, so dirty water runs away from cleaned sections instead of back over them.
- Clear and inspect. Move cars, planters, and anything that can be sprayed. Sweep or blow off loose dirt, leaves, and grit. Walk the surface and mark cracks, loose pavers, and soft asphalt to work around.
- Protect plants and drains. Wet down nearby grass and planting beds with a garden hose before any cleaner goes on. Note where wash water will run, and keep it out of storm drains as far as you can. More on that below.
- Pre-treat the stains. Apply the right cleaner to each stain type from the stain map, not one product for the whole driveway. Absorb fresh oil first with cat litter or a commercial absorbent, then degrease. Let each cleaner dwell for its label time, and keep it wet.
- Test a hidden corner. Set the washer to the low end of your material’s range, fit the wide tip, and wash a small spot near an edge. Check for etching, color change, or sand loss before you commit to the whole driveway.
- Wash in overlapping passes. Work in sections, holding the nozzle a steady distance from the surface, about 12 inches for concrete and farther back for asphalt and pavers, and overlapping each pass by about a third. A surface cleaner gives the most even result on flat concrete.
- Scrub what pressure leaves behind. Tire marks, deep oil shadows, and growth in textured areas often need a stiff brush after the wash. Let the cleaner do the work here. More pressure is rarely the answer when a spot resists.
- Rinse thoroughly. Switch to a wide tip and rinse the whole surface, pushing dirty water toward the street side, not back toward the house. Rinse plants again after the wash to dilute any overspray.
- Dry, inspect, and finish. Let the driveway dry fully, then walk it again. Note what is left, decide whether sealing or re-sanding is next, and fix any joint sand or loose paver before regular traffic returns.
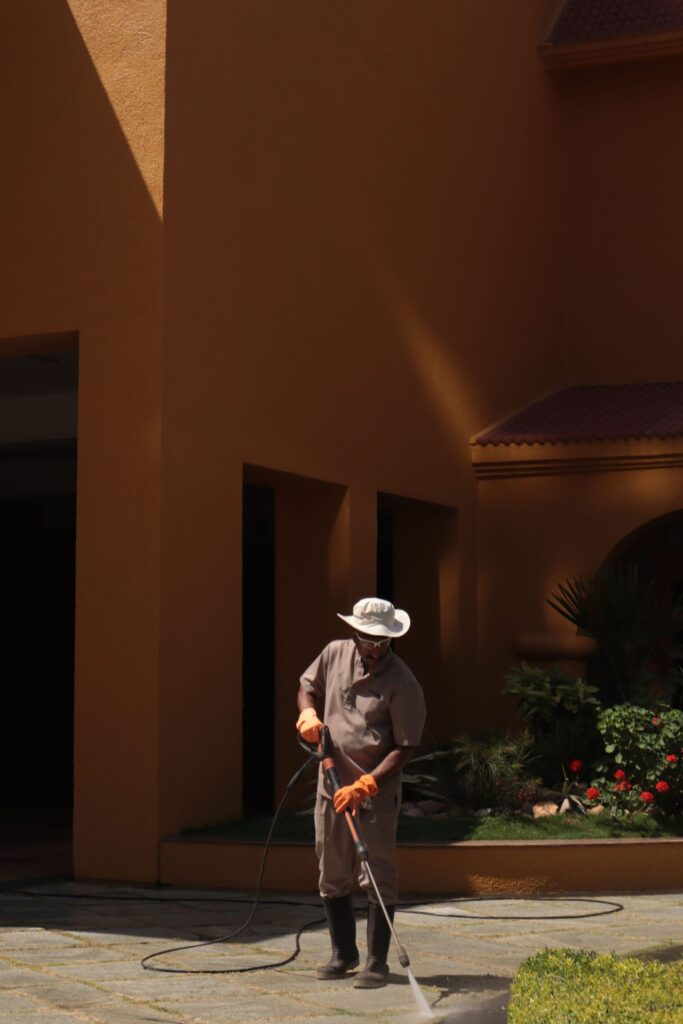
For a typical two-car driveway, plan on a morning, not an hour. Sweeping and pre-treating take longer than people expect, and rushing the dwell time is the most common reason a wash looks uneven. If you hire the job out, the same sequence applies, and it is a fair question to ask a contractor how they pre-treat, what pressure they plan to use on your material, and where the wash water will go. Our guide to questions to ask a pressure washing company gives you the full list.
Stain by stain: oil, rust, green growth, and tire marks
General washing handles general dirt. Named stains need named methods, and the method that works on one can damage the surface on another.
Oil and grease. For a fresh spill, cover it with an absorbent such as clay cat litter, leave it for at least an hour or overnight for a large spill, then sweep it up. For the shadow that remains, apply an alkaline degreaser rated for your surface, scrub with a stiff brush, let it dwell, and rinse. Old, deep oil in concrete may need several rounds, and a faint shadow can remain even after a good job. That shadow is oil that soaked into the pores, not a sign you failed. A sealer after cleaning helps keep the next spill on the surface, where it is far easier to deal with.
Rust. Rust stains come from metal furniture, tools, battery acid, and fertilizer granules left sitting on the surface. They need an acid-based rust remover, usually built around oxalic acid, applied for a short dwell of about 5 to 10 minutes, then rinsed thoroughly. Engineer Fix’s guide to cleaning a dirty driveway warns that acids can etch cement paste if left too long, so set a timer and do not walk away. Never use a rust remover on asphalt unless the label clears it for asphalt, and test colored or sealed concrete first.
Green and black growth. Algae, mold, and mildew love damp, shaded driveways, and they return fast if you only blast the surface without treating the growth. A peroxide-based wash or a diluted bleach-based solution, applied and left to dwell, kills the growth rather than just pushing it around. If your concrete keeps turning black in the same shaded area, read our guide on why a concrete driveway turns black, since the cause is often shade, drainage, or organic debris sitting on the slab, not just dirt. After treatment, rinse well, and keep leaves and debris off the area so it dries faster between rains.
Tire marks and efflorescence. Tire marks respond to a degreaser plus scrubbing, or to a careful surface cleaner pass. They are rubber and road film pressed into the surface by heat, so they take elbow grease rather than a magic product. Efflorescence, the white crust on concrete and pavers, is mineral salt left behind as water evaporates. Brush it dry first, wash mildly, and then ask where the water is coming from. Sealing over efflorescence without fixing the water source just traps the problem, and the crust usually returns.
Mistakes that damage a driveway
Most driveway damage from cleaning is avoidable, and it comes from a short list of errors. The first is the pinpoint tip. A 0-degree red tip concentrates the whole stream into one spot, and it can cut concrete, gouge asphalt, and trench paver joints. Leave it in the box. The second is parking the wand in one spot. Even at the right pressure, holding still etches a stripe or a pit. Keep moving, and keep the distance steady.
The third mistake is using the wrong cleaner, especially a solvent degreaser on asphalt or a strong acid on concrete left to dwell too long. The fourth is washing a damaged surface as if it were sound. Cracked, spalled, or raveling areas need repair first, or at least a wide berth during washing. The fifth is skipping the test patch. Ten minutes in a hidden corner would have caught most of the damage stories I hear, from faded stamped concrete to bleached pavers. If a cleaner or a pressure setting worries you, test it where nobody will see the result.
Runoff, plants, and neighbours: the part people skip
Wash water has to go somewhere, and that somewhere matters. Detergent, oil residue, and loosened grime should not run straight into a storm drain, which in most areas leads to local waterways rather than a treatment plant. Keep wash water on your own property where you can, direct it toward grass or gravel rather than the street drain, and check your local rules if you are using anything stronger than a mild detergent. Hired crews should be able to say where their wash water goes. If they cannot, that is a useful warning sign.
Plants need the same care. Pre-wet beds and lawn edges before you start, rinse them again after, and avoid letting strong cleaners pool around roots. Pressure itself is a hazard too. A washer that can cut concrete can cut skin, so wear eye protection, gloves, and closed shoes, never point the wand at people or pets, and grip the wand with both hands. If water is pooling on the driveway instead of draining away, that is a drainage problem, not a cleaning problem. Our guide on why water pools on a driveway walks through the causes, from slope to a settled slab, and cleaning will not fix any of them.
DIY or hire it out
Most driveway cleaning is a solid DIY job, but not every driveway qualifies. The table below draws the line the way I would draw it for my own house.
| Situation | DIY | Hire a pro |
|---|---|---|
| Sound concrete or pavers, general dirt and light stains | Yes, with the right tip and a surface cleaner | Only if you prefer not to rent or buy a washer |
| Asphalt in good shape, light to moderate grime | Yes, at low pressure, or by brush and hose | For a deep clean before sealcoating |
| Deep oil, rust, or growth that survived two rounds | Try a second method first | Yes, pros have hotter water and stronger, surface-rated chemistry |
| Cracked, spalled, raveling, or settled surface | Clean gently by hand only | Yes, and ask about repair before washing |
| Large, steep, or heavily stained driveway | Possible, but slow | Usually worth it for time and even results |
| Wash water cannot be kept off drains or neighbours | Stop and rethink the plan | Yes, ask how they capture or divert runoff |
A pro is also the right call when the surface is sealed, stamped, or colored and you are not sure what it can take. A contractor who names your material, states a pressure range, and explains their pre-treatment is giving you the answers that matter. One who promises a single pressure for every driveway is not.
After cleaning: seal, re-sand, and stay clean
Cleaning is only half the job if the surface stays unprotected. For concrete, a penetrating sealer keeps oil and water near the surface, where the next clean is far easier, without changing the look much. Film-forming sealers give a wet look and stronger stain resistance, but they can get slippery when wet and they need recoating on schedule. For asphalt, a compatible sealcoat restores color and protects the binder, and it needs a fully dry surface and the right weather to bond. For pavers, fresh joint sand is the finish, and a paver sealer is optional, best decided after the joints are full and dry.
Timing matters. Seal only when the surface is fully dry and clean, and follow the product’s temperature and curing instructions rather than rushing to park on it. If you want the longer view, including when to reseal and how cleaning fits into yearly care, our concrete driveway maintenance guide lays out the full schedule. For the rest of the house, our exterior house cleaning guide by surface matches each surface, from siding to decks, with the method it can actually take, and our soft washing versus pressure washing guide explains why some surfaces should never see high pressure at all.
Staying clean is mostly habit. Sweep regularly so dirt does not grind into the surface under tires. Clean spills promptly, especially oil, before they soak in. Keep leaves and debris off shaded areas so they dry out. Re-check the joints on a paver driveway each spring, and top up sand before weeds move in. A driveway that gets a light wash once or twice a year, with stains treated as they appear, rarely needs the aggressive deep clean that causes damage.
Frequently asked questions
Most driveways benefit from a general wash once or twice a year, with stains treated as soon as you notice them. Shaded or tree-covered driveways may need an extra wash for green growth, while a sealed driveway that sheds water well can often go longer between deep cleans.
It depends on the material. Cured, unsealed concrete usually takes 2,000 to 3,000 PSI, asphalt should stay around 1,000 to 2,000 PSI, and pavers around 1,200 to 2,000 PSI. Start at the low end of the range for your surface, test a hidden spot, and only step up if the dirt is not moving.
Yes, if the pressure, tip, or cleaner is wrong for the material. Too much pressure etches concrete and gouges asphalt, a pinpoint tip cuts stripes, and the wrong cleaner can strip a sealer or soften asphalt binder. The damage is avoidable with a wide tip, a steady distance, a test patch, and the right product for your surface.
A diluted bleach-based wash can treat green growth on concrete, but it must be diluted, kept wet, and rinsed thoroughly, and it should be kept off plants. Peroxide-based washes are a gentler option for many jobs. Never mix bleach with other cleaners, and never use it undiluted on a driveway.
Absorb fresh oil first with cat litter or a commercial absorbent, then treat the shadow with an alkaline degreaser rated for your surface, scrub, let it dwell, and rinse. Old oil may need several rounds, and a faint shadow can remain in porous concrete even after a thorough job.
Not always, but sealing helps. Concrete benefits from a penetrating sealer, asphalt from a compatible sealcoat when it looks dry and faded, and pavers from fresh joint sand with an optional sealer. Seal only on a fully dry, clean surface, and follow the product instructions for weather and curing time.
Yes. A stiff brush, a mild detergent, and a garden hose handle light dirt on all three materials, and they are the safest choice for asphalt and for any damaged surface. Reserve the pressure washer for heavier grime on sound surfaces, and use it at the low end of the safe range.
Sources
Bob Vila’s guide to pressure washing a driveway covers concrete pressure ranges, nozzle choice, surface cleaners, and the caution about washing new concrete too early. Engineer Fix’s guide to cleaning a dirty driveway sets out material-by-material cleaner choices, dwell times, pressure ranges for concrete, asphalt, and pavers, and sealer types. Nathan’s Paving guide to pressure washing asphalt covers low-pressure asphalt technique, pre-cleaning inspection, wide-angle nozzles, and sealcoating after washing.

6 Comments
Pingback: Concrete Driveway Maintenance Guide: Clean, Seal & Repair
Pingback: Why Is My Concrete Driveway Turning Black? Causes & Fixes
Pingback: How to Clean Concrete: Pressure Washing Guide, Step by Step
Pingback: How to Lay Pavers: Complete DIY Installation Guide - Home Exterior Lab
Pingback: How to Cut Pavers: Wet Saw, Grinder & Splitter Compared
Pingback: Can You Put Pavers Over Concrete? Overlay Guide