

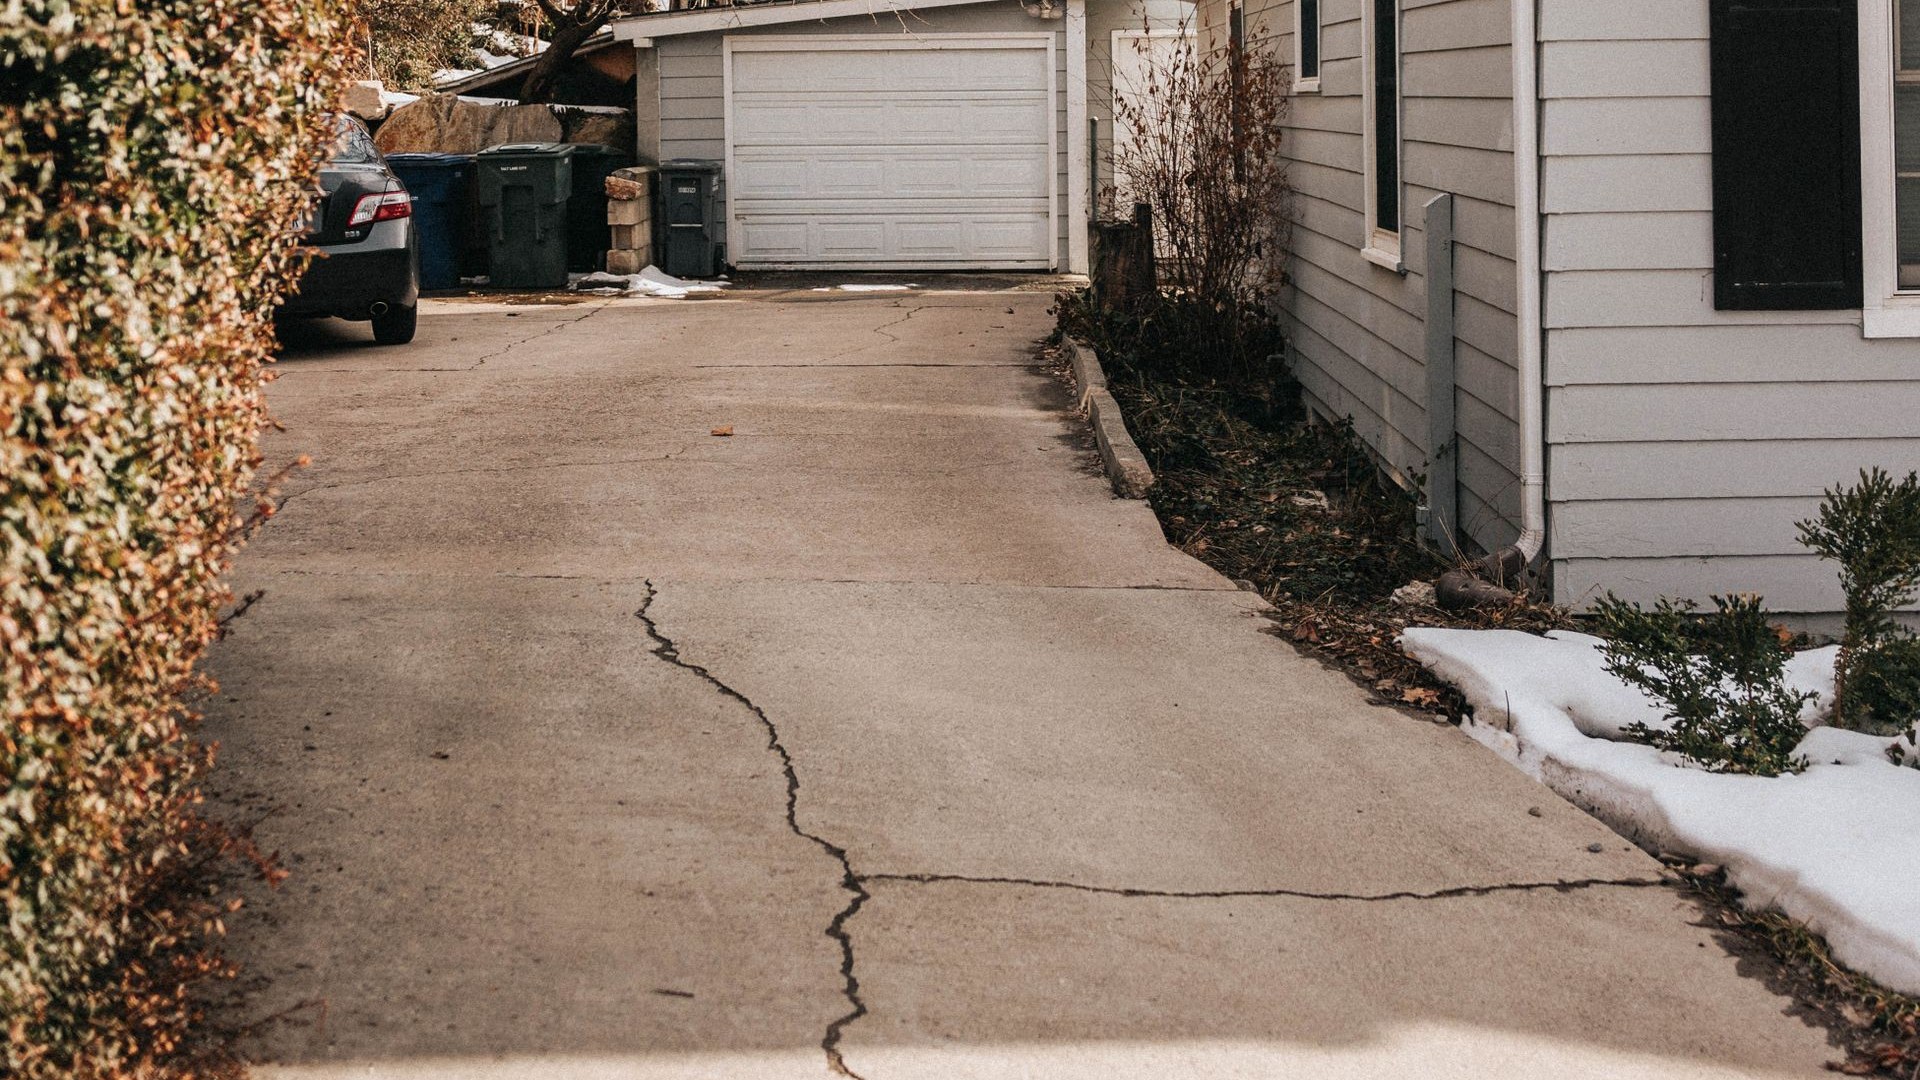
Your driveway takes more punishment than almost any other part of your house. Cars weighing two tons roll over it every day, rain soaks into it, summer sun bakes it, and in cold climates water freezes inside its pores and pries it apart from within. Concrete driveway maintenance is simply the routine work that fights all of that: regular cleaning, quick stain treatment, crack and joint repair, periodic sealing, drainage control, and winter protection. None of it is complicated, and none of it is frequent. But skipping it is the difference between a driveway that still looks solid after 30 years and one that is crumbling after 10. Well-installed concrete can last 25 to 50 years, and how you maintain it decides which end of that range you land on, as concrete contractor R&M Concrete explains in their overview of how long concrete lasts.
What Does Concrete Driveway Maintenance Actually Cover?
Strip away the jargon and the job has six parts: cleaning, inspection, crack and joint repair, sealing, drainage control, and winter protection. Crack and joint repair stops water from getting in and freezing, which is the main way small damage turns into big damage. Every section below maps to one of those jobs, so you can jump straight to the one you need.
How Often Should You Do Each Maintenance Task?
You do not need a weekly ritual. What you need is a seasonal rhythm, because most concrete damage follows the weather. Walk the driveway twice a year at minimum: once in early spring after the freeze-thaw season, and once in late fall before winter arrives. That twice-a-year inspection habit comes from Ace Handyman Services’ crack-sealing guide, and it is the single highest-value habit in this whole article.
| Season | What to do |
|---|---|
| Spring | Walk the full driveway and mark new cracks with chalk. Wash off winter grime and road film. Seal any cracks you find. Check control joints for missing or crumbling sealant. Splash water on the surface: if it soaks straight in instead of beading, plan a reseal. |
| Summer | Do your deep clean, ideally with a pressure washer on a gentle setting. If the driveway is due for sealer, summer’s warm, dry weather is the best window for applying it. Trim back tree roots and vegetation creeping toward the slab edges. |
| Fall | Clear fallen leaves promptly, since some foliage stains concrete. Seal cracks now, before water gets in and freezes. Confirm downspouts and grading still move water away from the slab. |
| Winter | Clear snow and ice promptly. Skip deicing chemicals and rock salt entirely; use sand or kitty litter for traction instead. Use a plastic shovel rather than a metal one. |
Beyond the seasons, two longer cycles matter. Reseal the surface every few years (more on timing below), and re-inspect any crack repairs after their first full winter, since severe thermal movement can reopen wider ones.
How Should You Clean a Concrete Driveway?
Start simple. Sweep regularly so dirt, leaves, and grit never sit long enough to trap moisture against the surface. For routine washing, a garden hose, dish soap or laundry detergent, and a stiff-bristle brush handle most grime. Work from the high end of the driveway down so dirty water flows away from the clean area, and rinse until no soap residue remains. If you want the full surface-by-surface approach we use around the rest of the house, our surface-by-surface exterior cleaning guide covers the same logic for siding, brick, and more.
For a deeper clean, a pressure washer earns its keep, but technique matters more than power. Lowe’s cleaning and sealing guide recommends a 25-degree tip for most concrete cleaning, stepping down to a 15-degree tip only for heavy-duty spots, and holding the wand 8 to 24 inches from the surface. Keep the wand moving in overlapping strokes and never park the stream in one spot. Test an inconspicuous area first: if the water etches the concrete, switch to a lower-pressure tip. For help matching the method to each surface around your home, see our guide to soft washing vs. pressure washing. Start with the soap tip if your machine has one, let the cleaner soak per the label without drying out, then rinse with a wide tip. Wear splash-resistant goggles, long sleeves, and closed-toe shoes while you work. And if the surface is already flaking or spalling, ease off: excessive pressure can damage weakened concrete, a point Travelers Canada makes in their concrete driveway care guide.
What Is the Best Way to Remove Stains From a Concrete Driveway?
Treat stains fast. Fresh spills lift out far more easily than ones that have had months to soak into the pores. Identify the stain first, then match the treatment:
| What the stain looks like | Likely culprit | First treatment |
|---|---|---|
| Dark, greasy spot | Motor oil or automotive fluids | Blot excess with rags (rubbing drives it deeper). Cover with cat litter for several hours, sweep up, then scrub with a degreaser or a baking-soda-and-dish-soap paste. Older stains may need TSP or WD-40. |
| Orange-brown streaks | Rust from fertilizer, metal furniture, or irrigation water | Light rust: lemon juice or vinegar, 15 minutes, scrub, rinse well. Tougher rust: commercial rust remover or oxalic acid mixed with water. |
| Green or black film in shaded areas | Algae or mildew | Scrub with a concrete cleaner and stiff brush, then rinse. This is surface growth, not structural damage. |
| Reddish-brown discoloration | Leaf tannins or clay soil | Detergent and a stiff brush usually do it. Clear leaves promptly in fall to prevent repeats. |
| Paint spots | Latex or oil-based paint | Latex paint often lifts with the same grease-stain methods. Oil-based paint may need a chemical paint stripper and several hours of dwell time. |
| Dark tire marks | Rubber transfer | Degreaser, stiff brush, and a pressure-washer pass. |
Two cautions from the sources: never use acids as a general concrete cleaner, even though mild acids have their place as a spot treatment for rust. Rinse acidic treatments thoroughly. And keep fertilizers off the driveway entirely; they stain and their chemistry is rough on the surface.
Which Driveway Cracks Actually Need Repair?
Not every crack is an emergency. Concrete shrinks as it cures and moves with temperature, so some cracking is normal. The American Concrete Pavement Association notes that narrow, hairline cracks that stay tight usually do not even need sealing, while wide cracks that open and close with temperature like joints do. Your job is triage: measure the widest point of each crack with a ruler (not the average, the widest point) and match it to the right response.
| Crack width | What it usually means | What to do |
|---|---|---|
| Under 1/8 inch (hairline) | Surface shrinkage or thermal movement | Liquid crack filler wicks in by capillary action. Simple DIY. |
| 1/8 to 1/4 inch (working crack) | Opens and closes slightly with temperature | Flexible polyurethane sealer. Rigid cement filler will re-crack as the joint moves. |
| 1/4 to 1/2 inch | Wider movement, needs depth control | Foam backer rod about 25 percent wider than the crack, then sealant over it. |
| Over 1/2 inch, or one side sits higher than the other | Structural movement, likely a subbase or drainage problem | Stop: get a professional assessment first. Sealing over an unsettled base will fail. |
This width-based decision logic comes from Ace Handyman Services’ crack-sealing guide and Angi’s driveway crack repair guide, and both draw the DIY line in the same place: up to half an inch is homeowner territory, beyond that is a contractor’s call. One more trigger for calling a pro: cracks that keep coming back in the same spot after repair. That pattern points at the soil or drainage underneath, not the surface.
How Do You Seal Cracks in a Concrete Driveway?
Once you have triaged the cracks, the repair sequence is the same whether the crack is a hairline or needs a backer rod. Preparation decides whether the fix lasts two years or ten, so do not rush it.
- Clean out the channel. Chip away loose concrete with a cold chisel, scrub the walls with a wire brush, and vacuum out the dust. A crack that looks clean often carries a film of silica dust that breaks the sealant bond.
- Confirm it is dry. Tape plastic sheeting over the crack for an hour. If moisture beads underneath, wait: sealing over wet concrete is the most common reason DIY repairs fail.
- Set the backer rod (cracks 1/4 inch and wider). Press the foam rod in gently without stretching it, leaving room for the sealant above.
- Apply the sealant. Cut the nozzle at 45 degrees, slightly narrower than the crack. Pull the gun toward you at a steady speed, overfilling about 1/8 inch proud of the surface. For hairlines, pour liquid filler slowly and add a second pass after five minutes if it settles.
- Tool it flush. Smooth the bead with a putty knife or a gloved finger so it sits level with the slab. Painter’s tape along both edges gives clean lines.
- Let it cure. Most polyurethane sealants go tack-free in 1 to 4 hours around 70 degrees but need 24 to 72 hours for full cure. Keep cars off until the label’s full-cure window passes.
Pick your weather. Ace Handyman Services’ crack-sealing guide recommends applying between 50 and 90 degrees Fahrenheit with at least 24 hours of dry weather ahead. Early morning beats midday in summer, since a sunbaked slab makes the sealant skin over too fast and traps air.
What Should You Do About Driveway Joints?
Those straight grooves dividing your driveway into squares are control joints, and they are doing you a favor. Concrete cracks as it shrinks; the joints give it a planned place to do it so the cracking stays neat instead of zigzagging across the slab. They are not damage, but they do need occasional attention.
The main purpose of sealing concrete pavement joints is to keep surface water from draining down through the joints into the soil layers below, and to keep pebbles and grit from lodging in the joint faces, according to the American Concrete Pavement Association. Resealing becomes necessary whenever the old sealant is missing or deteriorated. So during your spring and fall walkarounds, look along the joints: if the sealant has pulled away from the walls, crumbled, or vanished entirely, clean out the joint and run a fresh bead of flexible sealant. Pull out any weeds or grass first, roots and all, so they do not wedge the joint back open.
Should You Seal Your Concrete Driveway?
For most driveways, yes. A sealer slows water absorption, which cuts freeze-thaw damage; it resists oil and chemical stains; and it makes the surface easier to clean next time. Angi’s sealing guide puts the rhythm at about every five years for concrete, while concrete pros cite a 2-to-5-year range depending on traffic, sun, and climate. Treat five years as the planning number and let the surface tell you the rest.
The tell is the water test. Splash water on the concrete: if it beads up, the existing sealer is still working. If it soaks straight in and darkens the surface, protection is gone and it is time to reseal. Lowe’s cleaning and sealing guide describes exactly this check. Other signs include stains that suddenly penetrate where they used to sit on top, and a surface that dries in blotchy patches after rain.
One warning: more is not better. Sealing concrete every year can actually encourage more hairline cracking, and a fresh coat over an intact one does nothing but waste money and material. Seal on condition, not on a calendar.
New concrete is the exception to the schedule. Angi’s sealing guide suggests waiting about a month after placement before sealing so curing can finish, and Travelers Canada’s care guide says to keep cars off new slabs for at least the first week.
Penetrating vs Film-Forming Sealer: Which Type Fits Your Driveway?
Sealers fall into two families, and the right one depends on what your driveway looks like and what you want from it.
| Sealer type | How it works | Finish | Best for |
|---|---|---|---|
| Penetrating | Soaks into the concrete’s pores and protects from within; nothing sits on the surface | Invisible, keeps the natural matte look | Plain gray driveways, especially in freeze-thaw climates where water protection matters most |
| Film-forming (acrylic and similar) | Forms a protective layer on top of the surface | Adds anything from a light satin sheen to a wet glossy look | Stamped or decorative concrete where you want to enrich the color, or anyone chasing extra curb appeal |
Penetrating sealers are the workhorse choice for an ordinary driveway: they do not change the appearance, they do not get slippery the way some surface films can, and a quality one lasts years. Film-forming sealers look great on decorative concrete but show wear sooner under tire traffic, so expect a shorter interval between coats. Whichever you choose, buy a product rated for exterior concrete and follow the label; the label’s coverage and cure instructions beat any generic advice.
How Do You Apply Concrete Sealer Without Ruining the Finish?
Sealing is a satisfying DIY job precisely because the method is simple and the mistakes are avoidable. The order matters: repairs first, then cleaning, then sealer.
- Repair, then clean. Fill cracks and let repairs cure. Then wash the driveway and let it dry for at least 24 hours, as Lowe’s sealing walkthrough instructs. Sealer trapped over dirt or moisture peels and bubbles.
- Do the water test. If water still beads in most areas, you may only need to spot-treat worn sections rather than coating the whole slab.
- Pick your day. You want 50 to 90 degrees, low wind, and no rain for 24 to 48 hours. Start at the garage and work toward the street so you never walk on fresh sealer.
- Apply thin and even. A garden or tank sprayer with overlapping strokes is fastest for large areas; a roller with an extension pole works fine too, with a brush for edges and seams. Thin coats beat thick ones. Puddles become white spots and peeling later, so spread out any buildup with a rag.
- Let it cure. Most products want a second coat at a right angle to the first after the label’s recoat window. Then stay off it: foot traffic after the label says so, and no cars for up to 48 hours, which matches Angi’s sealing timeline.
Wear splash-resistant goggles and chemical-resistant gloves during application (Lowe’s safety checklist calls for both), and keep the sealer off siding, plants, and anything you do not want coated. If the old sealer is failing unevenly, it may need professional prep before a new coat will bond; a fresh coat over flaking sealer just flakes with it.
How Do You Protect a Concrete Driveway Through Winter?
Winter is where neglected driveways suffer most. Water gets into every pore and crack, freezes, expands, and widens the damage a little more with each cycle. R&M Concrete calls freeze-thaw the single biggest factor in premature spalling and cracking where winters are cold. Your winter routine has three parts.
First, keep deicing chemicals off the concrete. Sodium chloride (rock salt) and calcium chloride accelerate surface damage, and on reinforced slabs they can corrode the steel inside. Travelers Canada’s driveway care guide is blunt about it: deicers cause deterioration of the concrete, and damage from salts and deicers is not covered by their home warranty. Use sand or kitty litter for traction instead. If you do use a deicer somewhere it cannot be avoided, rinse the driveway thoroughly in spring.
Second, clear snow and ice promptly and do not let them sit. Meltwater that refreezes in cracks does the same damage as rain. Use a plastic shovel or a snow blower; metal blades can gouge the surface.
Third, brush slush and road spray off the apron where your car parks. That slush carries the exact deicing chemicals you are trying to keep off the slab.
How Do You Keep Water From Undermining the Slab?
Water hurts concrete twice: from above, through cracks and pores, and from below, by saturating the soil the slab sits on. Saturated soil settles unevenly, and an unevenly supported slab cracks from underneath no matter how well you sealed the top. Two habits prevent most of it.
Keep the edges dry. The ground around the driveway should slope away from the concrete so rain runs off instead of pooling against it. Keep gutters and downspouts discharging well away from the slab; if you are unsure what “well away” means, our guide on how far downspouts should drain from the house gives the distances. Do not aim sprinklers at the driveway or let the hose run against its edges.
Watch for pooling on the surface. A puddle that lingers for days after rain is telling you something about why water pools on a driveway — the slab’s pitch or the drainage around it — so note where it sits and how long it stays.
Repair, Reseal, Resurface, or Replace: How Do You Decide?
Sooner or later every driveway owner faces the big question: is this slab worth saving? The answer depends on what is wrong with it, not how old it looks. Use this as your framework.
| What you see | Likely verdict | Why |
|---|---|---|
| Isolated hairline or small cracks, surface otherwise sound | Repair it yourself | Cosmetic damage. Sealing the cracks stops water entry and the slab has years left. |
| Sealer worn off (water soaks in), surface sound | Reseal | The protection layer is gone but the concrete is fine. A fresh coat resets the clock. |
| Widespread surface wear, minor spalling, light discoloration, slab still flat and solid | Resurface | A resurfacing layer renews the top without the cost of replacement, as long as the base is sound. |
| Random cracking across large areas, slabs settled unevenly with trip hazards, concrete over 40 years old failing in several ways at once, or frost heave that keeps moving the slab | Replace | These point to base failure or a worn-out slab. Patching over a failed base just delays the inevitable and adds cost, as R&M Concrete puts it. A new slab on a properly prepared base will outlast the patched one by a wide margin. |
The honest version: repair buys time for a good slab, and replacement is the answer for a bad one. Resurfacing sits in the middle and only makes sense when the structure underneath is sound, so get the base assessed before committing to it.
Which Driveway Jobs Are DIY, and Which Need a Pro?
Most concrete driveway maintenance is firmly DIY: sweeping, washing, stain treatment, sealing hairline and working cracks, maintaining joints, and applying sealer. A weekend, basic tools, and attention to the label get it done. Even a full reseal is a standard homeowner project.
Bring in a concrete contractor when the problem is structural or keeps returning. The clear triggers: cracks wider than half an inch, one side of a crack sitting higher than the other, slabs that have settled or rock underfoot, cracks that reopen in the same spot after repair, and any drainage problem that regrading or downspout work does not fix. A pro can also tell you whether resurfacing will bond to your slab or whether you are throwing money at a base that has already failed. That assessment is worth paying for before you commit to either.
Concrete Driveway Maintenance FAQs
About every five years for most concrete driveways, or every two to five years if yours sees harsh winters, heavy traffic, or strong sun. Let the water-bead test decide: if water soaks in instead of beading, the sealer is done. Do not seal yearly; over-sealing concrete can encourage hairline cracking.
Yes. Use a 25-degree tip for general cleaning and hold the wand 8 to 24 inches from the surface, moving in overlapping strokes. Test an inconspicuous spot first and drop to a lower-pressure tip if the water etches the concrete. Never park the stream in one place.
For general grime, dish soap or laundry detergent with a stiff brush and a hose. For oil, a degreaser after absorbing the excess with cat litter. Skip acidic or bleach-based cleaners for routine washing; they erode the surface over time.
You cannot prevent every crack, since concrete shrinks as it cures and moves with temperature. You can sharply cut the odds: keep control joints sealed, seal the surface on schedule, keep water and deicers off it, keep heavy vehicles off it, and watch the soil drainage around the edges.
Repair isolated cracks in an otherwise sound slab; that is almost always the economical answer. Replace when cracking is widespread and random, slabs have settled into trip hazards, the concrete is past 40 years with multiple failure modes, or frost heave keeps moving the slab despite repairs.
It is better not to. Rock salt and chloride deicers accelerate surface scaling and damage, and the harm is worse on concrete less than a year old. Use sand or kitty litter for traction, clear snow promptly, and rinse the driveway in spring.
A well-installed and maintained concrete driveway typically lasts 25 to 50 years. Installation quality and maintenance decide where in that range yours lands: sealing, early crack repair, and keeping deicers and heavy loads off the slab add years.
Sources
- Lowe’s guide to cleaning and sealing a concrete driveway
- The American Concrete Pavement Association on joint and crack resealing
- Angi’s guide to how often a driveway should be sealed
- Angi’s guide to fixing driveway cracks
- R&M Concrete on how long concrete really lasts
- Ace Handyman Services’ guide to sealing cracks in a concrete driveway
- Travelers Canada’s concrete driveway care guide (PDF)

2 Comments
Pingback: Why Is My Concrete Driveway Turning Black? Causes & Fixes
Pingback: Soft Washing vs Pressure Washing: Surface Guide | Home Exterior Lab