

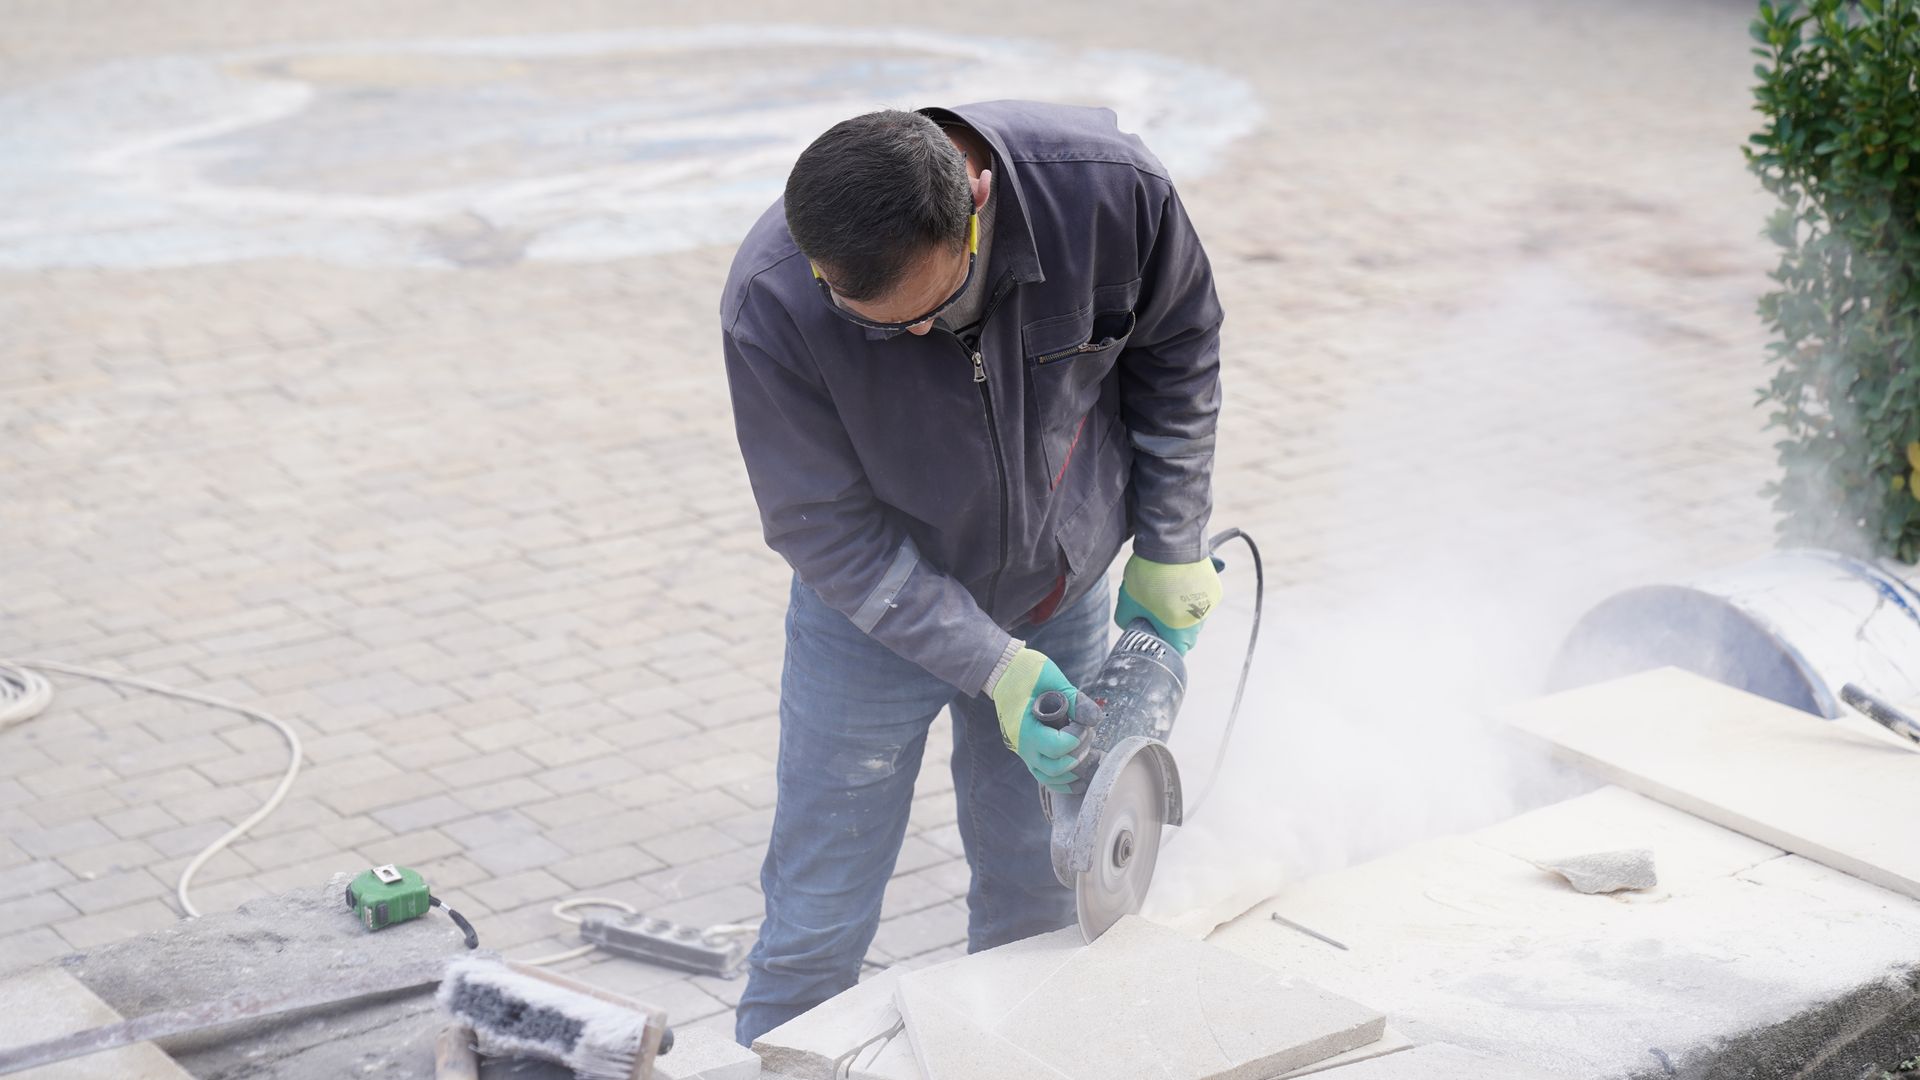
Cutting a paver is the moment a patio stops looking like a kit and starts looking like it was built for that exact spot. A paver is a manufactured concrete, clay brick, or natural stone unit used to pave patios, walkways, and driveways, and almost every layout needs some of them trimmed: along an edge, around a post, or where a curve bends away from the grid. The good news is that you do not need a pro shop to get clean results. You need the right tool for the number and shape of cuts you have, a careful mark, and a healthy respect for the dust.
Short answer: For most DIY patio and walkway jobs, a wet saw gives the cleanest straight cuts, an angle grinder with a diamond blade handles curves and small jobs, and a manual splitter is the fastest dust-free choice for lots of straight cuts in standard concrete pavers. Score first, cut in shallow passes with a saw or grinder, and never dry-cut concrete or stone without a respirator, eye protection, and hearing protection.
Last updated: November 5, 2026
Contents
- Which Tool Should You Use?
- Before You Cut: Measure, Mark, and Dry-Lay
- Silica Dust and Safety: The Part to Take Seriously
- Cutting With a Wet Saw
- Cutting With an Angle Grinder
- Cutting With a Manual Splitter
- Cutting With a Hammer and Chisel
- Cutting Curves and Angles
- Fitting the Cut Pieces
- When Cuts Go Wrong
- Rent, Buy, or Hire Out the Cutting?
- Frequently Asked Questions
- Sources
Which Tool Should You Use?
Every cutting method trades speed, edge quality, dust, and cost against the others. There is no single best tool, only the best fit for your cut list. Count your cuts before you choose. A patio with six edge cuts is a different job from a walkway with sixty.
| Tool | Best for | Edge quality | Dust level | Typical DIY fit |
|---|---|---|---|---|
| Wet saw (masonry or tile saw) | Many straight cuts, visible edges | Cleanest, closest to a factory edge | Low, water suppresses dust | Rent for a full patio; buy only if you pave often |
| Angle grinder with diamond blade | Few cuts, curves, tight spots, trimming in place | Good if scored first, rougher on deep single passes | High when dry cutting | Best buy for a small job if you already own a grinder |
| Manual paver splitter | Many straight cuts in standard concrete pavers | Straight but rough, rock-faced look | Almost none | Rent for a big straight-edged job |
| Hammer and masonry chisel | One or two cuts, minor adjustments | Ragged, needs cleanup | Low | Cheapest option, slowest and least precise |
| Cut-off (demolition) saw | Thick pavers, cutting installed edges in place | Good on straight runs | High unless water is applied | Rent for thick stone or in-place edge trimming |
Two rules narrow the choice fast. First, if the edge will sit in plain sight, like the front step of a patio or the border of a walkway, use a wet saw. A splitter edge looks fine tucked against edging or a wall, but it reads as rough on a showpiece border. Second, if you are cutting natural stone, check the tool rating for stone. Family Handyman notes that most wet tile saws will not be powerful enough for stone pavers, so a masonry table saw or a stone-rated blade is the safer pick there.
Blade choice matters as much as tool choice. Use a diamond blade rated for masonry or stone, matched to the material you are cutting, and check that it is rated for the speed of your tool. A segmented rim cuts faster and rougher, a continuous rim cuts smoother and slower. For visible edges, the smoother rim is worth the extra time.
Before You Cut: Measure, Mark, and Dry-Lay
Most bad cuts are bad measurements wearing a saw blade costume. I have watched a careful cut go to waste because the paver was measured against the wrong edge of the gap, and the fix was a second cut on a fresh paver. Slow down here and the saw work gets easy.
Measure the gap, not the paver you think should fill it. Lay whole pavers up to the gap, then measure the empty space at both ends, since walls and edging are rarely perfectly square. If the two measurements differ, you need an angled cut, not a straight one, and that changes how you mark it. Leave the normal joint gap on each side of the cut piece, the same spacing the rest of the field uses, so the cut piece does not end up wedged tight while its neighbors sit loose.
Mark with a pencil or lumber crayon and a speed square or straightedge, drawing the line across the top and down both sides of the paver. A line on the top only is easy to drift away from once dust and water hide it. For a curve, trace the shape with a flexible guide, like a garden hose or a thin strip of PVC, as Engineer Fix suggests for complex cuts, then transfer that line to each paver with a marker.
Dry-lay the cut pieces before you commit to cutting the whole batch. Set the uncut pavers in place, mark each one in position, and number the back of each piece with chalk so you know which gap it belongs to. Cutting in place, with the paver already sitting in the field, is a pro shortcut for edge runs, but it is easier to lose the mark in dust, and it can scratch the neighboring pavers, so I still prefer a bench setup for most visible work. The pattern you are laying decides how many cuts you will make: our guide to brick paver patterns compares running bond, herringbone, basketweave and stack bond, and the waste each one adds.
Silica Dust and Safety: The Part to Take Seriously
Silica dust is the real hazard in this job. Cutting concrete, brick, or stone releases fine particles of crystalline silica, and breathing them over time can cause silicosis and lung disease. This is not a scare line to skip past. It is the reason wet cutting, dust extraction, and a proper respirator matter more than shaving a few minutes off a cut.
Wet cutting is the single biggest improvement you can make. Water on the blade captures most of the dust at the source, keeps the blade cool, and usually gives a cleaner edge. If you must cut dry, use a saw or grinder with dust extraction and a vacuum rated for silica dust, and still wear a respirator.
Dust control is also a legal and workplace issue, not just a comfort choice. OSHA sets a permissible exposure limit for respirable crystalline silica and requires controls such as water or ventilation on job sites. At home, follow the same logic: wet-cut when you can, work outdoors or in a well-ventilated area, keep other people out of the dust plume, and clean up with water or a vacuum, not a dry broom. Our guide to how to lay pavers covers the wider layout and base work that should come before any cutting.
Keep dust out of your lungs, eyes, and ears. Wear a P100 or N95 respirator that fits your face, not a loose paper dust mask, plus safety glasses or goggles, hearing protection, and gloves. A diamond blade can grab and kick, so keep both hands on the tool, keep the cord and hose out of the cut path, and never remove a guard to see the line better.
Cutting With a Wet Saw
A wet saw is the workhorse for straight cuts. It is basically a small table saw with a diamond blade and a water tray, and the water does three jobs at once: it cools the blade, suppresses dust, and helps the blade cut cleanly. If you are cutting more than a handful of pavers, or any edge that will be seen, this is the tool to rent first.
Work through the cut in the same order every time, so you do not have to think about the setup while the blade is spinning.
- Set up the saw
Set up the saw on a stable, level surface outdoors, fill the water tray, and check that water is reaching the blade before you start cutting.
- Mark and align
Mark the paver on the top and both sides, then align the mark with the blade and the fence, keeping your hands clear of the blade path.
- Cut at full speed
Cut at full speed, letting the blade do the work, and feed the paver slowly and evenly without forcing it or twisting it mid-cut.
- Keep a steady pace
Keep a steady pace through the whole cut, then let the blade stop before you lift the pieces, and rinse the slurry off the cut faces before it dries.
If a cut starts to wander, stop, check the mark against the blade, and re-align rather than steering the paver back on course mid-cut. A forced correction usually leaves a curved edge that is harder to fix than a fresh cut on a spare paver.
Cutting With an Angle Grinder
An angle grinder is the most flexible tool in the list, and the one most DIYers already own. With a diamond blade and a steady hand, it can cut straight lines, curves, and notches, and it can trim pavers that are already laid. Its weakness is dust and depth: a small grinder only cuts partway through a thick paver in one pass, and dry cutting throws a lot of silica dust into the air.
Score first, then cut deeper. Mark the line, make a shallow scoring pass along it, then make a second, deeper pass, and a third if needed, until you are through. Shallow passes give a cleaner edge, keep the blade cooler, and reduce the chance of the blade binding or kicking. For a thick paver, score both sides, cut from the top, then flip the paver and finish from the other side, meeting in the middle.
Use both hands, keep the guard on, and let the blade spin up fully before it touches the paver. Work outdoors, wear a respirator, and keep the cord out of the water if you are wetting the cut. A grinder is also the right tool for trimming a paver in place, for example where a new edge meets an existing wall, but take extra care not to cut into the neighboring pavers or the base below.
Cutting With a Manual Splitter
A manual splitter does not saw at all. It scores a line across the paver, then applies pressure from both sides until the paver snaps along that line. There is almost no dust, no water, and no noise, which makes it a good choice for a long, straight edge run in standard concrete pavers. The trade-off is the edge: it is a broken, rock-faced edge, not a sawn one, so it suits borders tucked against edging, not showpiece faces.
Work in this order for a clean break.
- Mark the line on the top and both sides, then set the paver in the splitter with the line aligned under the blade.
- Score the line firmly, then apply steady pressure until the paver snaps, rather than forcing it in one sudden jerk.
- Check the break against the gap, and trim any high spots with a hammer and chisel or a grinder before fitting.
Splitters work best on standard, uniform concrete pavers. Irregular, very thick, or natural stone pavers can break unevenly, and a splitter will not cut curves or notches. If more than a few pieces break badly, switch to a wet saw for those pieces rather than wasting pavers.
Cutting With a Hammer and Chisel
A hammer and masonry chisel is the slowest method, but it costs almost nothing and it works for one or two cuts. It is also the method for small adjustments, like knocking a corner off a cut piece or smoothing a rough splitter edge.
Score a line around the paver with the chisel and hammer, working your way around the top and sides, then place the chisel on the line and strike it firmly to snap the piece. Do not try to cut through in one blow. A series of lighter, controlled taps along the line gives a straighter break and less chipping. Clean up the edge with the chisel held flat, tapping off small high spots until the piece fits.
Wear eye protection for this work in particular, since chips fly unpredictably. If you need more than two or three cuts, rent a saw or splitter instead. The time saved will more than cover the rental, and the edges will be far better.
Cutting Curves and Angles
Curves are where a grinder earns its keep. A wet saw can cut a gentle curve in a few passes, but a tight curve needs the relief-cut method: a series of straight cuts up to the curve line, then snapping off the waste fingers and smoothing the edge to the curve.
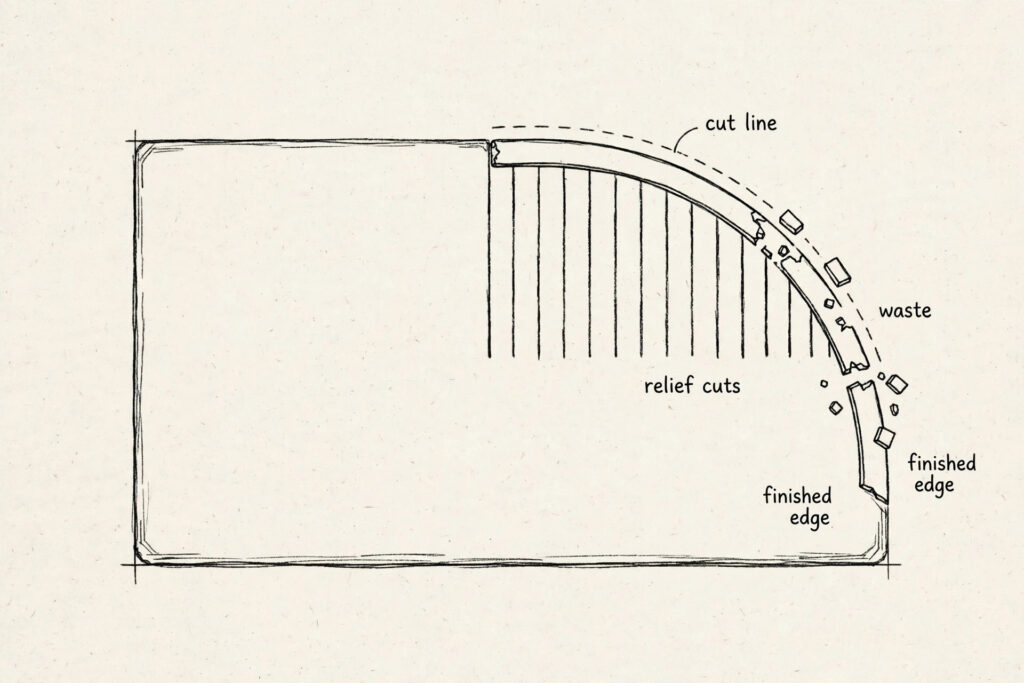
- Mark the curve clearly on the top of the paver, then mark a series of parallel relief cuts running from the waste edge up to, but not past, the curve line.
- Cut along each relief line with a grinder or wet saw, stopping at the curve line, so the waste is divided into narrow fingers.
- Snap off the waste fingers with a hammer and chisel, working from the outside in, and keep the break close to the curve line.
- Smooth the edge to the curve with a grinder, a rubbing stone, or a chisel, checking the fit against the gap as you go.
Angled cuts follow the same measure-twice rule as straight cuts. Measure both ends of the gap, transfer both measurements to the paver, draw the line between them, and cut along it. A small angle error at the start becomes a visible gap at the end, so check the angle with a speed square before you cut, not after.
Fitting the Cut Pieces
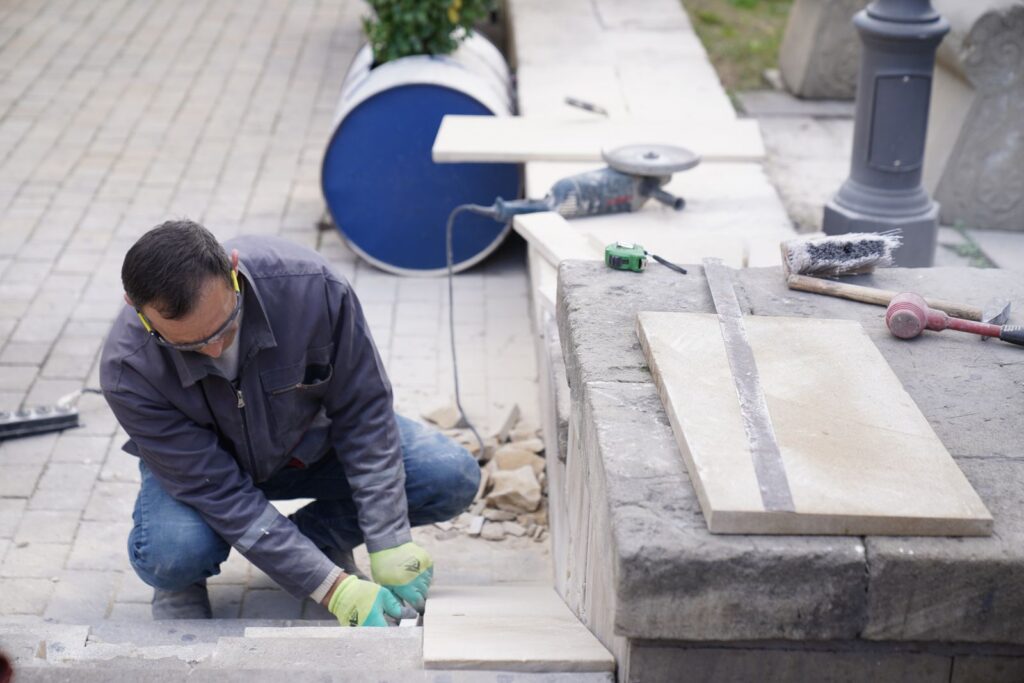
A cut piece should sit level with the rest of the field, with the same joint gap on all sides. Set it in place, check it with a straightedge across the neighboring pavers, and tap it down with a rubber mallet if it sits high. If it sits low, lift it, add a little bedding sand, and re-seat it. Do not force a tight piece in with a hammer. A forced piece will rock, crack, or push its neighbors out of line.
After fitting, sweep joint sand into the gaps, compact the area if the project calls for it, and sweep again. Cut edges are more vulnerable to chipping than factory edges, so avoid dragging heavy tools across them, and keep the joints full so the pieces cannot shift and grind against each other.
For the wider job, see our guide to how to lay pavers, and for keeping the finished surface clean, see our driveway cleaning guide and our guide to cleaning concrete. And if the new edge meets a cracked concrete slab, read our guide on how to repair large cracks in a concrete driveway first, since a moving crack will keep moving under your new edge.
When Cuts Go Wrong
Chipped edges are the most common problem, and they usually come from forcing a cut, using a worn blade, or cutting in a single deep pass. Slow down, score first, and make shallow passes. If a chip is small, smooth it with a rubbing stone or a grinder. If it is large and on a visible face, cut a fresh paver rather than trying to hide it with sand.
A cut that wanders off the line is usually a marking or alignment problem, not a saw problem. Check that the line is on both sides of the paver, that the fence is square, and that you are not twisting the paver as you feed it. A paver that breaks unevenly in a splitter is often too thick, too irregular, or already cracked. Set it aside for a hidden spot, or cut it with a saw instead.
Dusty cuts, even with water, usually mean the water flow is too low, the blade is worn, or you are cutting too fast. Check the water tray, clean the tray of slurry, and slow the feed rate. If dust is still heavy, stop and improve the extraction or ventilation before you continue.
Rent, Buy, or Hire Out the Cutting?
Rent a wet saw for a full patio or a long edge run. A day rental is usually far cheaper than buying a saw you will use once, and rental saws are built for this work. Buy a diamond blade for a grinder you already own if you only have a few cuts, and buy a splitter only if you regularly cut standard pavers. Hire out the cutting if you have a large natural stone job, very tight curves, or a showpiece border where a single bad cut would be obvious. A pro with a masonry table saw can cut a whole batch in the time it takes to set up a rental, and the edges will be consistent.
Whatever route you choose, buy a few spare pavers. A small spare allowance covers bad cuts, breakage, and future repairs, and matching pavers are much harder to find a year later than they are on the day you buy them.
Frequently Asked Questions
Yes. An angle grinder with a diamond blade can cut pavers, and a manual splitter or hammer and chisel can work for straight cuts. A wet saw gives the cleanest visible edges and the least dust, so it is the best choice for a large job or a showpiece border, but it is not the only way to get a usable cut.
Yes. Use a diamond blade rated for masonry or stone, matched to the material and to your tool. A segmented rim cuts faster and rougher, while a continuous rim cuts smoother and slower. Check the blade rating for your saw speed before you start.
Score the line first, cut in shallow passes, keep the blade sharp, and do not force the cut. A wet saw gives the cleanest edge, and a steady, even feed rate matters more than speed. Small chips can be smoothed with a rubbing stone or a grinder.
Yes, with an angle grinder or a cut-off saw, but take care not to cut into neighboring pavers or the base. Mark the line clearly, cut in shallow passes, and protect the surrounding pavers from dust and chips. For a long installed edge, a cut-off saw with water is usually cleaner than a small grinder.
Dry cutting creates a lot of silica dust, which is harmful to breathe. Wet cutting is safer and usually cleaner. If you must dry-cut, work outdoors, use dust extraction, and wear a properly fitting P100 or N95 respirator, eye protection, and hearing protection.
Yes, with a diamond blade rated for masonry, but it cuts dry, so it makes a lot of silica dust, and thick pavers need several passes plus a snap to finish. It works for a few straight cuts, but for a full patio a wet saw or grinder is a better pick.
Mark the curve, then make parallel relief cuts with an angle grinder, stopping just short of the curve line. Snap off the small waste fingers with a hammer, then grind the stepped edge smooth to the line in light passes, checking the fit often.

3 Comments
Pingback: How to Lay Pavers: Complete DIY Installation Guide - Home Exterior Lab
Pingback: Driveway Cleaning Guide: Concrete, Asphalt, and Pavers
Pingback: How to Lay Brick Pavers: Patterns, Technique & Mistakes