

Last updated: November 4, 2026
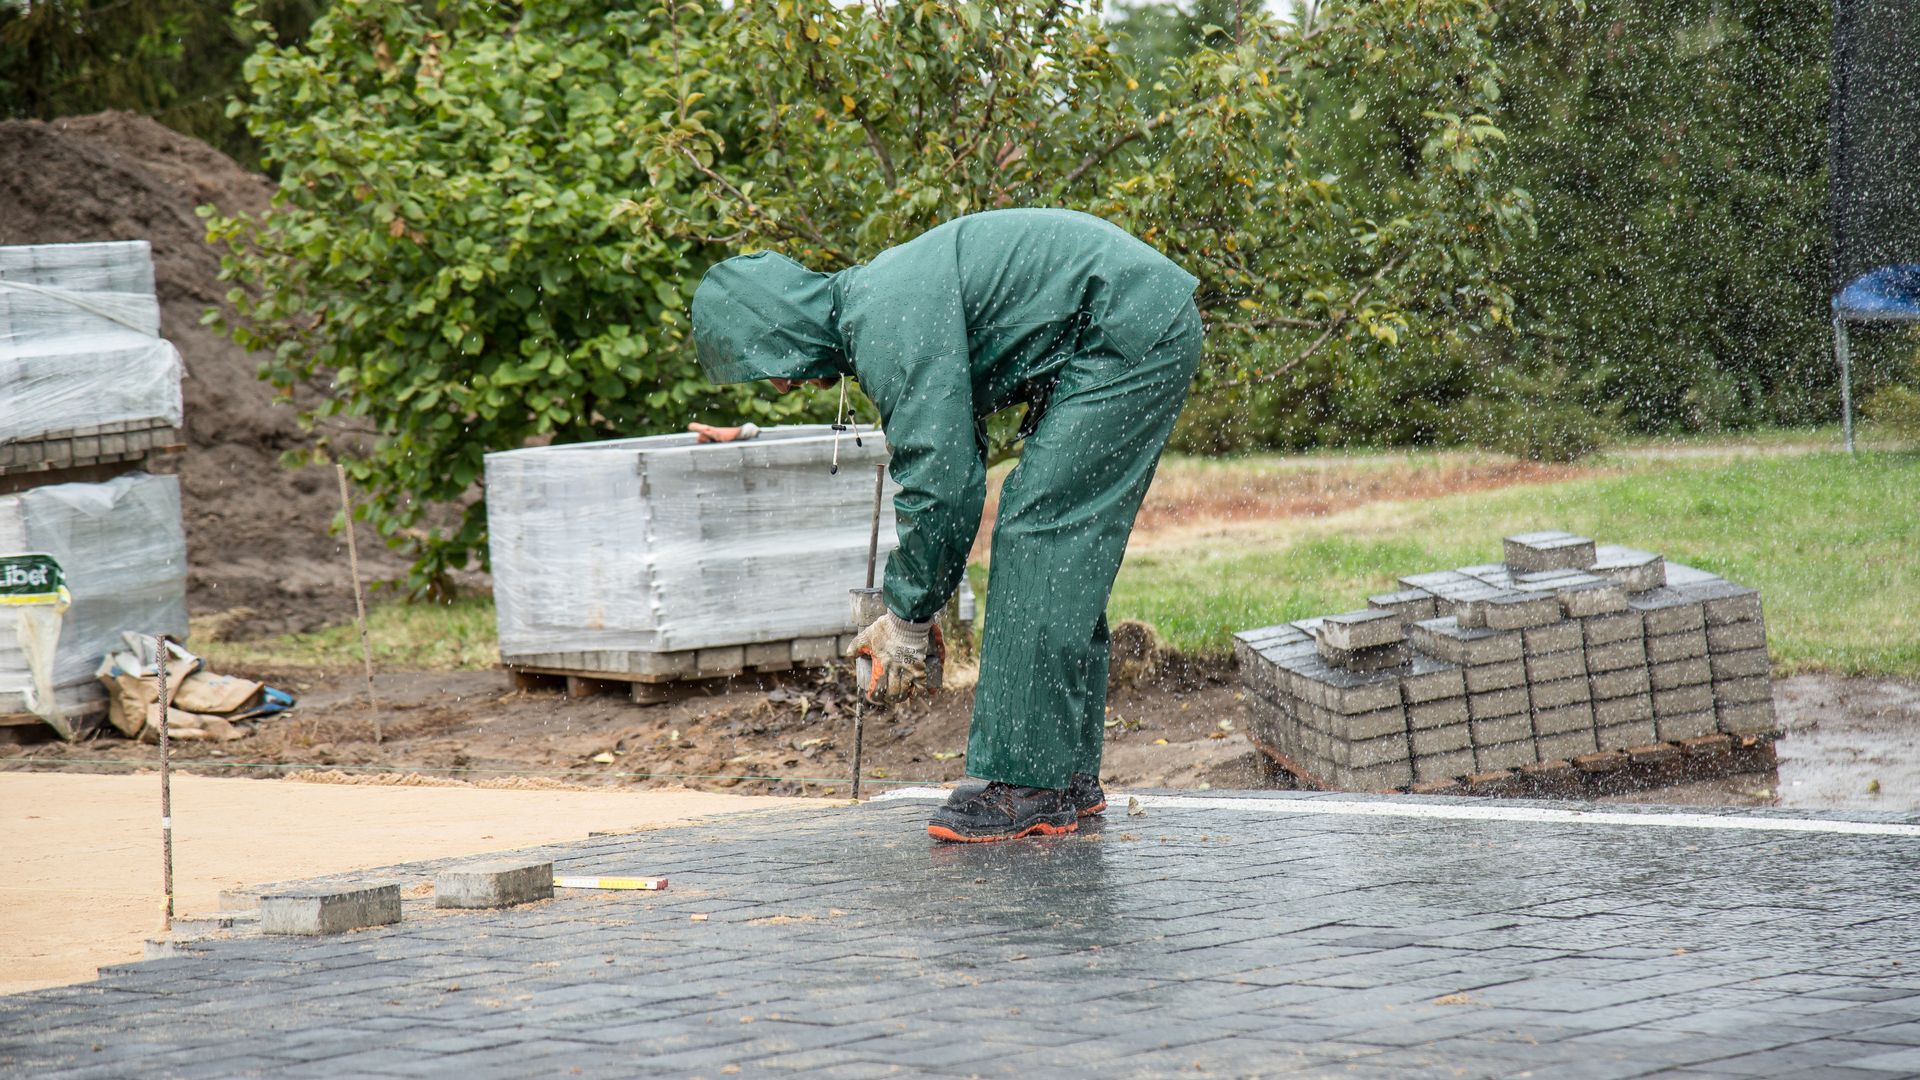
Laying pavers means building a paved surface from individual blocks set on a prepared base, rather than pouring one solid slab. Each paver sits on a thin bed of screeded sand, over a compacted layer of crushed stone, with its edges held in place by a restraint and its joints filled with sand. Get those buried layers right and the surface stays level for years. Get them wrong and no amount of careful pattern work on top will save it, because the pavers will follow whatever the ground underneath does.
I learned that order the hard way on a small walkway years ago, when I spent a whole Saturday getting the pattern perfect on a base I had rushed. It looked great for a month. By spring, one corner had sunk where I had skipped compaction, and the whole walk tilted toward the house. I lifted those pavers, rebuilt the base properly, and relaid the same blocks in an afternoon. The pattern was the easy part both times. The base was the job.
Contents
- What laying pavers really means
- Read your site before you dig
- Choose the right pavers for the job
- How deep to dig, and how much to order
- Tools and materials
- The installation, step by step
- Patterns that suit a first project
- Mistakes that show up later, and how to fix them
- Seal or not, and how to look after pavers
- DIY or hire it out
- Frequently asked questions
- Sources
What laying pavers really means
A paver surface is a flexible pavement, which is a plain way of saying the blocks can move a tiny amount with the ground instead of cracking like a solid slab would. That flexibility is the whole point. When frost lifts one corner or a root pushes from below, a paver field can shift slightly and still be repaired one block at a time, while a poured slab in the same spot would crack across its face. The trade is that the system only works as a system. Remove the edge restraint and the field spreads. Skip the base and it sinks. Leave the joints empty and the blocks rock.
The job changes with what the surface has to carry, so decide that before you buy anything. A patio or walkway carries feet, chairs, and a grill. A driveway carries cars, turning wheels, and delivery vans, and it needs a deeper base and thicker pavers to do it without rutting. Trying to build a driveway on a patio base is the most expensive shortcut in this guide, because you pay for it twice: once when you lay it, and again when you lift it.
| Surface | What it carries | Base depth to plan for | Paver thickness |
|---|---|---|---|
| Patio | Foot traffic, furniture, a grill | 4 to 6 inches of compacted crushed stone | About 2 3/8 inches (60 mm) is standard |
| Walkway | Foot traffic, a wheelbarrow, a stroller | 4 to 6 inches of compacted crushed stone | About 2 3/8 inches (60 mm) is standard |
| Residential driveway | Cars, turning wheels, occasional heavy vehicles | 6 to 8 inches at minimum, deeper on weak soil | Thicker driveway-rated pavers, about 3 1/8 inches (80 mm) |
| Pool deck or light patio | Foot traffic, water splash, bare feet | 4 to 6 inches of compacted crushed stone | About 2 3/8 inches (60 mm), with a non-slip texture |
Those depths are planning figures, not a promise for every yard. Clay soil, a high water table, or a spot that stays wet after rain all argue for going deeper, and a manufacturer guide for the exact paver you buy should win over any general table, including this one. If your yard stays soggy for days after rain, sort out why before you pave over it, because a patio built on a wet patch inherits the wet patch.
Read your site before you dig
Most failures start before the first shovel of dirt moves, because the site was not really read. A patio that looks fine on a dry Saturday can turn into a pond after the first heavy rain if the ground already slopes toward the house, or if a downspout dumps right where the new edge will sit. Walk the yard after rain if you can, and watch where water actually goes. It is cheaper to move a downspout or regrade a swale now than to lift pavers later.
Check the soil under the grass while you are at it. Dig a test hole where the patio will sit and look at what comes out. Topsoil is dark and loose and has to come off, because pavers laid on topsoil will sink as it breaks down. Below it you want firm mineral soil you can compact. If the hole fills with water, if the soil is soft clay that smears like pottery, or if you hit roots thicker than your thumb, plan on a deeper base, a fabric layer, or both, and be honest about whether the spot is right at all.
Three checks before you order anything: first, the finished surface must fall away from the house at about 1/4 inch per foot, which works out to about 1 inch for every 4 feet of run, and never toward a foundation, a basement window, or a neighbor’s yard. Second, keep the finished paver height below any door threshold and below siding, so water cannot run inside or sit against wood. Third, call 811 or your local utility locator and mark every buried line in the area before you dig, because gas, water, and electric lines do not forgive a rushed excavation. Our guide on why water pools on a driveway walks through the same drainage checks in a driveway context, and the same logic applies here.
Choose the right pavers for the job
Concrete pavers are the default for a first project for good reasons. They come in consistent sizes, they are widely available, they are cheaper than most stone, and a damaged unit can be swapped without touching the rest of the field. Clay brick pavers cost more and feel more traditional, and they hold color well because the color runs through the brick, but they are harder to cut and less forgiving if the base is uneven. Natural stone looks wonderful and varies in thickness in a way that makes a first project harder, because every stone has to be leveled by hand against its neighbors. For a first patio, start with concrete pavers in a simple shape, and save stone for a second project when you already know how the base behaves. Before you budget, see how stamped concrete compares with pavers on upfront and 10-year cost.
| Material | Best for | Watch out for |
|---|---|---|
| Concrete pavers | First patios, walkways, driveways | Color can fade over years in strong sun; sealing helps |
| Clay brick pavers | Traditional look, small patios | Higher cost, harder cuts, less size consistency |
| Natural stone | High-end patios, irregular shapes | Variable thickness, higher cost, slower leveling |
| Permeable pavers | Yards where runoff is a problem | Needs a deeper open-graded base and special joint fill |
Buy from more than one pallet and mix the pallets as you lay, because color varies slightly from batch to batch and a single-pallet field can show a band where one pallet ended. Order about 10 percent extra for cuts and breakage, and keep the spares in the garage, because a future repair in the same color is worth more than the few dollars those spare pavers cost. Check the paver thickness against the table above before you pay, because a decorative 1-inch paver that looks fine in the store will crack under a car no matter how good the base is.
How deep to dig, and how much to order
The excavation depth is simple arithmetic once you know the layers, and it is worth doing on paper before you dig. Add the paver thickness, 1 inch of bedding sand, and the crushed stone base depth, and that total is how far below the finished surface you dig. For a patio with standard 2 3/8-inch pavers, 1 inch of sand, and a 4-inch base, that is about 7 3/8 inches below the finished height. For a 6-inch base it is about 9 3/8 inches. A driveway with thicker pavers and a deeper base digs deeper still. Write the numbers down, set a string line at the finished height, and measure down from it as you dig, because guessing the depth by eye is how a patio ends up an inch high at the door.
The diagram below shows how those layers stack up.
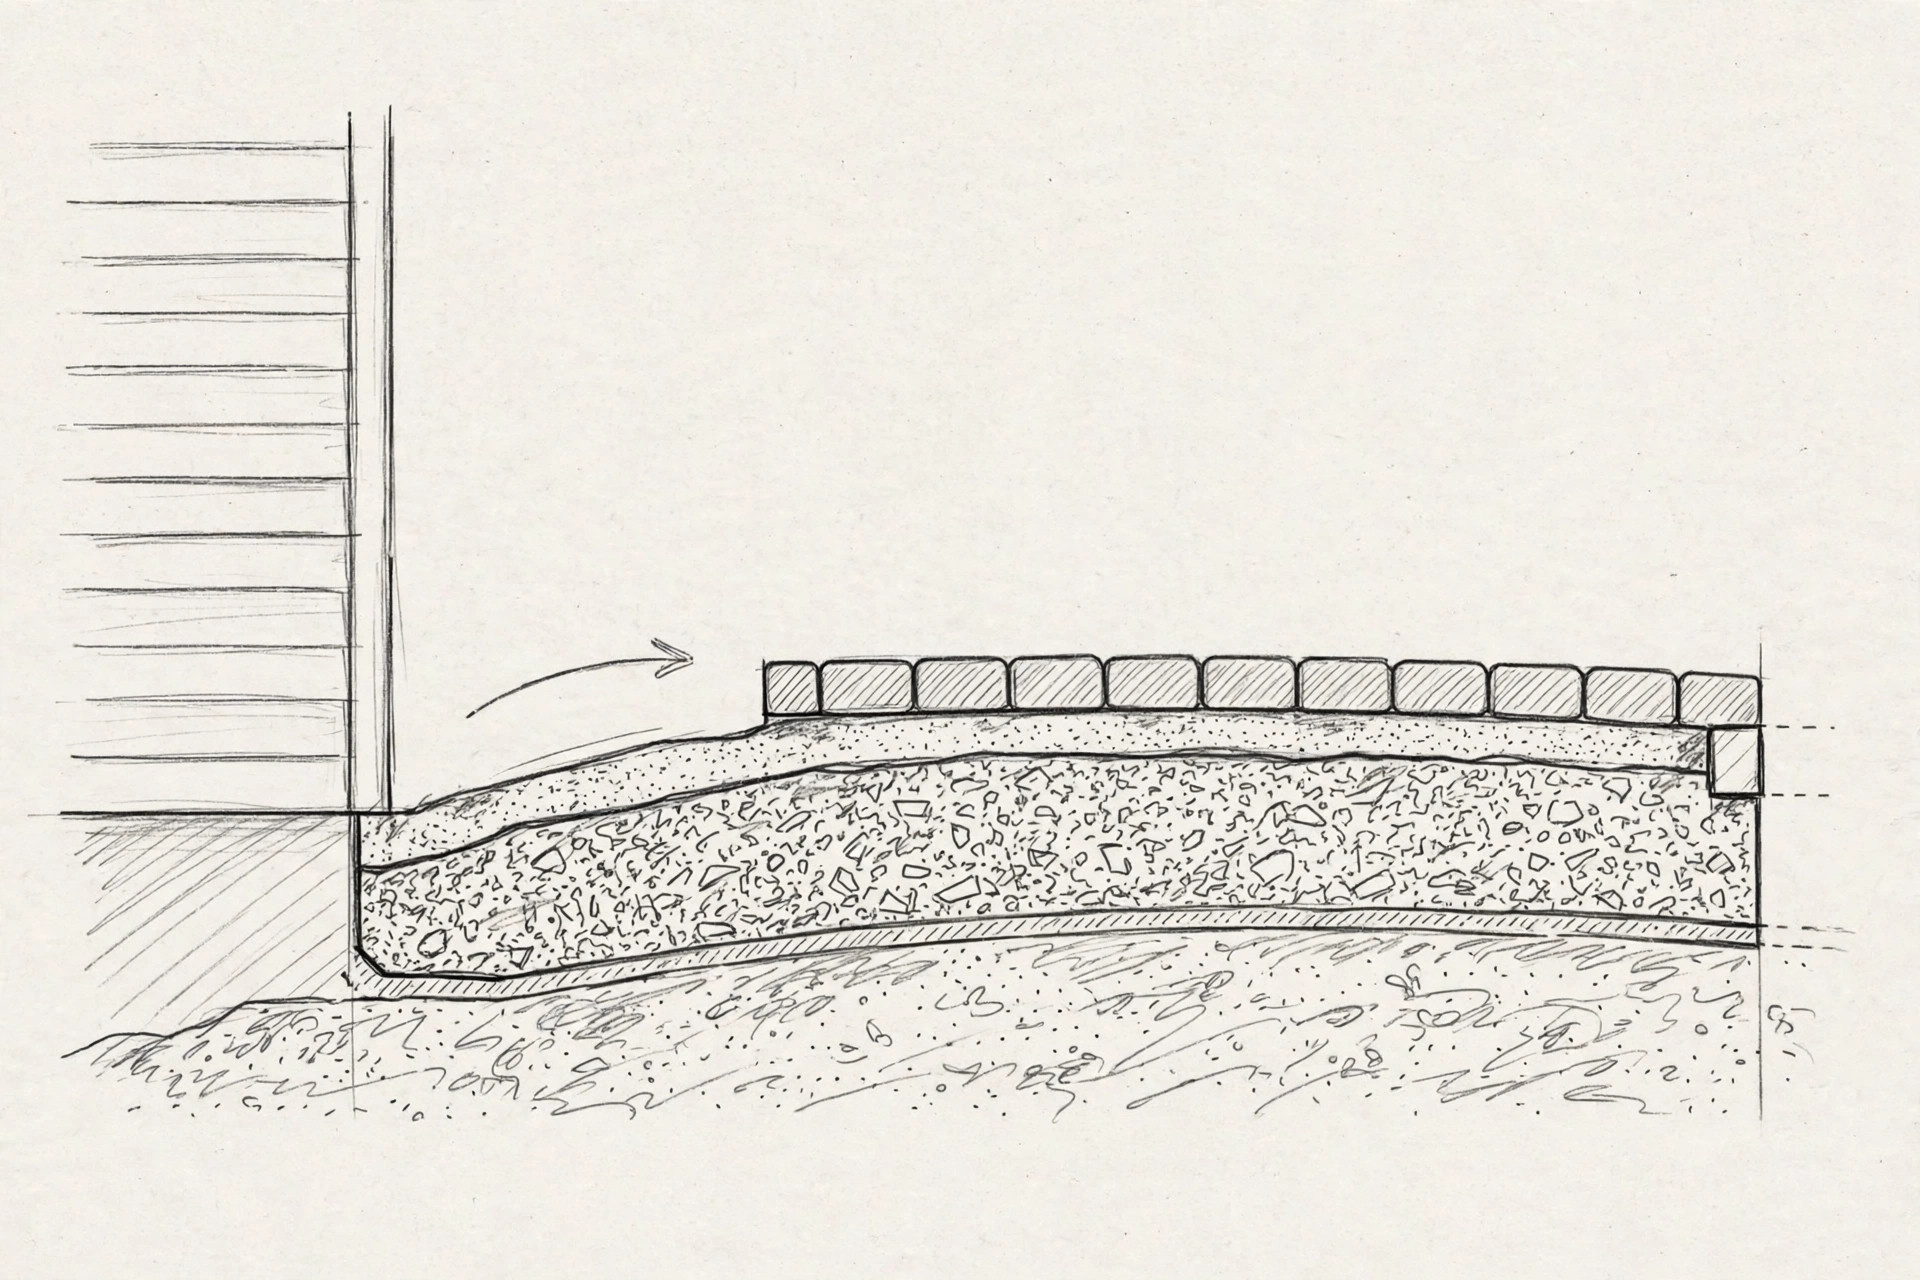
| Layer, top to bottom | What it is | Typical thickness | Notes |
|---|---|---|---|
| Pavers | The blocks you walk or drive on | 2 3/8 inches for patios, 3 1/8 inches for driveways | Thickness must match the use, not just the look |
| Bedding sand | Coarse concrete sand, screeded level | 1 inch, no more | Do not compact it before laying pavers |
| Crushed stone base | Angular crushed stone, often called 21A, crusher run, or road base | 4 to 6 inches for patios, 6 to 8 inches or more for driveways | Compact in lifts no thicker than 3 inches |
| Geotextile fabric, if used | A permeable fabric sheet under the base | One sheet, overlapped at joints | Useful on clay or soft soil; not a substitute for depth |
| Subsoil | The existing ground, compacted | — | Remove all topsoil first; topsoil is not a base |
A worked example helps. For a 12-foot by 12-foot patio, which is 144 square feet, a 4-inch base is one-third of a foot deep, so the base volume is 144 times 1/3, or 48 cubic feet, which is just under 1.8 cubic yards. Order a little extra for compaction and waste, and ask the supplier how much their material compacts, because a loose cubic yard does not stay a cubic yard once it is compacted. Do the same arithmetic for sand: 1 inch over 144 square feet is 12 cubic feet, or just under half a cubic yard. These are small numbers until you have to wheelbarrow them, so plan delivery access and a place to pile material that does not kill the lawn you are trying to improve.
Extend the excavation beyond the finished edge by at least 6 inches on every side, and more if the edge restraint needs a footing. The base has to support the edge blocks too, and a base that stops exactly at the last paver leaves that paver sitting on air. Mark the larger outline with stakes and string, not just the finished outline, and check the diagonals before you dig, because a rectangle that is out of square at the stake stage will be out of square forever.
Tools and materials
You do not need a garage full of specialty tools, but you do need a plate compactor, and renting one is the normal choice for a first project. A hand tamper will not compact a base the way a plate compactor will, and it will wear you out trying. Rent the compactor for the days you will actually use it, and schedule delivery so the base material arrives before the compactor does, not after it has already gone back.
- Stakes, string line, a line level, and spray paint for marking
- A shovel, a wheelbarrow, and a rake
- A tape measure and a long straightedge or level for checking grades
- A plate compactor, rented, with a protective pad for the final pass over pavers
- Screed rails and a screed board, which can be simple straight lumber
- A rubber mallet for tapping pavers level without chipping them
- A masonry saw or angle grinder with a diamond blade for cuts, plus eye and ear protection and a dust mask
- A push broom for sweeping joint sand
- A garden hose with a gentle spray for misting polymeric sand
- Work gloves, knee pads, and sun protection, because this is a long day outside
On sand, buy the right sand and do not substitute. Bedding sand should be coarse concrete sand, sometimes sold as concrete sand or screed sand, not fine play sand and not stone dust, which holds water and can stain. Joint sand can be the same coarse sand for a basic job, or polymeric sand if you want joints that resist weeds and ants better. Polymeric sand costs more and demands a dry surface and careful activation, which is why step 10 below treats it gently instead of rushing it.
The installation, step by step
The sequence below is the whole job in order, and the order matters. Do not lay pavers on a base you have not compacted yet, and do not screed more sand than you can lay before lunch, because screeded sand that gets walked on or rained on is no longer level. Work in sections you can finish, and check levels as you go, not at the end when fixing them means lifting everything.
- Mark out and square the layout. Drive stakes at the corners, run string lines at the finished height, and check the diagonals. For a rectangle, equal diagonals mean square corners. Mark the larger excavation outline, not just the finished edge, and keep the string lines up as a reference while you dig, because a layout that drifts during excavation is hard to pull back later.
- Excavate to depth, and get rid of the soft stuff. Remove grass, topsoil, and any soft or organic material down to firm ground, then dig to the depth you calculated. Keep the bottom of the excavation as level as the finished slope allows, and remove roots, rocks, and buried debris that would create soft spots. If you hit a soft patch that will not firm up, dig it out and fill it with crushed stone, compacted, rather than paving over it and hoping.
- Compact the subsoil and lay fabric if the soil needs it. Compact the exposed subsoil with the plate compactor, working in overlapping passes until it feels firm underfoot. On clay or soft soil, roll out geotextile fabric over the compacted subsoil, overlapping joints by at least 12 inches and trimming it to the excavation edge. Fabric keeps soil from migrating up into the base over time, but it does not make a shallow base deep, so do not use it as an excuse to skip depth.
- Build the base in thin lifts. Spread crushed stone in layers no thicker than 3 inches, level each lift roughly, and compact it thoroughly before adding the next. Wet the stone lightly if it is dusty, because a little moisture helps compaction, but do not soak it into mud. Check the grade after each lift with a straightedge and a level, because a base that is out of grade at the bottom will be out of grade at the top, and fixing grade with extra sand later is exactly what causes dips.
- Set the edge restraint on the compacted base. Install the edge restraint around the full perimeter before you screed sand, using the manufacturer’s spikes or a concrete haunch as specified. The restraint has to sit on compacted base, not on loose sand, and it has to be continuous, because a gap at a corner is where a field starts to spread. Check that the restraint top will sit just below the finished paver height, so it holds the edge without showing.
- Screed 1 inch of bedding sand, and then leave it alone. Set screed rails to the height that leaves exactly 1 inch of sand after screeding, spread coarse bedding sand between them, and pull a straightedge along the rails in one smooth pass. Do not compact the screeded sand, do not walk on it, and do not screed more than you can lay in a day. A footprint in screeded sand is a dip in the finished patio, and it will show.
- Lay the pavers with a click and drop, starting from a fixed edge. Start at a straight edge, a house wall, or a fixed restraint, and work outward so you are always laying against pavers that are already set. Hold each paver slightly tilted, touch its edge to its neighbor, and drop it into place instead of sliding it across the sand, because sliding pushes sand into the joint and changes the level. Keep the joints consistent by using the spacer nibs on the pavers if they have them, and check every few rows with a straightedge, tapping high pavers down with a rubber mallet and lifting low ones to add a pinch of sand underneath.
- Cut the edge pieces last. Leave the edge cuts until the full field is laid, then measure each gap, mark the paver, and cut it with a masonry saw or angle grinder with a diamond blade, wearing eye and ear protection and a dust mask. Cut outdoors or with dust control, because silica dust is not a joke. Fit the cut pieces snugly against the restraint, and do not force a piece that is too big, because a forced piece will lift its neighbors. For the cutting itself, see our guide to how to cut pavers.
- Compact, sweep in joint sand, and compact again. Once the field is laid, run the plate compactor over it with a protective pad, working in overlapping passes, to settle the pavers into the bedding sand. Then sweep joint sand over the surface, working it into every joint with a push broom, and compact again. Repeat the sweep and compact until the joints stay full, because half-filled joints are where weeds start and blocks start to rock.
- Activate polymeric sand gently, and keep traffic off while it cures. If you used polymeric sand, follow the product instructions exactly, because brands differ in how much water they want and how fast they set. In general, mist the surface lightly, in passes, until the joints are damp but not flooded, and do not blast them with a hose, because a hard stream washes the binder out and leaves a crust on top of empty joints. Keep foot traffic off until the sand has cured as the product directs, usually at least a day, and keep cars off longer, because a joint that sets under a tire sets crooked.
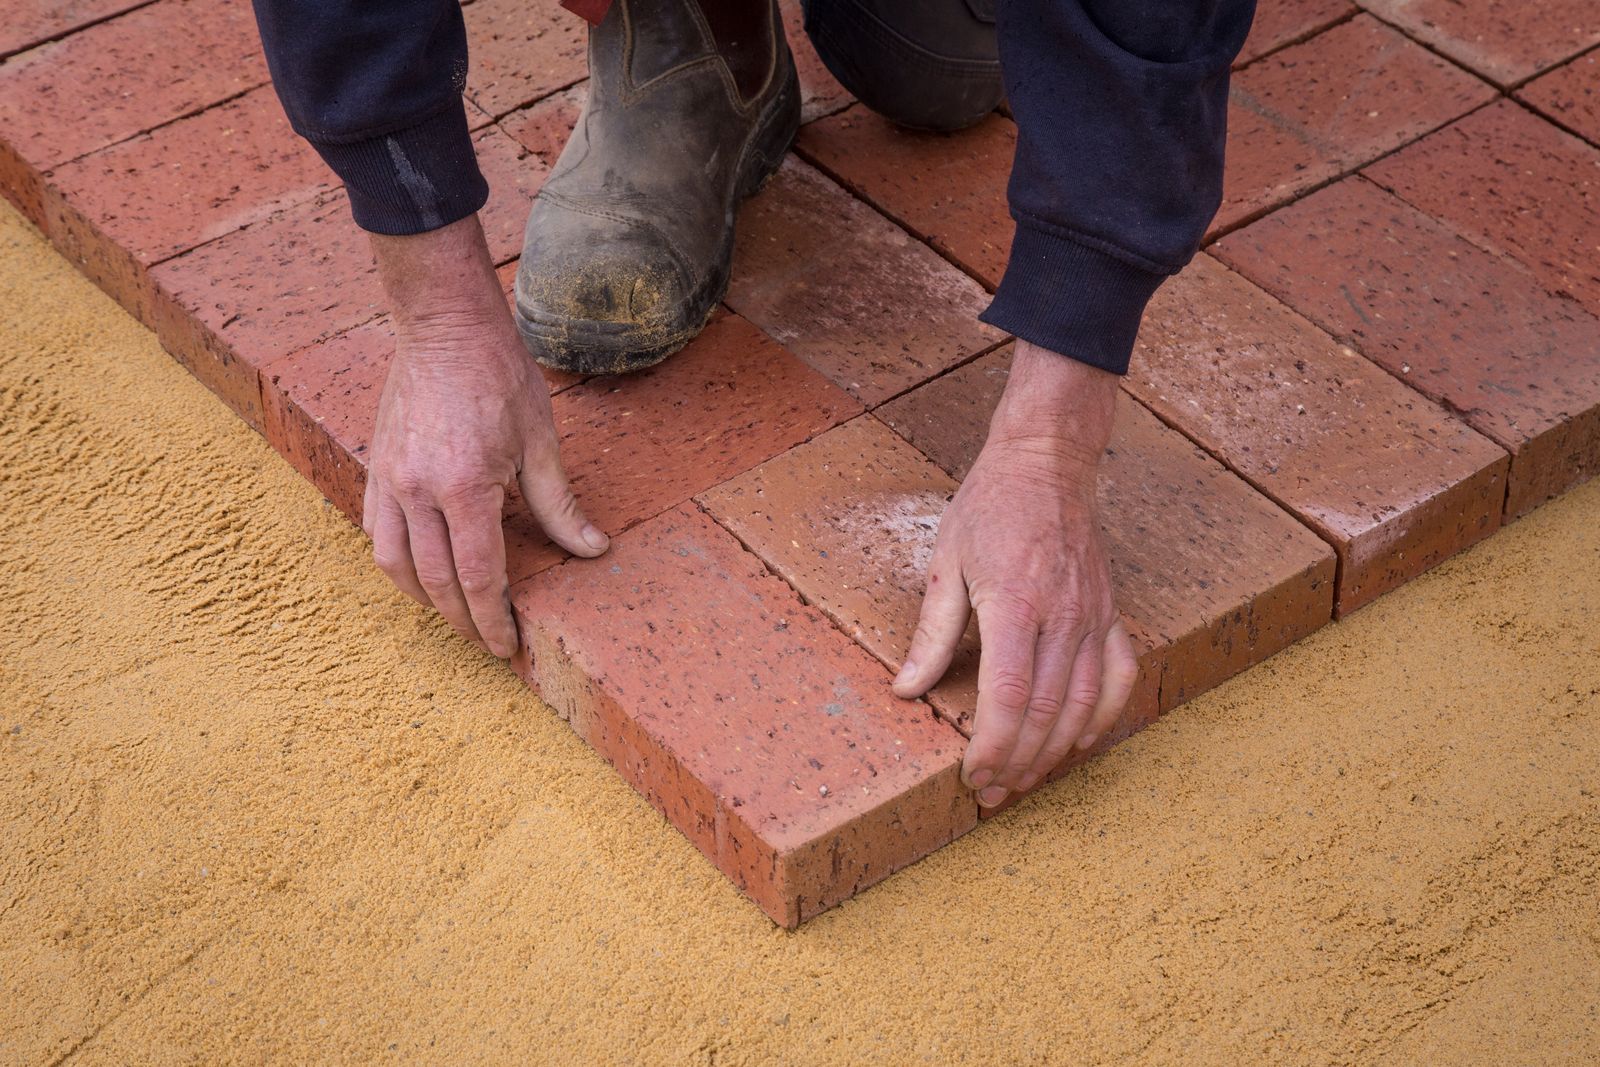
Watching the work once helps more than reading about it twice, so this This Old House video on building a brick patio is worth a look before your first row: it shows the graded base going down in layers, the screed rails, and the click-and-drop setting in real time.
Patterns that suit a first project
A pattern is not just decoration, because it changes how the field handles loads and how many cuts you have to make. A running bond, where each row is offset by half a paver, is the easiest pattern to lay and the hardest to mess up, because every row repeats and the cuts are mostly at the edges. A herringbone pattern, where pavers sit at right angles to each other, locks together better under turning wheels and is the better choice for a driveway, but it takes longer to lay and uses more cuts. Basket weave looks classic and uses a simple repeating square, but it can feel busy on a large patio and it is less forgiving if a paver is slightly out of size. For the full comparison, our guide to brick paver patterns covers running bond, herringbone, basketweave and stack bond, with the waste and difficulty of each.
| Pattern | How it lays | Best for | Cut load |
|---|---|---|---|
| Running bond | Rows offset by half a paver | First patios and walkways | Low, mostly edge cuts |
| Herringbone at 45 degrees | Pavers at right angles, diagonal to the edge | Driveways and heavy use | Higher, many angle cuts at edges |
| Herringbone at 90 degrees | Pavers at right angles, square to the edge | Driveways, smaller areas | Moderate |
| Basket weave | Pairs of pavers forming squares | Small patios, traditional look | Low if the area fits the module |
Whatever pattern you pick, dry-lay a few rows before you commit to the whole field, and check the pattern against the edge restraint, because a pattern that does not fit the outline will force cuts everywhere. A test row also shows whether your pavers are truly consistent in size, which matters more in herringbone than in running bond, where a small size difference can be absorbed row by row.
Mistakes that show up later, and how to fix them
Most paver problems announce themselves slowly, which is why they are easy to miss until they are obvious. A dip that was an inch deep last year is two inches deep this year, because water finds the low spot, softens the base there, and makes the dip deeper. The fix is almost always the same: lift the affected pavers, fix the base, and relay the same blocks. That is the advantage of a flexible pavement, and it is worth using early, before a small dip becomes a trip hazard or a pond.
| Problem you see | Likely cause | Fix |
|---|---|---|
| A single paver rocks | Bedding sand washed out or a high spot underneath | Lift it, level the sand, relay it, refill the joint |
| A dip in one area | Base not compacted in lifts, or topsoil left underneath | Lift the area, rebuild the base in thin lifts, relay |
| Edge pavers spread outward | Missing or failed edge restraint | Reset the restraint on compacted base, relay the edge |
| Weeds in every joint | Joints half-empty, organic debris left in joints | Clean joints, refill fully, consider polymeric sand |
| White haze on the surface | Efflorescence, salts coming out of concrete pavers | Usually fades with weather and cleaning; do not seal over it |
| Water ponds on the patio | Grade toward the house, or a low spot from settlement | Re-grade the area, check downspouts, relay to the correct fall |
| Polymeric sand crusts on top | Too much water during activation, or activation in heat | Remove the crust, refill joints, activate gently in cool conditions |
The repair advantage is real, but it has a limit. If more than a third of a field has settled, or if the base is the wrong material altogether, a full rebuild is faster and cheaper than patching one area after another. Be honest about which situation you are in, because patching a bad base is just a slower way of rebuilding it.
Seal or not, and how to look after pavers
Sealing is optional, and it is better to skip it than to seal badly. A sealer can deepen color, slow staining, and help hold joint sand in place, but it also traps whatever is already in the pavers, including efflorescence and moisture, and it will peel or turn cloudy if it goes on a dirty or damp surface. If you do seal, clean the patio first, let it dry fully, and test the sealer on a spare paver or a hidden corner, because a sealer that looks great on the sample can look too glossy or too dark across a whole patio. Plan on reapplying every few years, because sealers wear, especially on driveways.
If you do not seal, the maintenance is simpler and mostly about joints and drainage. Sweep regularly so debris does not sit in the joints and break down into soil, top up joint sand when you see it wash out after heavy rain, and pull weeds while they are small, because a large weed root can lift a paver. Clean stains early with water and a stiff brush before reaching for chemicals, and check the edge restraint once a year, because a loose edge is the first sign of a field starting to spread. Our driveway cleaning guide covers the cleaning side in more detail, including which cleaners to avoid on concrete pavers.
DIY or hire it out
A small patio or walkway is a reasonable first DIY project if you are comfortable with a full day of digging and wheelbarrowing, and if the site is flat, well drained, and free of buried lines or structural work. The skills are not mysterious, but the work is physical, and the base is unforgiving of shortcuts. Renting a plate compactor and a masonry saw, and having a second person for the laying day, makes the job much more realistic than trying to do it alone with a hand tamper.
Call a contractor when the job stops being a patio and starts being construction. That includes a driveway with heavy vehicle use, a patio that needs a retaining wall, steps, or drainage work, a site with a steep slope or a high water table, or any project where the finished height affects a foundation, a basement, or a neighbor’s drainage. A good contractor will talk about base depth, compaction lifts, and edge restraint before they talk about pattern, and they will put those details in writing. If a quote only lists pavers and labor, ask what base is included, because that is where the price differences hide. For the long-term care side after the job is done, our concrete driveway maintenance guide covers the maintenance routines that apply to paved surfaces generally.
One last check before you start: walk the finished layout in your mind at the end of a rainy day, not just on a sunny one. Where will water go when the patio is in? Where will you stack snow, if you get it? Where will a delivery van turn, and will it drive over the edge? Answering those questions now is free. Answering them after the pavers are down costs a rebuild.
Frequently asked questions
How deep should I dig for a paver patio?
Dig the paver thickness plus 1 inch of bedding sand plus the base depth, which works out to about 7 to 9 inches for a typical patio with 2 3/8 inch pavers and a 4 to 6 inch base. Driveways dig deeper, about 10 to 12 inches or more, and weak or clay soil argues for the deeper end of every range.
Can I lay pavers directly on dirt or grass?
No, not if you want them to stay level. Dirt and grass break down, hold water, and settle unevenly, so pavers laid on them sink and tilt within a season or two. Excavate to firm subsoil, compact it, and build the crushed stone base and sand bed described above.
How thick should the sand under pavers be?
Exactly 1 inch, screeded flat, and not compacted before laying. A thicker sand layer settles unevenly and leaves a wavy surface, and sand must never be used to fill a low spot in the base. Fix the base height first, then screed the sand.
Do I need an edge restraint for pavers?
Yes, around the full perimeter except where pavers meet a solid wall, step, or concrete edge. Without a restraint, traffic and frost push the outer rows outward, joints widen, and the field loses its interlock. Spike the restraint into the compacted base, not into loose soil or sand.
Should I use polymeric sand or regular joint sand?
Polymeric sand is the better default for most patios, because it hardens when misted, locks the joints, and resists weeds, ants, and washout. It needs a fully dry surface, careful sweeping of all dust off the paver faces, and gentle misting per the bag. Regular sand works, but it needs topping up more often and weeds find it faster.
How much slope does a paver patio need?
About 1/4 inch per foot away from the house, which is a 2 percent fall. That is enough to move water off the surface without feeling tilted underfoot. Build the fall into every layer, starting with the excavation and the base, not just the finished pavers.
Can I lay pavers over an existing concrete patio?
Sometimes, but it is a different build from the sand-set method in this guide: it needs a sound, well-drained slab at the right height, a suitable bedding or adhesive system, and edge details that hide the extra thickness. If the old slab is cracked, heaving, or already high against a door threshold, removal and a fresh base usually give the better result.
Sources
- This Old House guide to installing pavers, covering base preparation, screeding, and laying patterns.
- Engineer Fix guide to laying paving bricks on a sand base, covering excavation depth and joint sand.
- Unilock guide to common paver installation mistakes, covering base compaction, edge restraint, and drainage.

4 Comments
Pingback: Driveway Cleaning Guide: Concrete, Asphalt, and Pavers
Pingback: How to Cut Pavers: Wet Saw, Grinder & Splitter Compared
Pingback: Can You Put Pavers Over Concrete? Overlay Guide
Pingback: Is Stamped Concrete Cheaper Than Pavers? 2026 Cost Compared