

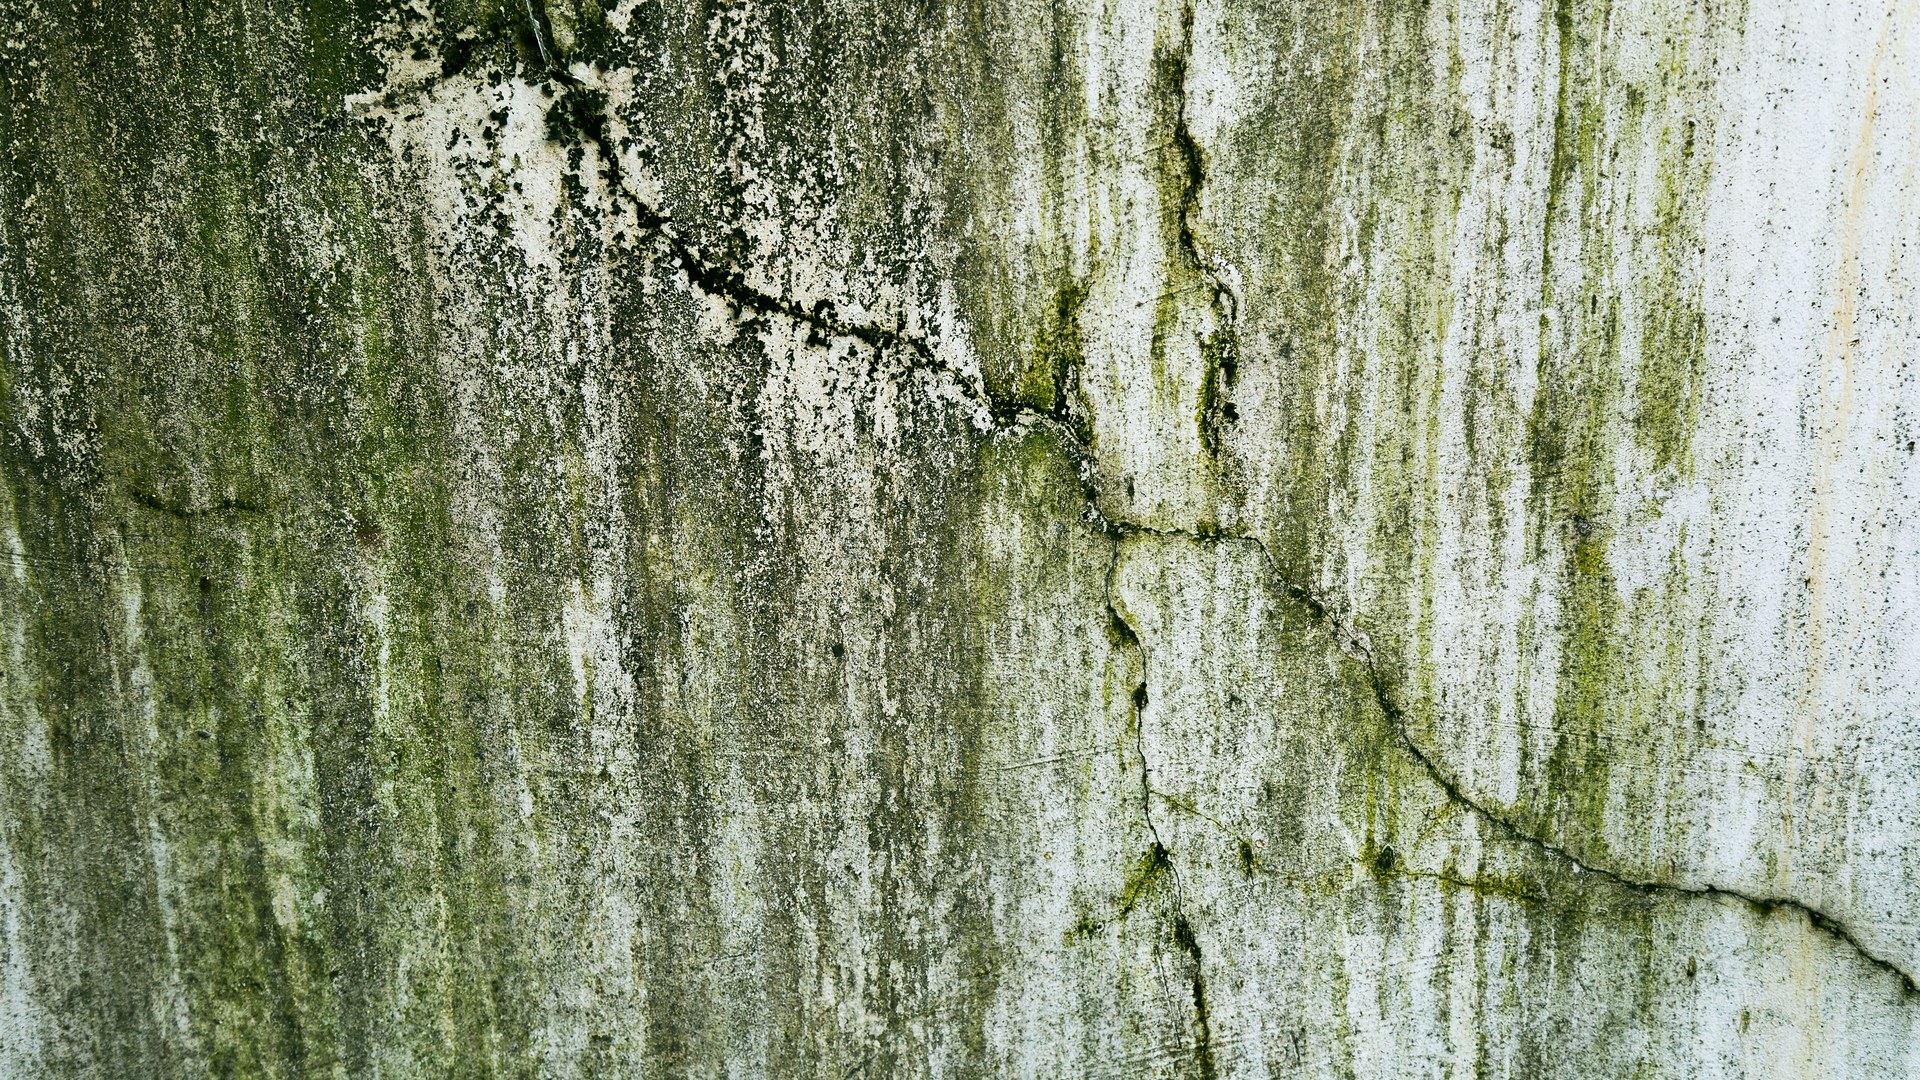
That green film creeping across your vinyl siding is algae, a simple plant-like organism growing on the layer of dust, pollen, and moisture that never quite dries on shaded walls. The safe way to clear it is a soft wash: apply a mild cleaner from the bottom up, let it sit 10 to 15 minutes, scrub gently along the laps with a soft-bristle brush, and rinse from the top down with a garden hose. No pressure washer needed, and the panels and your plantings come through unharmed.
Keep reading for the symptom map that confirms you are dealing with algae and not mildew, dirt, or oxidation, a method-picker table for choosing your cleaner, the full step-by-step routine, and how to keep the green from coming back.
On this page
- What that green film actually is
- Is it really algae? The four lookalikes
- Choose your cleaning method
- The soft-wash method, step by step
- Pressure washers: the honest limits
- Keep it from coming back
- DIY or call a pro?
- Frequently asked questions
- Sources
What that green film actually is
Green algae on siding is a colony of simple, plant-like organisms growing on the film of dust, pollen, and moisture that coats shaded panels. It is not eating your vinyl. It feeds on the dirt sitting on the surface, which is why it shows up on the damp, slow-drying walls and skips the sunny ones.
You will find it on the north side first, then anywhere shade and still air keep the wall wet long after rain: under deep eaves, behind shrubs planted too close, below gutters that splash, and anywhere a sprinkler kisses the wall each morning. Algae is not mold or mildew, though homeowners mix them up constantly. Mold and mildew are fungi and usually show gray or black; algae is green and plant-like, closer to the stuff on a pond rock than the stuff on old bread. If your spots are black rather than green, the decision tree is different, and black spots on vinyl siding: mold, mildew or artillery fungus walks through that one.
Outdoors, algae is a cosmetic problem first. The thing worth your attention is the damp condition feeding it, because a wall that never dries is a wall with other problems waiting. The first time I saw it on my own place, I assumed the siding was failing. It was not. It was just the shadiest wall doing what shady walls do.
Is it really algae? The four lookalikes
Washing the wrong thing is the classic way to waste a weekend. From the curb, four different problems all read as “dirty siding,” and each one cleans up differently. Check the location and the texture before you mix anything.
| What you see | Most likely cause | Where it sits | The giveaway |
|---|---|---|---|
| Patchy green film, sometimes slimy to the touch | Algae | Shadiest, slowest-drying wall, often the lowest courses | Smears green on a damp rag; returns to the same damp spots |
| Gray-black powdery or fuzzy patches | Mildew | Under window sills, behind shutters, porch enclosures, anywhere splashback lands | A dab of diluted bleach lightens it; if black spots are your whole problem, read black spots on vinyl siding: mold, mildew or artillery fungus |
| Brown or gray streaks running downward | Dirt and pollution runoff | Below gutters, under downspout outlets, near roads | Follows water paths; plain soap and water handles it |
| White chalk that powders onto your fingertip | Oxidation, not growth | Sun-battered walls, worst on dark colors | Chalky residue with no texture under it; this one is covered in why vinyl siding looks chalky |
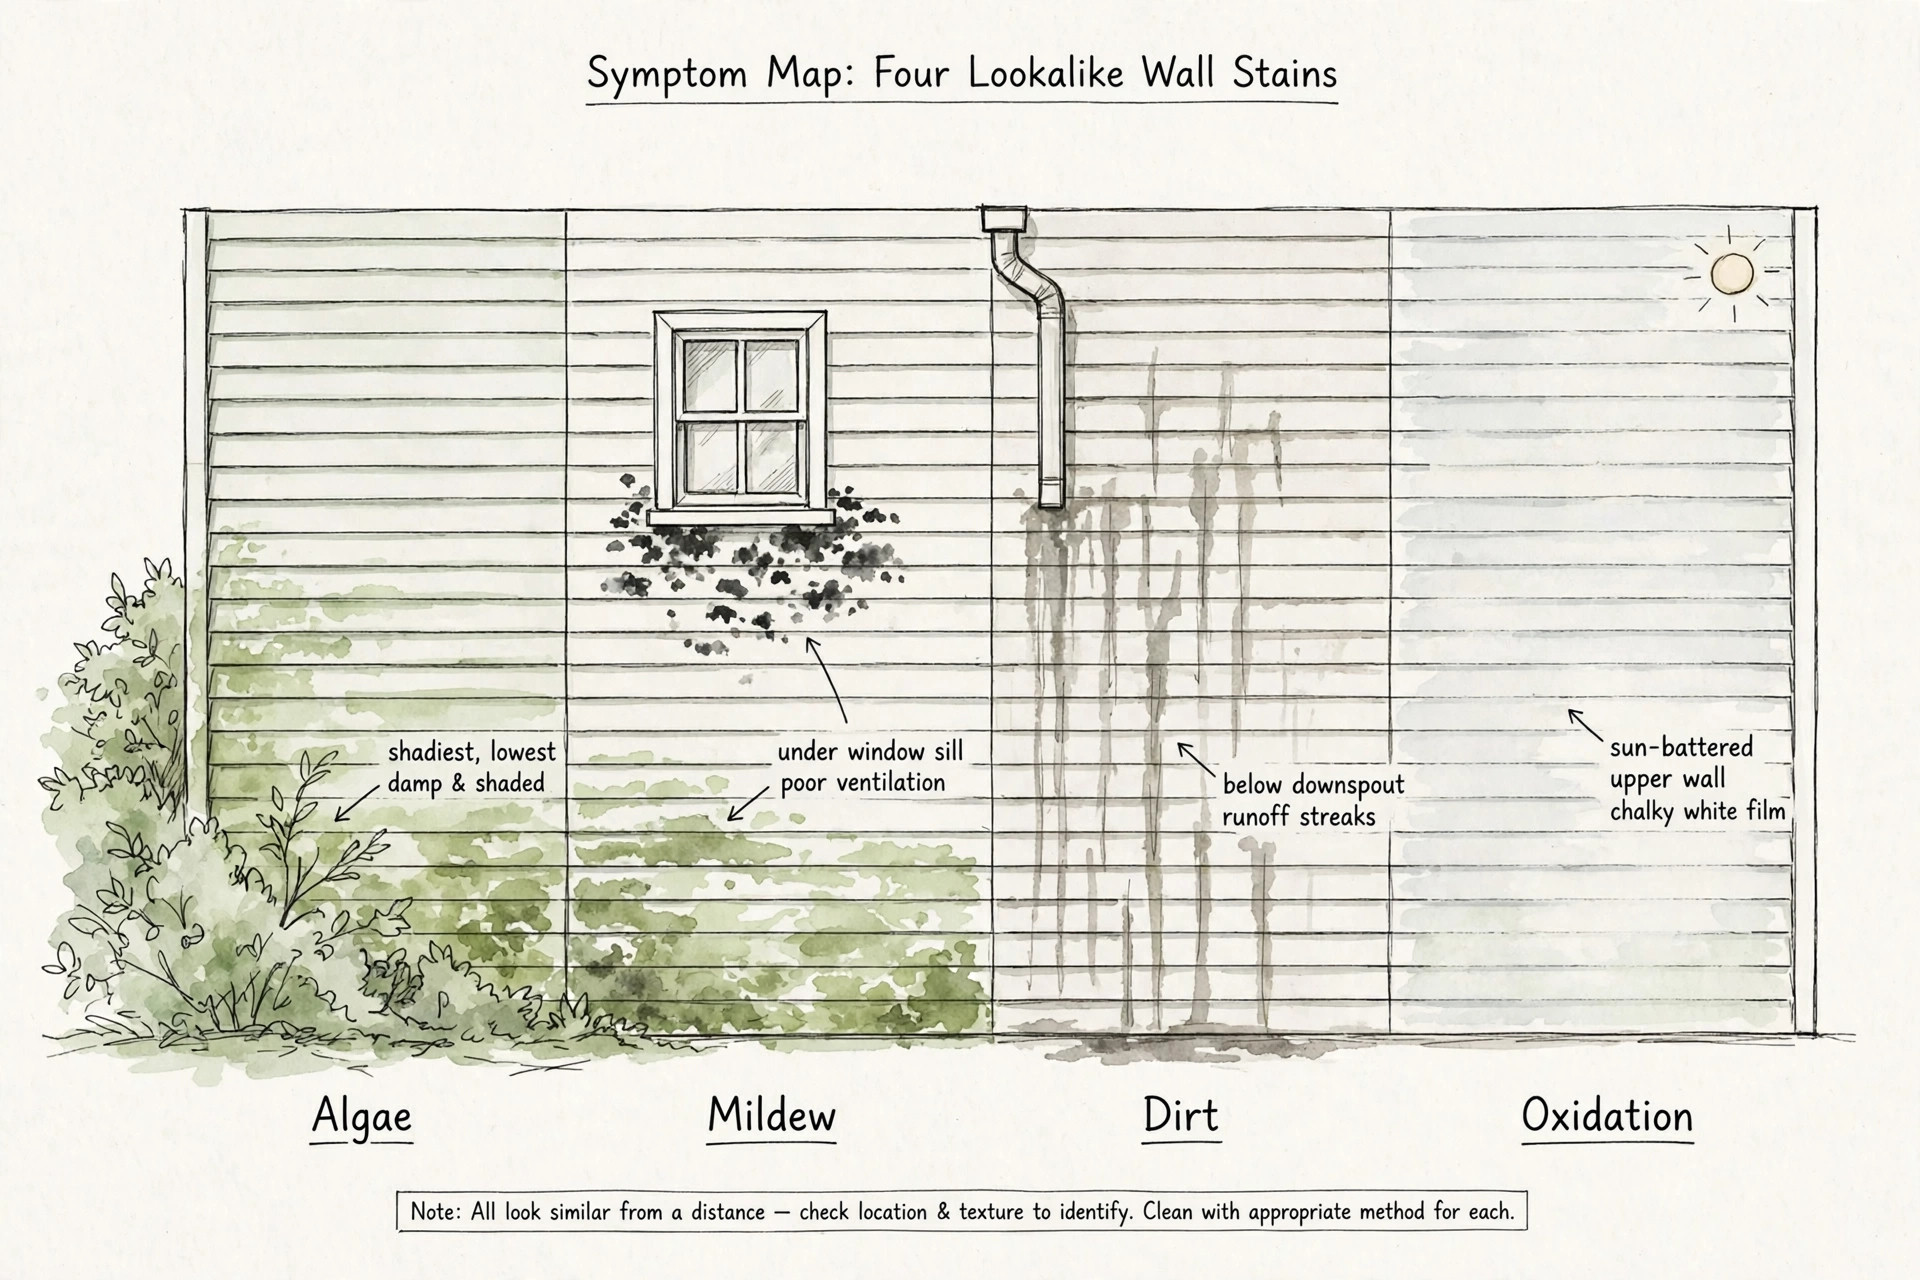
Three quick tests settle it in daylight:
- The wipe test. Rub a damp white rag over the stain. Algae smears green onto the cloth while the panel underneath looks fine. Oxidation powders white. Dirt streaks but shows no growth pattern.
- The location test. Walk the wall. North side and deep shade point to algae or mildew. The sunniest wall points to oxidation. Streaks under a gutter point to dirt.
- The bleach dab test. Dab a little diluted household bleach on one spot and wait a minute. Organic growth like algae or mildew lightens. Oxidation and plain dirt do not.
Choose your cleaning method
Match the cleaner to the job. The gentlest method that works is always the right call, and you can step up if the first pass leaves growth behind. If you are shopping for a green siding cleaner at the store, check the label for vinyl siding specifically and follow its dilution; stronger is not better on this material.
| Method | What it does to algae | Plant safety | Finish safety | Best for |
|---|---|---|---|---|
| Garden hose + mild dish soap | Lifts light film | Very safe | Very safe | Faint, early growth; yearly maintenance washes |
| White vinegar solution (about 30% vinegar in water) | Mild acid breaks down algae and mildew | Safe when rinsed off | Safe; spot-test first | Light to moderate growth without harsh chemicals |
| Oxygen bleach (sodium percarbonate, mixed per label) | Releases oxygen that lifts organic stains out of the surface | Friendlier to plantings than chlorine bleach | Generally safe; test a hidden spot first | Established films where vinegar is not enough |
| Diluted chlorine bleach mix (CertainTeed’s mildew formula) | Strongest kill of the household options | Hard on plants; cover them | Stronger mixes can damage siding, so measure carefully | Heavy growth, with landscaping protected |
| Store-bought outdoor cleaner (hose-end sprayer type) | Formulated for organic stains on siding | Follow the label | Follow the label | Homeowners who want a ready-made option |
| Pressure washer | Blasts growth off fast | Safe for plants | Highest damage risk | Rarely the right DIY choice; see the limits below |
A few rules apply whichever row you pick. Never mix bleach with ammonia or acidic cleaners; Iowa State University Extension’s siding guide is explicit that any cleaner you pair with bleach must not contain ammonia. Always test a new mix on a hidden spot first. Work on a mild, overcast day when you can, since cleaner that dries on the panels can leave its own marks. And start with the mildest option that fits the job; the least aggressive cleaner that works is the one that keeps the finish intact.
The vinegar ratio and the bottom-up technique come straight from manufacturer guidance. InspectAPedia’s roundup of vinyl siding cleaning procedures, which summarizes the Vinyl Siding Institute’s advice, lists a roughly 30% vinegar-in-water solution among the safest cleaners and calls for soft-brush scrubbing from the bottom up. CertainTeed’s official cleaning instructions say the same about washing bottom-up to avoid streaking and rinsing each section before the solution dries, with a plain warning that greater concentrations may damage the siding and soffit.
The soft-wash method, step by step
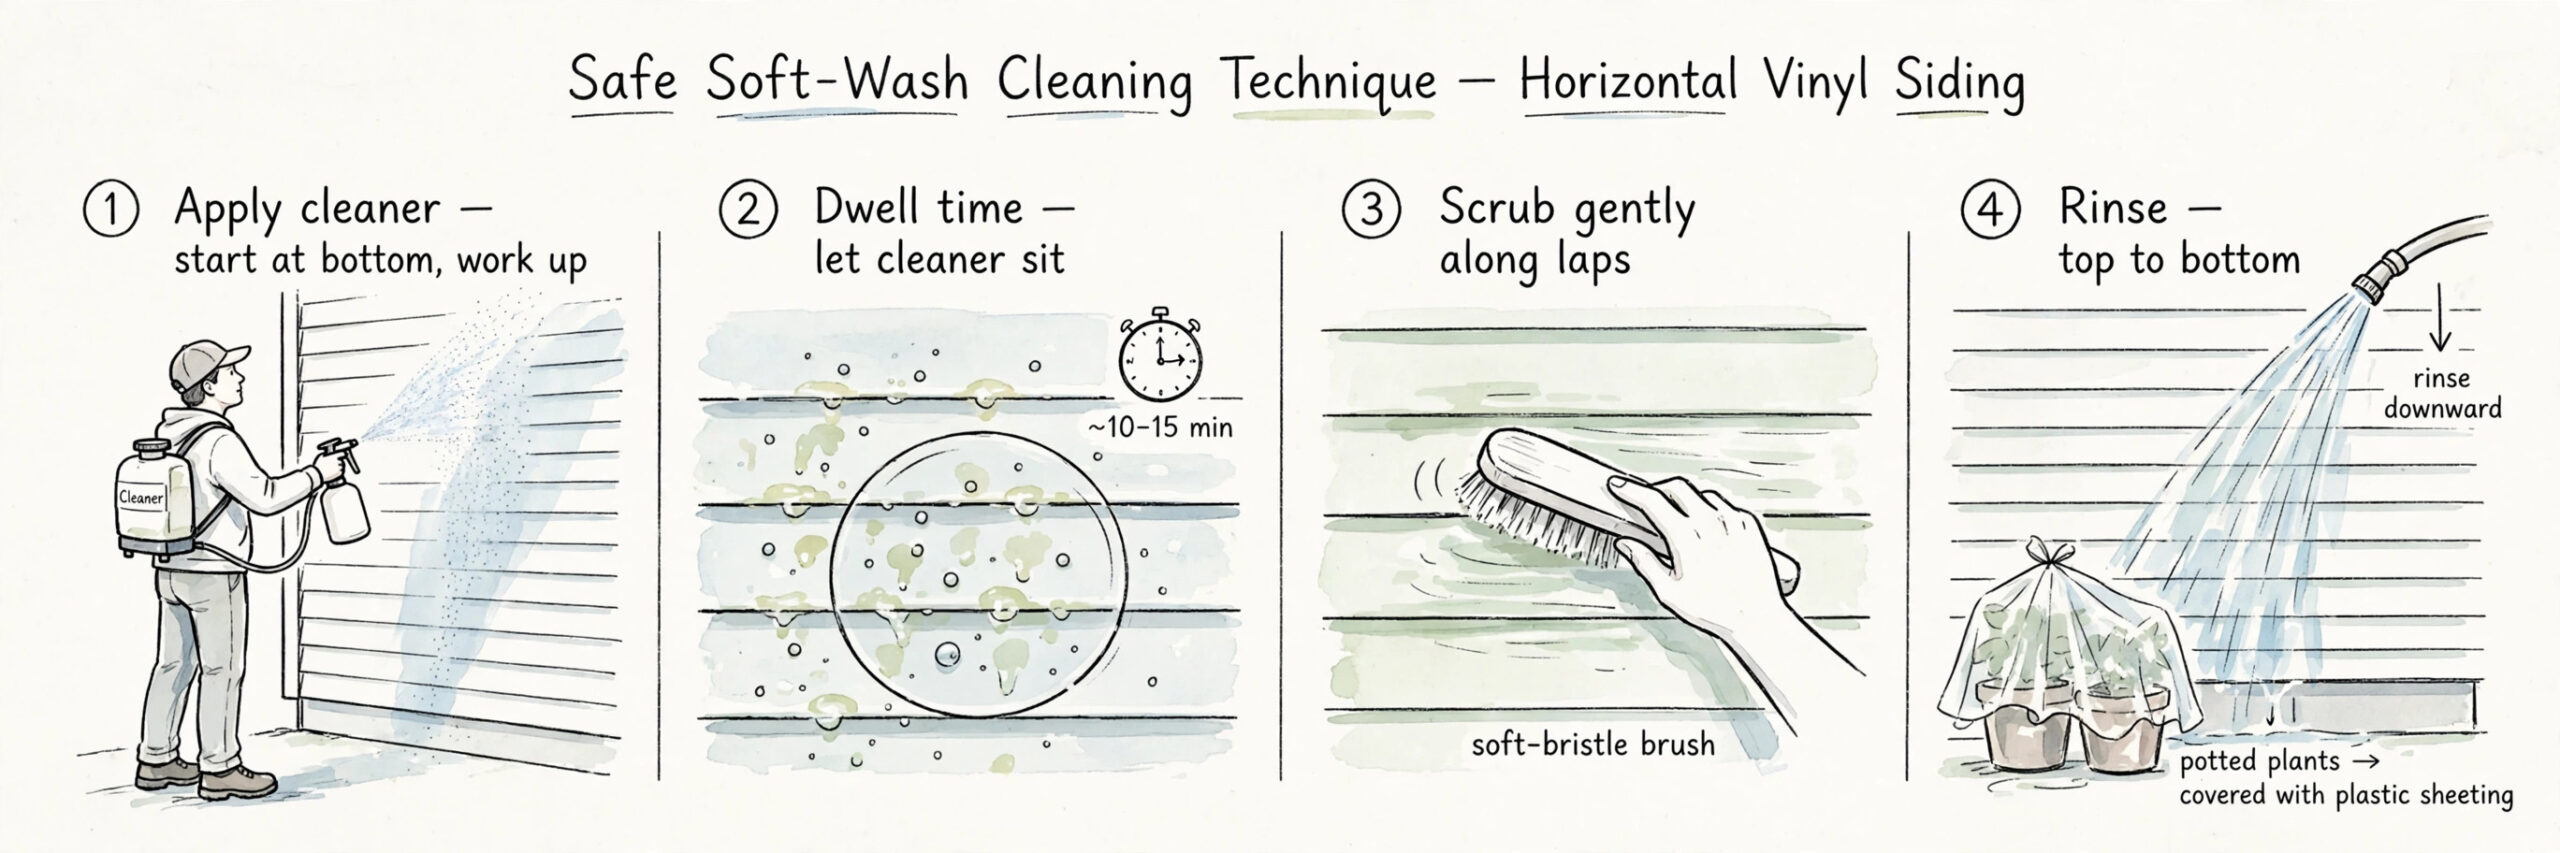
This is the whole routine for a one-story wall. Budget about an hour for a typical wall once the gear is out, using the vinegar mix or oxygen bleach from the table above.
The full soft-wash routine for cleaning green algae from vinyl siding without damage: about an hour for a typical one-story wall, using the vinegar mix or oxygen bleach from the table above.
- Step 1: Gear up and protect the plantings
Gloves and eye protection on. Cover foundation plantings with plastic sheeting or soak them thoroughly with fresh water before you start, and plan to rinse them again the moment you finish. Iowa State University Extension advises covering nearby plants with plastic and rinsing off any bleach solution right away if it touches them.
- Step 2: Rinse the wall with the garden hose
Knock the loose dirt off first so the cleaner reaches the growth instead of the dust. A plain rinse plus a soft brush already handles ordinary surface dirt, which is why the wipe test matters.
- Step 3: Apply your cleaner from the bottom up
Pump sprayer, soft brush, or sponge, working upward across each section. This is the streak-control step both CertainTeed and the Vinyl Siding Institute insist on: dirty runoff sliding down over dry, dirty siding below leaves marks that are hard to rinse out.
- Step 4: Let it dwell 10 to 15 minutes, and do not let it dry
The waiting does the real work, loosening the film so the brush barely has to push. If the sun is strong and the wall starts drying, mist it lightly with water. An overcast day in the 60s or 70s is the sweet spot for this reason.
- Step 5: Scrub gently along the laps with a soft-bristle brush
Follow the horizontal laps, not against them, with light pressure. Stiff bristles and abrasive pads are the enemy here: the Vinyl Siding Institute’s guidance warns they can change the gloss of the cleaned area and leave the wall looking splotchy.
- Step 6: Rinse from the top down, spray angled downward
Garden hose with a spray nozzle, each section rinsed before the solution dries. Never aim the stream upward at the laps. Forcing water up behind the panels is the single most damaging mistake in siding cleaning: it soaks the sheathing and insulation behind the wall and invites mold inside the wall cavity.
- Step 7: Rinse the plants and check your work
Fresh water over every planting near the wall. Walk the wall and re-treat any patches that survived the first pass; a second light application beats one aggressive one every time.
Pressure washers: the honest limits
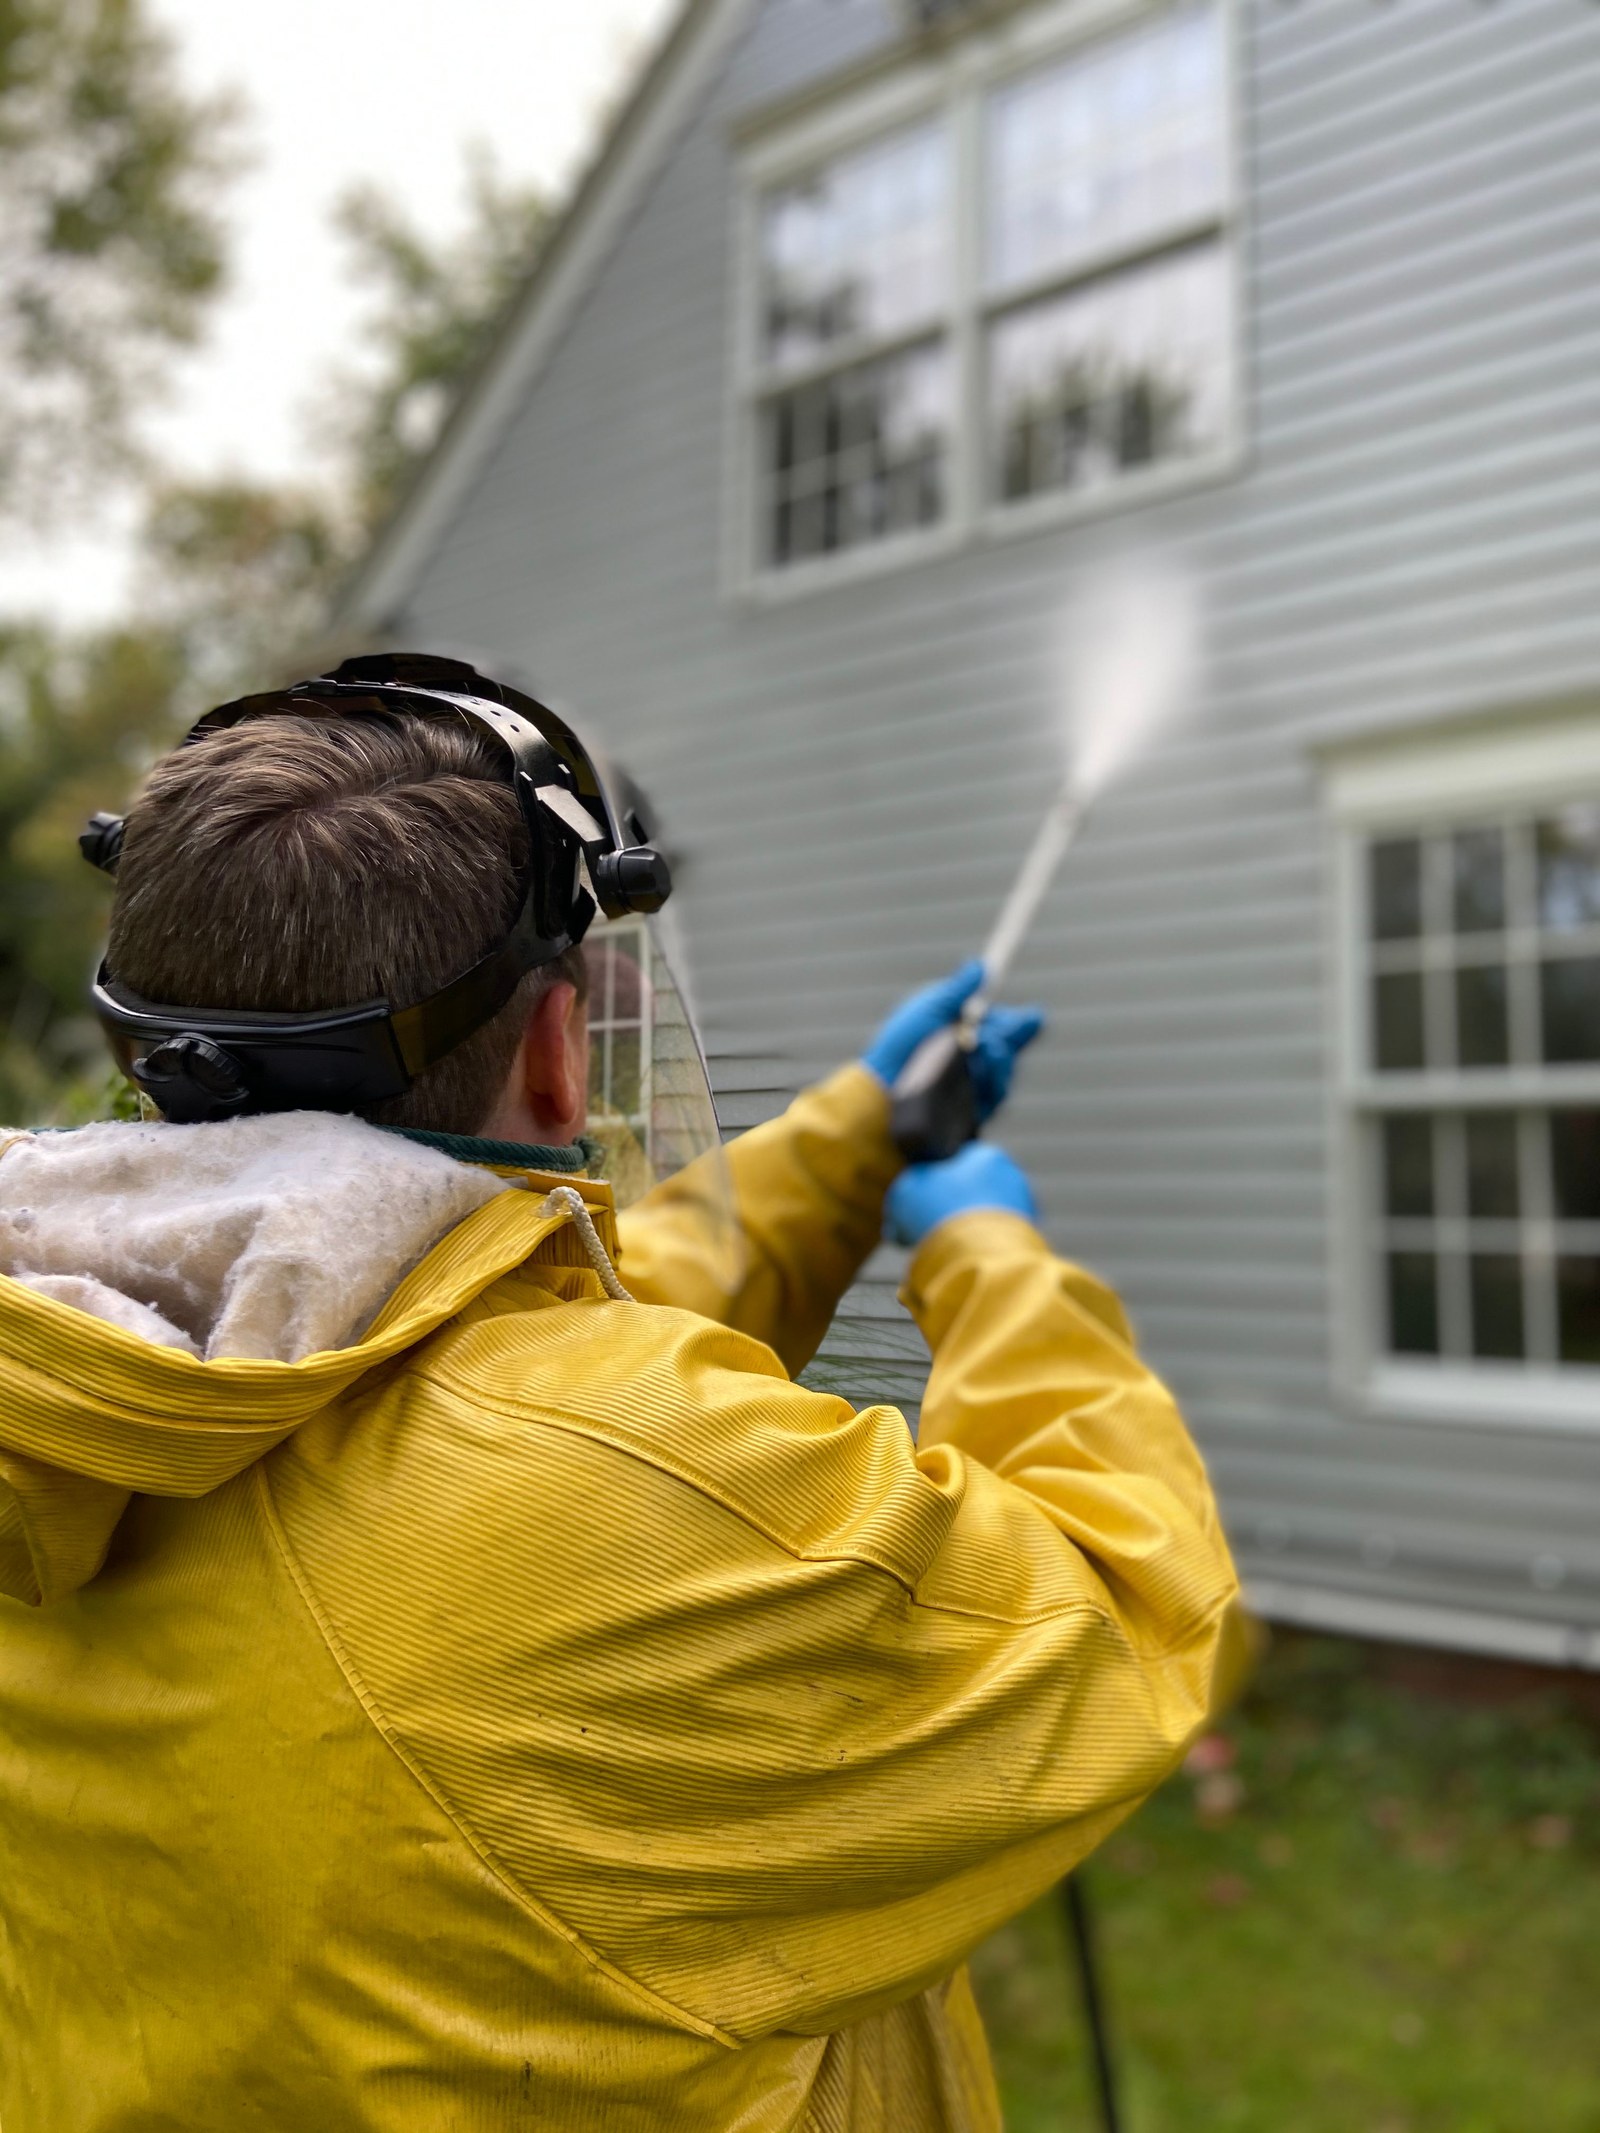
A pressure washer removes algae from vinyl siding fast, but it is the easiest way to cause hidden damage. Water forced up behind the panels soaks insulation and invites mold inside the wall cavity, and a narrow tip can cut permanent marks into the vinyl. Used carelessly, it also leaves the growth’s roots behind, so the green returns within weeks.
If you do use one, keep the pressure low and the wand back, use a wide fan tip rather than a pinpoint jet, and spray downward only, never up into the laps. InspectAPedia’s procedures note that pressures over about 100 psi raise the odds of both finish damage and water blown behind the siding. Honestly, for most algae jobs the hose-and-brush routine above gets the same result with none of the risk; soft washing versus pressure washing lays out which surfaces suit each method in detail.
Four mistakes account for most siding damage I hear about, and all four are avoidable: spraying upward into the laps, using a bleach mix stronger than the label or the manufacturer formula, scrubbing with a stiff or wire brush, and cleaning in hot direct sun so the solution bakes onto the panels. Skip those and the job stays boring, which is exactly what you want.
Keep it from coming back
Cleaning the wall without changing the conditions is mowing weeds without pulling roots. Four habits keep the green away far longer than any cleaner:
- Let the wall breathe. Trim shrubs back so sun and air reach the siding. Iowa State Extension flags plants crowding the house, especially on the north side, as a prime mold and algae setup, and calls trimming one of the best preventions there is.
- Keep water off the wall. Clean gutters, downspouts discharging away from the foundation, and sprinklers aimed at the lawn, not the house. A wall that dries between rains grows very little.
- Wash yearly. CertainTeed’s care instructions say to clean vinyl siding at least once a year for best appearance, and Iowa State suggests the same yearly rhythm. A light annual wash removes the dirt film before anything can feed on it. The exterior house cleaning guide by surface lays out a schedule that covers the whole exterior in the same pass.
- Check the north wall each spring. A quick look in spring catches early growth when soap and water still handle it, which is the cheapest clean you will ever do.
Staying on a regular wash schedule keeps regrowth at bay; see how often to wash your house exterior for the intervals by siding type.
DIY or call a pro?
Most algae jobs are firmly DIY. The line is about height, reach, and the condition of the siding, not the algae itself.
| Safe DIY | Call a pro |
|---|---|
| One story with stable footing | Second story or sections you cannot reach without stretching off a ladder |
| Light to moderate growth | Whole-wall, heavy growth that survived two proper cleanings |
| Siding in good shape, cleaner tested on a hidden spot | Aged, brittle, or already damaged siding where scrubbing risks the finish |
| Plantings you can cover or rinse | You suspect water is already getting behind the laps |
| You can identify the growth with the tests above | You cannot identify the marks with confidence |
If a pro is the answer, hire a soft-wash company rather than a pressure-washing outfit, and ask how they protect plantings and keep water out from behind the laps before they start.
Frequently asked questions
Diluted bleach mixes are standard for siding, but the concentration matters. CertainTeed’s own mildew formula uses a quart of 5% sodium hypochlorite in about a gallon of total mix, and the company cautions that greater concentrations may damage the siding and soffit. Test any mix on a hidden spot first, keep it off the plants, and rinse well.
You can, but gently: low pressure, a wide fan tip, the wand held back, and the spray angled downward only. Above roughly 100 psi, the risk of finish damage and water forced behind the panels climbs, according to InspectAPedia’s vinyl siding cleaning procedures. For most algae, the soft-wash routine above gets the same result with less risk.
A roughly 30% vinegar-in-water solution is listed among the safest siding cleaners in the manufacturer guidance InspectAPedia summarizes. It handles light to moderate growth well. For thick, established films, step up to oxygen bleach or a store-bought outdoor cleaner.
Cover foundation plantings with plastic sheeting before you start, and rinse them with fresh water right away if any cleaner lands on them. Iowa State Extension gives exactly this advice for bleach-based mixes.
At least once a year, according to CertainTeed’s care instructions, and Iowa State Extension suggests the same yearly rhythm. Shaded north walls are worth a quick check each spring.
The north wall gets the least sun, so it stays damp longest, and damp plus dirt film is the whole recipe. Trimming plants back, fixing gutter splash, and redirecting sprinklers dry the wall out, which matters more than any cleaner.
Algae sits on the surface film and is mostly a cosmetic problem. The thing worth watching is the damp condition that let it grow, since a wall that never dries is where real trouble starts.
Sources
- InspectAPedia’s vinyl siding cleaning procedures, summarizing the Vinyl Siding Institute’s guidance on soft-brush technique, the safest cleaner ranking, and why pressure over about 100 psi and upward spraying risk damage
- CertainTeed’s official cleaning instructions for vinyl siding and trim, covering bottom-up washing, the mildew solution formula, and the concentration caution

6 Comments
Pingback: Black Spots on Vinyl Siding: Mold, Mildew or Artillery Fungus?
Pingback: Exterior House Cleaning Guide by Surface | Home Exterior Lab
Pingback: Siding Oxidation vs. Dirt: How to Tell the Difference
Pingback: What Is Vinyl Siding? Types, Materials & Protection Guide
Pingback: Can You Paint Vinyl Siding? What Works & What Fails
Pingback: How to Clean Vinyl Siding Safely: Dirt, Mold & Stains