

A brick paver patio or walkway stands or falls on two choices you make before the first brick goes down: the pattern, and the way each brick meets the sand. Get the pattern right and the surface locks together under feet and tires. Get the laying technique right and the joints stay tight for years. Get either one wrong and the surface wanders, rocks, and weeds up within a season. The good news is that neither choice is hard once you know what each pattern is for and how the bricks are supposed to be set.
Short answer: Pick herringbone if cars will drive on it, running bond if it is your first job, and basketweave for a traditional look on foot traffic only. Lay a compacted gravel base, screed 1 inch of bedding sand, set the border first, then set each brick with the click-and-drop method, working from a fixed edge and checking alignment with a string line every few rows. Sweep joint sand in, compact, and top the joints up after the first rains.
Last updated: November 5, 2026
Contents
- What Is a Brick Paver?
- The Four Brick Paver Patterns
- Which Pattern Fits Your Project?
- Before You Lay a Single Brick
- How to Lay Brick Pavers, Step by Step
- Starting Each Pattern Without Wandering Off
- Mistakes That Ruin a Brick Paver Job
- DIY or Hire a Pro?
- Frequently Asked Questions
- Sources
What Is a Brick Paver?
A brick paver is a small, dense paving unit made to be laid dry on a sand bed, with no mortar holding it in place. The joints are filled with sand, the edges are held by a restraint, and the whole surface stays put through interlock and weight. Most brick pavers run about 4 by 8 inches, which means roughly four and a half of them cover a square foot, a handy number when you are counting an order.
Two kinds of brick paver sit on the shelf, and the difference matters more than the color chart suggests. Clay brick pavers are fired clay, the same material as a house brick, with the color running all the way through the unit, so a chipped corner shows the same tone as the face. Concrete pavers are cast concrete molded to brick size and shape, and they come in a wider range of colors and surface textures. Both lay the same way on the same sand bed. Clay holds its color a little more stubbornly over decades, while concrete gives you more choice and usually a lower price per unit. Concrete pavers also behave like any cast concrete surface when it comes to cleaning, so our concrete cleaning guide applies to them almost word for word.
| Attribute | Clay brick pavers | Concrete pavers |
|---|---|---|
| Material | Fired clay, same as a house brick | Cast concrete molded to brick size |
| Color | Runs through the whole unit, fades slowly | Surface and integral color, widest range |
| Size consistency | Small natural variation, plan for wider joints | Very uniform, tighter joints possible |
| Typical unit size | About 4 by 8 inches | About 4 by 8 inches, plus many other sizes |
| Best for | Traditional looks, paths and patios that age gracefully | Driveways, modern designs, tight budgets |
One size check decides whether your pattern will work at all, and it is the check most first-timers skip. Herringbone and basketweave only close up neatly if the paver is truly modular, meaning its length is exactly twice its width. A 4 by 8 inch brick qualifies. A brick that measures 4 by 7 and three quarters does not, and no amount of fiddling will make the pattern meet cleanly at the corners. Measure three or four bricks from the batch before you buy, not one, and ask the supplier for the true dimensions rather than the nominal size on the tag.
The Four Brick Paver Patterns
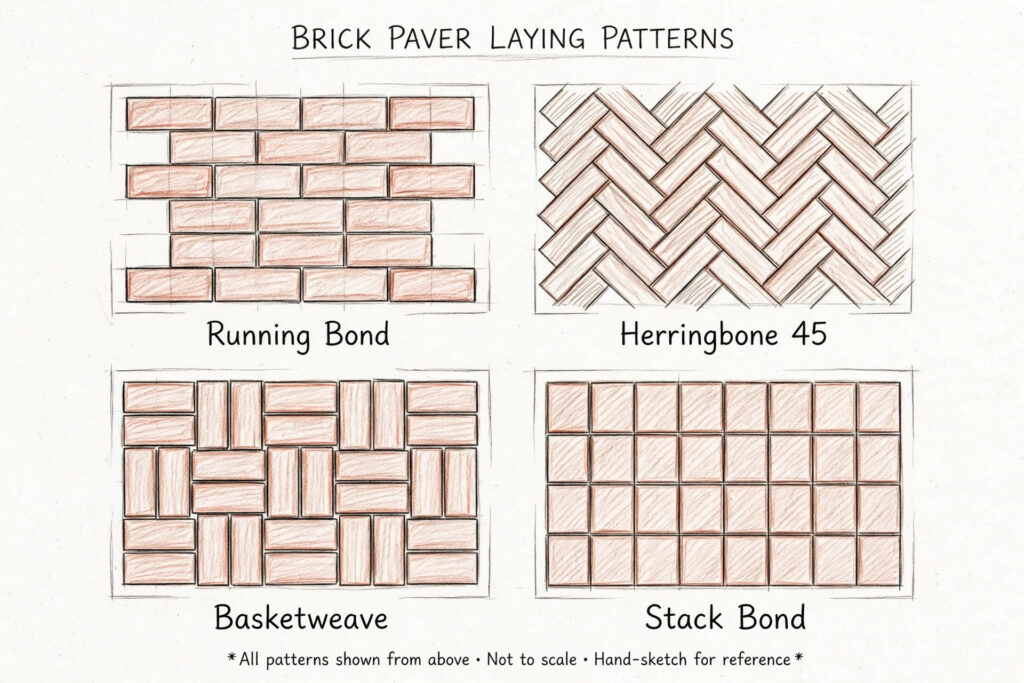
Four patterns cover nearly every brick paver job a house will ever need. Each one has a job it does best, a price in wasted cuts, and a difficulty level, and the table below puts those side by side so you can compare them in one glance. The waste figures come from a pattern guide that tracks cut loss per layout, and the load ratings follow the way installers talk about interlock: how well the field passes a load from one brick to its neighbors instead of letting a tire shear along a straight joint.
| Pattern | Interlock under load | Extra to order (waste) | Difficulty | Best use |
|---|---|---|---|---|
| Running bond | Moderate | 5% | Easy | Walkways, first DIY job, patios |
| Stack bond | Low | 5% | Easy | Modern patios, foot traffic only |
| Basketweave | Moderate | 5 to 8% | Easy | Traditional patios and walkways |
| 90-degree herringbone | High | 10% | Moderate | Patios, high-traffic paths |
| 45-degree herringbone | Highest | 15% | Hard | Driveways, premium patios |
Running bond
Running bond is the brick-wall pattern: rows of bricks with each course offset by half a brick. It is the fastest pattern to lay, it hides small size differences between bricks, and it wastes the least material, because the only cuts are half bricks at alternating row ends, and each cut gives you two usable halves. Its long sight lines can stretch a narrow walkway visually, which is a genuine trick on a small path. Its weak point is direction. Continuous joint lines run across the field, so under regular vehicle traffic it does not lock together as strongly as herringbone. Fine for patios, pool surrounds, and paths. A compromise choice for driveways.
Herringbone, 90 degrees and 45 degrees
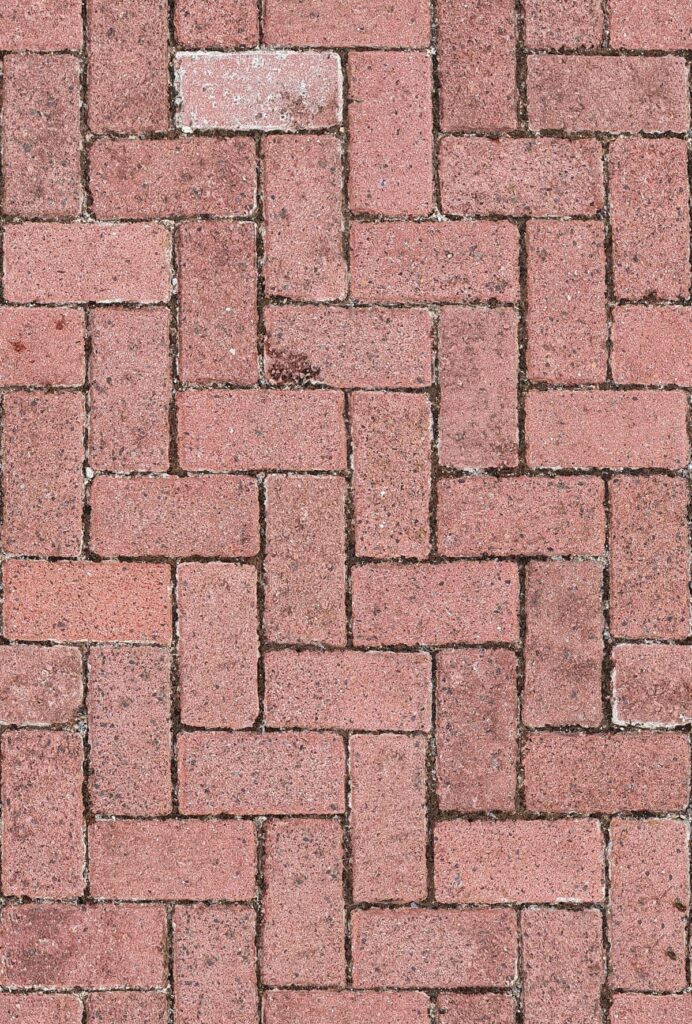
Herringbone lays rectangular bricks in a zigzag, each unit set at a right angle to its neighbors, so the field has no long straight joint lines in either direction of travel. That is exactly what you want under vehicles: braking and turning forces meet an interlocked mesh instead of a seam they can shear along. The 90-degree version keeps cuts manageable. The 45-degree version looks the most dynamic and is the standard recommendation for driveways, but it makes triangular offcuts along every edge, so budget a full 15 percent waste and expect a lot of saw time. A brick mason quoted on a This Old House project called herringbone the oldest pattern known to brick paving, and it is still the one pros reach for when tires are involved.
Basketweave
Basketweave pairs bricks in alternating horizontal and vertical sets, which reads like a woven basket and suits brick better than almost any other material. It only works with truly modular bricks, length exactly twice width, and it is nearly as fast as running bond on square-edged areas. It belongs on foot-traffic surfaces. Under a car it does not interlock the way herringbone does, so keep it off the driveway.
Stack bond
Stack bond lines the bricks up in a plain grid, joints lined up in both directions. Cutting is minimal and the look is crisp and modern, which suits large-format slabs and contemporary patios. Its weakness is structural: with no interlock at all, it should stay on foot-traffic areas, and precise joint alignment is unforgiving of sloppy laying. Every wobble shows.
Every pattern gets a border, and the border is not decoration. A soldier course, bricks stood on end around the perimeter, does three jobs at once: it frames the field visually, it gives the pattern a clean line to die into so you get fewer awkward slivers, and it finishes the edge where the restraint locks the whole system together. A darker border course is the simplest high-return design move in paving.
Which Pattern Fits Your Project?
Pick a pattern by working through three questions in order, the way installers do. First, what does the surface carry? Vehicles push you toward herringbone or another high-interlock layout. Foot traffic opens the whole catalog. Second, what is the shape of the area? Long narrow walkways suit running bond, which stretches them. Square patios take basketweave or herringbone well. Big rectangles with a lot of edge suit 90-degree herringbone, because the cuts stay manageable. Third, how much cutting and fiddling are you willing to do? A first job goes smoother in running bond or basketweave. Forty-five-degree herringbone is a second or third project, not a first, unless you are patient and good with a saw.
Two practical checks come before you order. Lay a test patch on your driveway first, big enough to see the pattern at full size, and live with it for a day. A pattern that looks busy on a sample board can look just right at patio scale, and the reverse happens too. Then buy all your pavers from one production lot. Color varies between dye lots, and a patio that mixes two lots shows it forever. That is another reason the waste figure matters: it is much better to have a dozen spare bricks than to order a second batch later.
Before You Lay a Single Brick
Call 811 at least two days before you dig, from anywhere in the country, and let the utility company mark buried lines. That call is free, and it is the one step that has no workaround. While you wait, mark the area with stakes and string, and set the slope so water runs away from the house. A quarter inch of fall per foot is the rule most guides use, which works out to about an inch of drop every eight feet. If the path or patio meets a house wall, a curb, or a sidewalk, measure from that fixed edge, because it becomes the reference line for everything that follows.
Count materials with the pattern in mind. Take the square footage, multiply by four and a half for standard 4 by 8 inch bricks, then add the waste figure from the table above: 5 percent for running bond, 15 percent for 45-degree herringbone. The bedding sand goes down 1 inch thick everywhere, which works out to about a cubic yard per 80 square feet of path. The gravel base is where the money and the work sit: roughly 4 inches of compacted crushed stone under a patio or walkway, and 6 to 8 inches under a driveway. If you want the arithmetic done for you, our paver base calculator works out the gravel and sand for the area and depth you enter.
Tools are simple, and most of them are already in a garage. You need a flat shovel, a wheelbarrow, a hard rake, a level, a rubber mallet or deadblow hammer, a mason’s chisel and a 3-pound hammer for splitting, a broom, string lines and stakes, a 2 by 4 screed board, and a plate compactor, which you can rent from most equipment yards. A wet saw or angle grinder with a diamond blade handles the edge cuts; our how to cut pavers guide compares the tools. Gloves, safety glasses, hearing protection, and a respirator for any dry cutting are not optional extras.
How to Lay Brick Pavers, Step by Step
The sequence below is the standard dry-lay method used for brick pavers on a sand bed, and it follows the same steps manufacturers print in their own installation guides. The base is the part that decides whether the surface stays flat, so if you want the full depth on excavation and base layers, our complete guide to laying pavers covers it in detail. This article stays in its own lane: the pattern choices and the brick-laying technique.
- Mark out and dig.
Stake the area, paint the outline, and call 811 at least two days before digging. Dig to the depth your base needs, keeping the bottom flat and the slope at a quarter inch per foot away from the house. On a slope, start at the bottom and work your way up, and use the shovel blade as a rough depth gauge.
- Build and compact the base.
Spread crushed stone in lifts no deeper than 4 inches, and compact each lift with the plate compactor while the stone is slightly damp. Patios and walkways take about 4 inches of compacted base. Driveways take 6 to 8 inches, 6 inches being the industry minimum and 8 inches the safer pick on clay or wet soil, and 2 and 3/8 inch thick pavers are the usual pick for residential driveways. A base that is skipped or rushed is the reason most paver jobs dip and settle later, so this is the step to take slowly.
- Set the border and edge restraint first.
Dry-lay a row of border bricks to fix the exact size of the field, then set the edge restraint. Anchor it with spikes at least 8 inches into the base every 2 to 3 feet. Leave one border unanchored until the field is laid, so the last row can be fitted tight. A soldier course of bricks stood on end makes a strong border, and it should sit on a firm edge, not on loose sand.
- Screed 1 inch of bedding sand.
Lay screed rails, fill between them with coarse washed sand, and pull the 2 by 4 across to leave a uniform 1-inch bed. Do not compact the bedding sand, and do not walk on it. Work in sections of about 8 feet, laying bricks before you screed the next section, so the fresh sand never sits open and unprotected.
- Check the modular size.
Before you commit to a pattern, lay a small test patch and check that the bricks meet cleanly. If herringbone or basketweave will not close up, the bricks are not truly modular, and you should switch to running bond rather than fight the pattern for the whole job.
- Lay the bricks with the click-and-drop method.
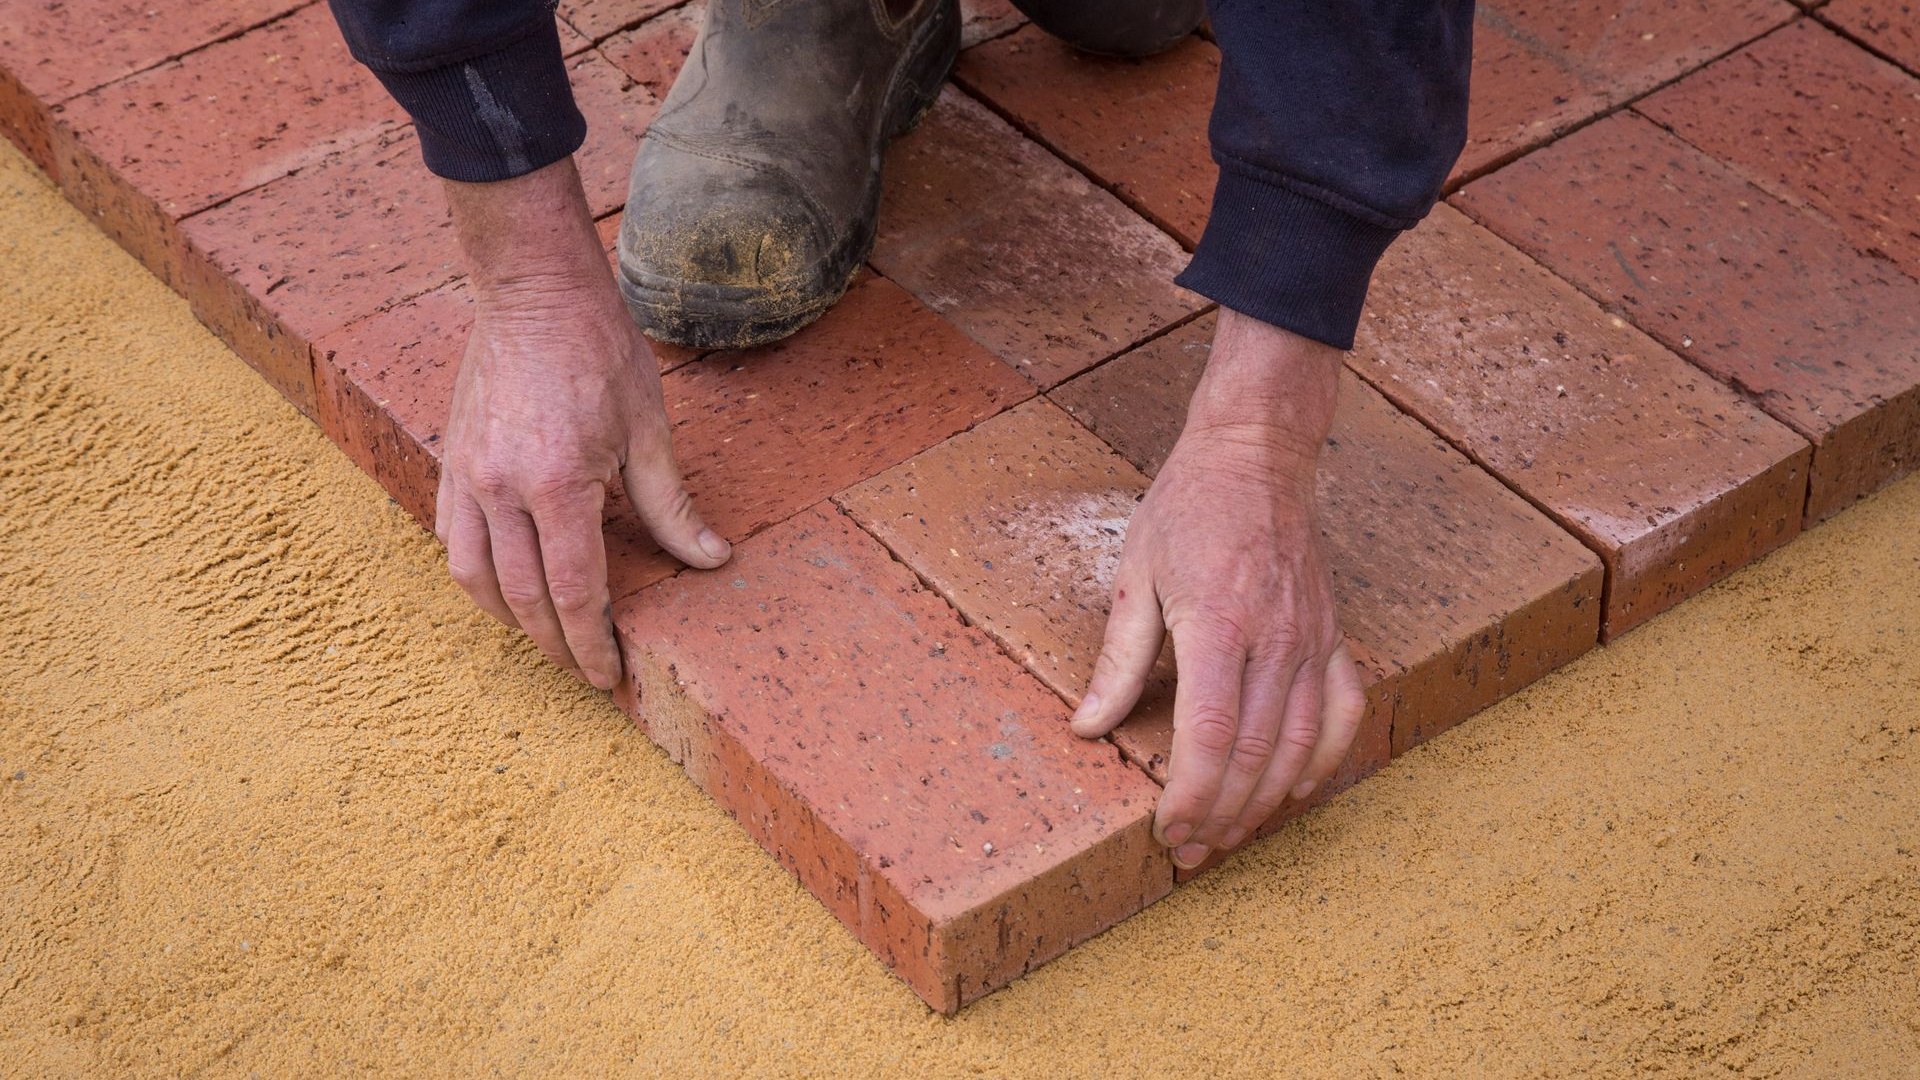
Start at a corner that includes a fixed edge, like the house or a curb, and lay one run along the two adjacent borders. Hold each brick so its bottom edge clicks against the top edge of the brick already in the sand, then drop it straight down. Do not press it in, do not hammer it, and do not slide it sideways into place, because sliding pushes sand into the joint and opens a gap you cannot close later. Leave about a 3/16 to 1/2 inch gap between bricks to allow for the natural size variation in clay units. Always work from the laid bricks, never by kneeling on the fresh sand. If you disturb the sand, re-level it with a broom or trowel before you lay more bricks.
- Keep the lines true with string.
Run a string line across the front of your laying edge every 2 to 3 feet, and check the rows against it as you go. If the pattern starts to wander, a trowel or a wide putty knife can nudge a brick back into line. Small gaps do not matter yet. The joint sand fills them later.
- Cut the edge pieces.
Once the whole bricks are in, mark and cut the pieces that fit against the border. Keep the cut pieces no smaller than 2 inches wide, and do not try to split off anything smaller than about an inch and a half, because it will not break cleanly. The cutting guide linked above covers the tools and the technique.
- Compact the field.
Spread a thin layer of sand over the surface to protect it, then run the plate compactor over the whole field twice. The compactor seats the bricks and forces sand up into the joints, which is what completes the interlock. On textured pavers, use a protective pad on the compactor or lay heavy geotextile fabric over the surface first, so the plate does not scuff the faces.
- Fill the joints and settle the surface.
Sweep dry joint sand across the surface and work it into the joints with a broom, then compact again. Repeat until the joints are full to the bottom of the chamfered edge. If you use polymeric sand, follow the maker instructions for watering it in. The sand will settle over the first rains, so keep a bag back and sweep more in until the bricks stop taking it. That last top-up is the difference between joints that lock and joints that weed up.
Starting Each Pattern Without Wandering Off
Every pattern has a starting move, and getting the first few bricks right is what keeps the rest of the field honest. The field is laid from a fixed straight edge, usually the house, working outward, and the border goes in first so the pattern has a clean line to die into.
Running bond starts with a full brick at the fixed edge, and the next row starts with a half brick, so the joints stagger by half a unit from row to row. If the joints from row to row drift to within an inch of each other on a curve, slip a half brick in to open the separation again. Basketweave starts on a chalk line snapped down the center of the sand bed. Lay three short rows to make a stepped pyramid in the middle of the edge, then work diagonally, filling in the steps until the surface is covered.
Ninety-degree herringbone starts at a corner with a pair of full bricks set at right angles, then a stepped leg of full bricks runs out from the corner, ending each leg with a half brick. The stepped legs are what keep the zigzag true. Forty-five-degree herringbone is the fussiest start of the four, and it has a trick worth knowing. Set a course of bricks on edge against the baseline as temporary spacers, then place the first pair of bricks at roughly 45 degrees, with the corner of the left-hand brick touching the spacers. Lay the first chevron, two courses at right angles to each other, and extend it along the baseline. The chevron pair checks itself: as long as the corner of each brick touches the baseline, the alignment must be right. A string line pulled along the outside corners of the second course confirms it, because every corner should just touch the taut string. Once the whole bricks are laid, pull the temporary spacers out, use them for the cut-in pieces along the edges, and cut in last. That order keeps the cut pieces large and the waste low.
Curves deserve a warning of their own. Gradual curves work fine, but a curve with a radius tighter than 5 feet forces wide gaps between the bricks, and no pattern hides that. If the design calls for a tight turn, widen the path or break the curve into short straight runs with a gentle angle between them.
Mistakes That Ruin a Brick Paver Job
Most brick paver failures show up as one of five symptoms, and each one points at a specific step that was skipped. Read the symptom, find the cause, and the fix usually writes itself.
| Symptom | Likely cause | Fix |
|---|---|---|
| Pattern wanders off line | No string line, or started from a loose edge instead of a fixed one | Pull string lines every few rows and lay from the house or curb outward |
| Bricks rock underfoot | Bedding sand disturbed, or screed left uneven | Lift the rocking bricks, re-level the sand with a trowel, and reset them |
| Edges spread outward | Edge restraint missing, or spikes too shallow | Install a restraint with spikes at least 8 inches deep every 2 to 3 feet |
| Surface dips after rain | Base stone not compacted in thin lifts, or base too shallow for the load | Prevention only: rebuild the base in 4-inch lifts; a dipped field has to come up |
| Joints widen and weeds move in | Joint sand washed out and never topped up | Re-sand the joints and top up after rains until they stay full |
The dip is the one failure with no cheap fix, which is why the base gets so much attention in every installation guide. A pattern mistake can be pulled up and relaid in an afternoon. A base mistake means lifting the whole field.
DIY or Hire a Pro?
A small patio or walkway in running bond or basketweave, on flat ground with no drainage trouble, is a very reasonable first DIY project. Two weekends, a rented compactor, and a helper feeding you bricks will get most garden paths done, and the work is forgiving: a brick laid wrong can be lifted and reset in seconds. That is the real advantage of dry-laid pavers over poured concrete. Nothing sets until you sweep the sand in.
Call a pro when the job has one of these features: a driveway in 45-degree herringbone, a large area where a wandering pattern would show for years, a slope or drainage problem that needs grading, or heavy clay soil that needs a deeper base than the standard depths. The Brick Industry Association publishes detailed technical notes for professionals, and a good installer will be working from that kind of guidance rather than guessing. If you hire, ask how deep the base will be, how it will be compacted, and what pattern they recommend for the load. The answers tell you quickly whether you are talking to someone who lays pavers or someone who just owns a compactor.
After the job, the surface needs little: keep the joints full of sand, sweep leaves off before they stain, and wash the field now and then. Our driveway cleaning guide covers washing for the whole driveway, brick field included, and it is the right next read once the pavers are down and settled.
Frequently Asked Questions
Running bond. It is the fastest to lay, it hides small size differences between bricks, and it wastes the least material, about 5 percent. Start with a full brick at the fixed edge, offset each next row by half a brick, and keep a string line across the laying edge.
Forty-five-degree herringbone. Its zigzag field has no long straight joint lines, so braking and turning forces meet an interlocked mesh instead of a seam they can shear along. Budget 15 percent extra for cuts, use 2 and 3/8 inch thick pavers, and build an 8-inch compacted base under it.
Yes. Herringbone and basketweave only close up neatly if the brick is truly modular, meaning its length is exactly twice its width. A 4 by 8 inch brick qualifies. Measure several bricks from the batch and check the true size, not the nominal size on the tag.
It depends on the pattern: 5 percent for running bond and stack bond, 5 to 8 percent for basketweave, 10 percent for 90-degree herringbone, and 15 percent for 45-degree herringbone. Buy all of it from one production lot, because color varies between lots.
Not if you want the surface to stay flat. A sand-only bed works for a small informal garden path, but a patio or walkway needs about 4 inches of compacted crushed stone under the sand, and a driveway needs 6 to 8 inches. Without that base, the field dips after the first heavy rain.
One inch, uniform across the whole area. Screed it with a 2 by 4 over rails, do not compact it, and do not walk on it. Lay bricks in sections of about 8 feet so the fresh sand never sits open.
Sealing is optional and it is a separate decision from laying. Let the joint sand settle through a few rains first, and make sure the joints are full before you seal anything. Sealing too early traps moisture and locks in sand that has not settled yet.
Sources
- ORCA, Brick Paver Installation Guide
- Alliance Pavers, Paver Patterns and Laying Styles Explained
- Paver Calculators, Paver Patterns Guide: Layouts, Difficulty and Waste Factors
- Pavingexpert, Setting Out 45-Degree Herringbone
- Cambridge Pavingstones, Installation Instructions
- Family Handyman, How to Build a Brick Walkway in the Garden

3 Comments
Pingback: How to Lay Pavers: Complete DIY Installation Guide - Home Exterior Lab
Pingback: How to Cut Pavers: Wet Saw, Grinder & Splitter Compared
Pingback: Is Stamped Concrete Cheaper Than Pavers? 2026 Cost Compared