

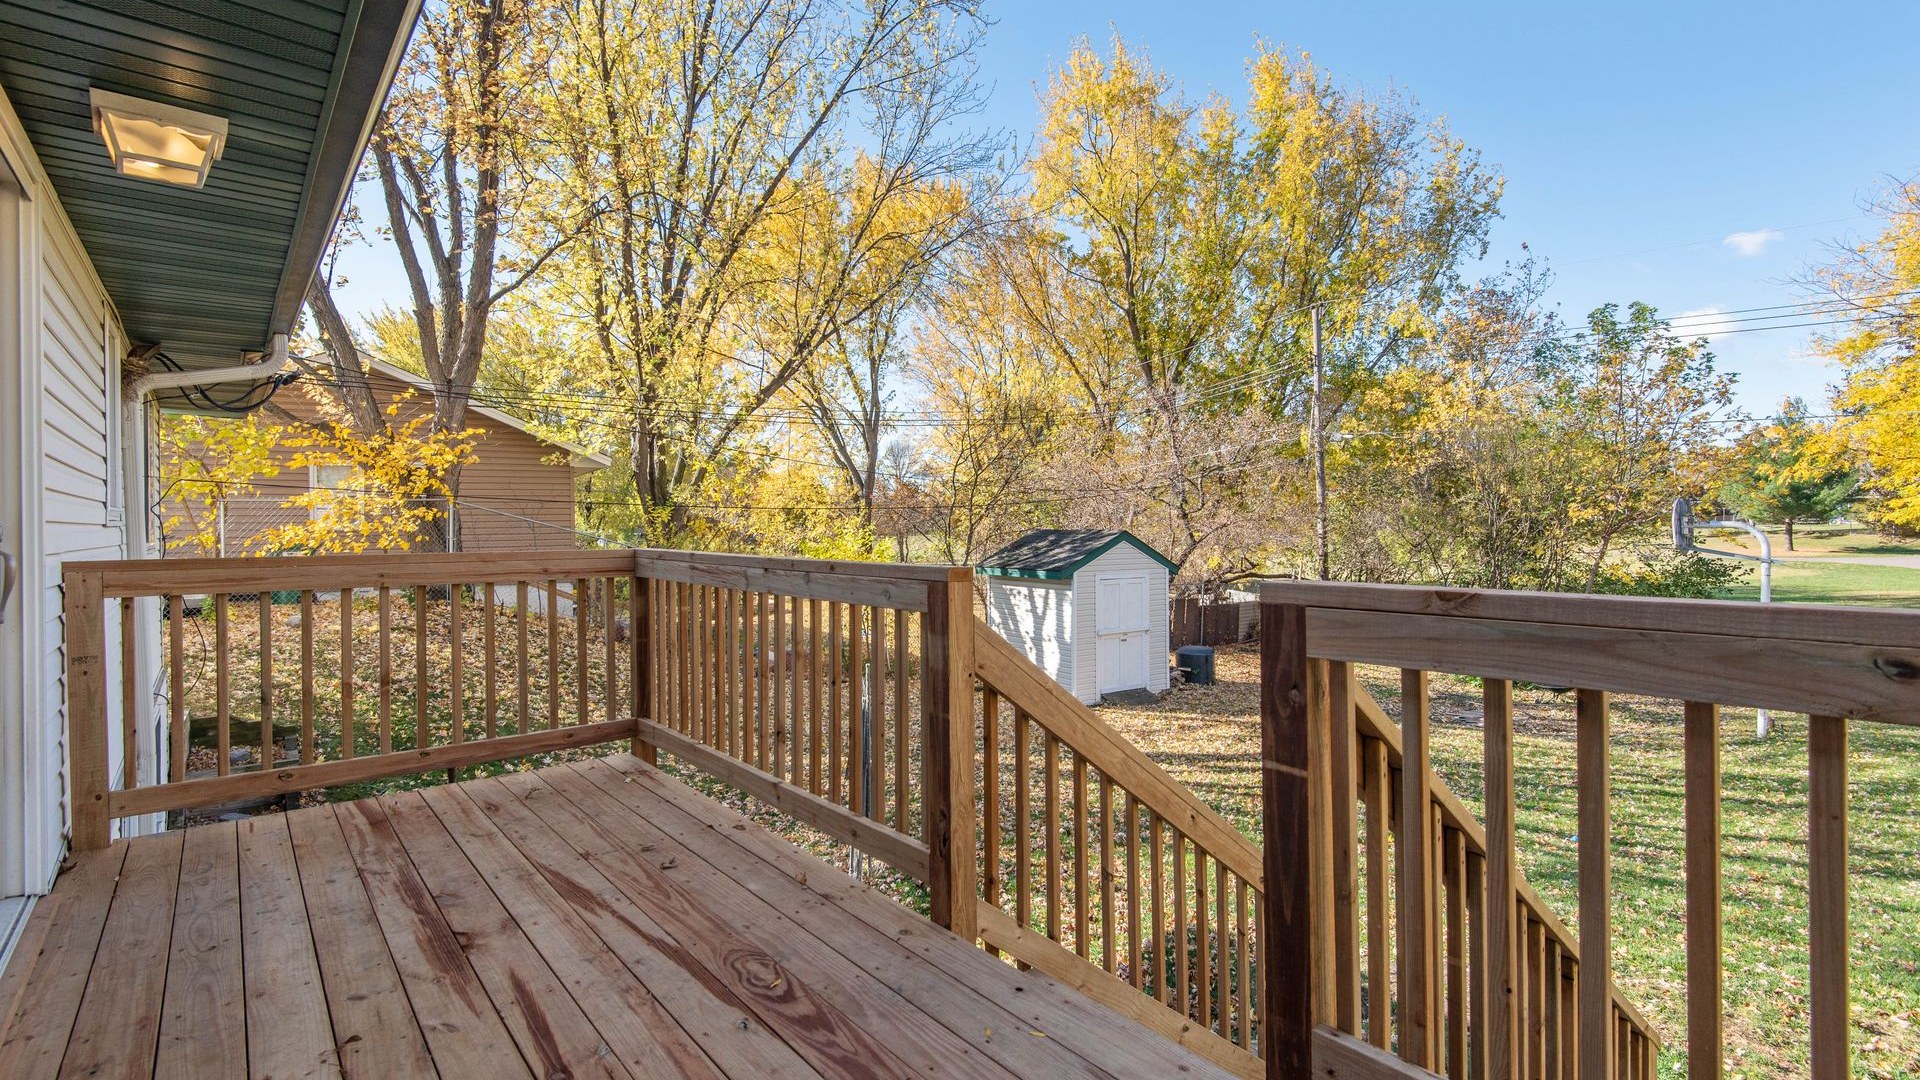
Building a wood deck means turning a patch of yard into a level, solid floor that stays put through wet seasons and winters. A wood deck is a framed platform, usually of pressure-treated lumber or a naturally durable wood, that sits on posts and footings or, for a low freestanding version, on blocks at grade. The short answer to how you build one is this: pick the build type first, get the layout square, set footings or blocks that will not move, flash the ledger properly if the deck attaches to the house, frame it level, then lay the boards with gaps for drainage and finish it before the weather gets to it.
Last updated: October 30, 2026
Most deck trouble starts before the first board goes down. A frame that is out of square shows up as a crooked last board. A footing that sits too shallow heaves in winter and pulls at the house connection. A ledger flashed badly rots the rim joist it is bolted to, quietly, for years. This guide walks through the full build in the order a careful builder does it, and it keeps the ground-level build as its own section, because that version skips deep footings and changes several decisions at once.
Contents
- Which deck are you building?
- Before you dig: permits, lines, and layout
- Footings and frost: how deep is deep enough?
- The ledger: the connection that must not fail
- Framing the deck, step by step
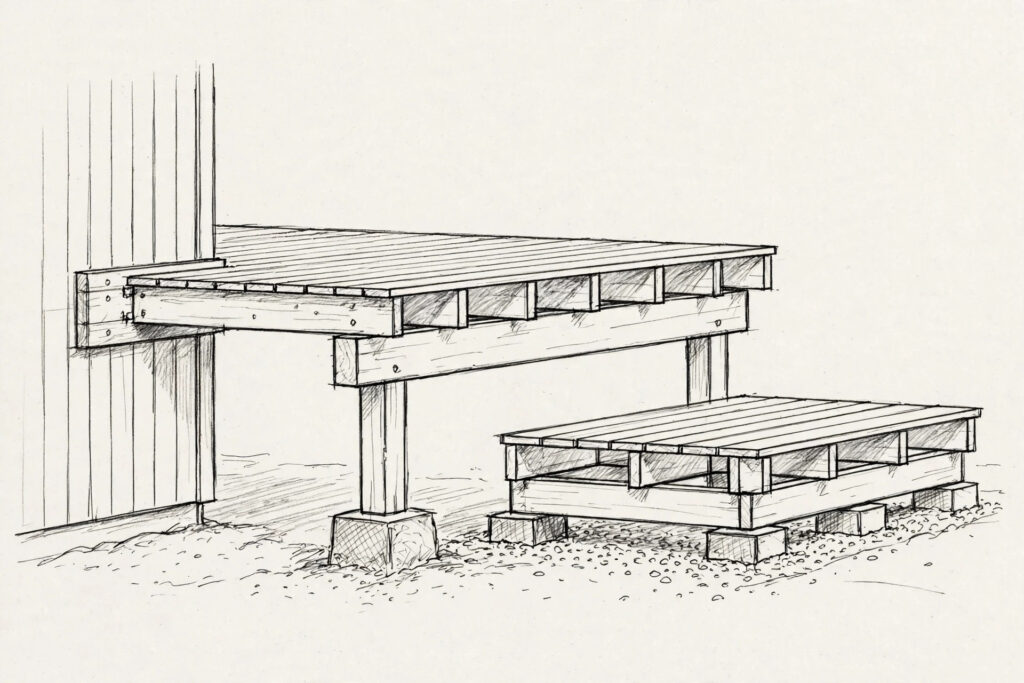
- Building the ground-level deck
- Decking, rails, and steps
- Mistakes that show up a year later
- DIY or hire a pro?
- Frequently asked questions
- Sources
Which deck are you building?
The first decision shapes everything else: does the deck attach to the house, or does it stand on its own? An attached deck uses a ledger board bolted to the house framing, which gives it a solid back edge and a clean step out the door. A freestanding deck carries its own weight on posts or blocks at both ends, which avoids touching the house wall at all. A ground-level deck is a freestanding deck that sits close to the ground, often just one step up, with no railing and no deep footings in many jurisdictions.
Height decides a lot of the code story. Once a walking surface sits more than 30 inches above the ground, guards and a proper stair with handrail enter the picture in most places, and the footing and bracing requirements get stricter. Below that line, a simple platform build is often enough. That is why the ground-level version in this guide is genuinely simpler, not just a raised deck with shorter posts.
| Build type | Best for | Foundation | Railing usually needed? |
|---|---|---|---|
| Attached, raised | A door that opens onto a deck at main-floor height | Ledger plus concrete footings below frost line | Yes, above 30 inches |
| Freestanding, raised | Houses where the wall cannot take a ledger, such as brick veneer or a cantilevered floor | Footings at all posts, no ledger | Yes, above 30 inches |
| Ground-level, freestanding | Patios, fire pit areas, and yards with a gentle grade | Concrete pier blocks or pads on compacted gravel | Usually no |
Pick the type before you buy lumber. The framing sizes, the footing plan, and even the permit question all flow from it, and changing your mind after the holes are dug wastes a weekend.
Before you dig: permits, lines, and layout
Call your local building department before you buy anything. Permit rules vary by town, and the same deck can need a permit in one county and not in another. As a rough guide, many jurisdictions follow the pattern in the county handouts that cite the residential code: attached decks generally need a permit, and detached decks above 30 inches need one too. A low freestanding deck often does not, but “often” is not a permit, so ask and get the answer in writing if you can.
Call 811 before you dig, even for shallow holes. Decks.com repeats that reminder in its footing guide, and it costs nothing: utility locators mark buried lines so a post hole does not become a repair bill. Mark setbacks too. A deck that creeps into a side-yard setback or over an easement can be ordered moved, and no footing depth fixes that.
Sketch the deck on paper first, with the door, the steps, and any tree, faucet, or vent in the way. Decide which way the deck boards will run, because the joists run at right angles to the boards, and that sets the whole frame direction. A 12 by 16 foot deck is a good first build: big enough to use, small enough to keep square without heroics. For the board count, run your exact dimensions through our deck board calculator before ordering, since it works out courses, waste, and screws from your numbers rather than a guess.
Layout starts with string lines and batter boards, a pair of stakes with a cross board set back from each corner so the lines survive the digging. Square the rectangle with the 3-4-5 triangle: measure 3 feet along one side from a corner, 4 feet along the other, and adjust until the diagonal between those marks reads 5 feet. Check both diagonals of the full rectangle as well. When they match, the frame is square, and every board after that goes down straight.
Footings and frost: how deep is deep enough?
A footing spreads the deck load over enough soil that the deck does not sink, and it anchors the deck against frost heave. Frost heave is the lift that happens when wet soil freezes and expands, and it is the reason shallow footings fail in cold climates. Decks.com explains that even a footing that settles back in spring can damage the ledger connection, because the up and down movement works the bolts loose and opens gaps water can enter.
The rule is simple to state and local to apply: footings go below the local frost line, or at least 12 inches deep where the ground does not freeze. Frost depth runs from about 12 inches in warm southern zones to 4 or 5 feet in the coldest northern states, so a number borrowed from another state is useless. Your building department or a local footing depth map gives the figure that applies to your soil. Dig to undisturbed earth, not to fill dirt someone spread last year, and keep the bottom of each hole flat so the concrete bears evenly.
For a raised deck, the usual setup is a concrete pier formed in a cardboard tube, sitting on a wider footing pad, with a metal post base set into the top so wood never touches concrete directly. That base matters more than it looks. Wood sitting on damp concrete wicks moisture and rots from the bottom, and a post base with a standoff keeps an air gap under the post end. Slope the top of the concrete slightly so water sheds off instead of pooling around the post.
| Climate | Typical frost depth | What it means for your holes |
|---|---|---|
| Warm, no real frost | About 12 inches | Dig at least 12 inches for stability, even with no frost risk |
| Moderate frost | Roughly 18 to 36 inches | Check the local figure, since neighboring counties can differ |
| Deep frost | 36 inches to 5 feet or more | Plan on a full day of digging or a rented auger |
Let concrete cure before you load it. A day or two of patience beats a pier that cracks under the first beam, and most builders give footings at least 24 to 48 hours before setting posts.
The ledger: the connection that must not fail
If your deck attaches to the house, the ledger is the single most important board in the build. The ledger is the horizontal board bolted through the siding and sheathing into the house rim joist, and it carries half the deck load along the wall. Ledger failures are the most common cause of serious deck collapses, and they almost always trace back to flashing or fasteners, not to the board itself.
Start by removing siding and trim above the ledger line and checking the sheathing behind it. Rot found now is a repair, not a surprise later. Cover the exposed sheathing with self-adhering membrane, then set the ledger so the finished deck surface ends up a comfortable step below the door threshold. Flashing goes on in shingle fashion, each layer overlapping the one below so water runs out and down, never in behind the board. The American Wood Council deck guide requires flashing of corrosion-resistant metal at least 0.019 inch thick, or an approved non-metallic material, and it warns against aluminum in direct contact with copper-treated lumber, since the treatment chemicals corrode it.
Fasten with half-inch lag screws or through-bolts into solid framing, never into siding or sheathing alone, and stagger them in a zigzag pattern along the board. The AWC guide sizes fastener spacing from the joist span and the load, and it assumes a 40 pound per square foot live load with a 10 pound dead load for a residential deck. That is the load a deck full of people and furniture puts on the frame, and it is why a handful of screws into soft sheathing is not a ledger connection. Where the house framing is brick veneer, a cantilevered floor, or a wall you cannot verify, stop and build freestanding instead. A ledger bolted to something that cannot hold it is worse than no ledger at all, because it looks secure.
Two ledger situations mean calling a pro or the building department before you proceed: a ledger over a finished basement wall where you cannot confirm the rim joist, and any house with engineered floor trusses, which need special blocking details. Both are common, both are fixable, and neither is a good first-time guess.
Framing the deck, step by step
With the foundation set and the ledger flashed, the frame goes up in a fixed order: posts and beam first for a freestanding deck, ledger first for an attached one, then joists, then blocking and the rim. Keep a level and a tape on you at every stage. A frame that is level at the beam stage stays level, and a frame checked only at the end is a puzzle.
The framing sequence for a raised wood deck: posts and beam, joists, blocking, and a final square and level check before any deck boards go down.
-
Step 1: Set the posts plumb on their bases
Cut posts from pressure-treated lumber rated for ground contact, set each one on its metal post base, and brace it plumb in both directions before moving on. The American Wood Council guide sets 6×6 as the minimum post size for its prescriptive decks, which is a step up from the 4×4 posts older decks often used.
-
Step 2: Set the beam level across the posts
A beam is usually two or three 2x boards nailed together into one unit, sitting directly on top of the posts with a metal cap or connector. Check it level along its full length, and keep the beam overhang past the last post modest, since a long overhang turns the beam into a lever.
-
Step 3: Hang the joists at 16 inches on center
Joists are the parallel boards that carry the decking, and 16 inches on center is the standard spacing for wood decking. Use joist hangers with the nails the hanger maker specifies, not drywall screws or short nails, and keep each joist crown side up so the frame does not dish.
-
Step 4: Add blocking and the rim joist
Blocking is short lumber fitted between joists at mid-span and over the beam, and it stops joists twisting under load. Close the frame with a rim joist around the outside edge, which ties the joist ends together and gives the fascia and any rail posts something solid to bolt to.
-
Step 5: Check square, level, and diagonals again
Measure both diagonals one more time and run a long level across the joist tops. Fix a low joist now with a shim or a sistered piece, because a dip under the decking shows as a puddle and a bounce for the life of the deck.
Joist size follows the span, and span tables do the thinking here. In the American Wood Council tables, a Southern pine 2×8 joist at 16 inches on center spans 11 feet 10 inches, and a 2×10 reaches 14 feet. Shorter spans let you use smaller lumber, and longer spans push you to deeper joists or a mid-span beam. Guessing at joist size is how decks bounce, so look the span up for your species and spacing before cutting.
Use only corrosion-resistant fasteners and connectors with treated lumber: hot-dipped galvanized or stainless steel, per the AWC guide, with every connector galvanized or stainless as well. Plain steel rusts fast in treated wood, and a rusted hanger nail is a connection that has already started to fail. Field-cut ends of treated lumber get a brush-on preservative, since the cut exposes untreated wood inside the board.
Building the ground-level deck
A ground-level deck, also called a floating deck, is a freestanding platform that sits close to the ground. It is the easiest wood deck to build well, and the one most first-time builders should start with. It needs no ledger, no deep footings in many jurisdictions, and no railing when it stays low, which removes the three parts of a raised deck that cause the most trouble.
The trade is that a low deck lives close to moisture, so drainage and airflow do the job that height does on a raised deck. Strip the sod and topsoil from the footprint, because organic matter rots and settles under the frame. Lay weed-barrier fabric, then 2 to 4 inches of compacted gravel or crushed stone. The gravel drains water away from the wood and gives the blocks a base that does not shift with every rain.
Set precast concrete pier blocks on the gravel, spaced to suit your joist span, and level each block to the others with a long level or a string line. Build the frame from pressure-treated lumber rated for ground contact, and keep the frame sitting on the blocks, not on the soil. Decks.com notes the 2021 residential code exemption that covers this exact build: footings are not required for a freestanding deck where the joists bear directly on precast pier blocks at grade, the deck is no more than 200 square feet, and the walking surface is no more than 20 inches above grade within 36 inches of the edge. That exemption is a code provision, not a blanket promise, so confirm your town has adopted it before you skip footings.
Airflow still matters at ground level. Leave the frame open at the sides where you can, keep mulch and soil pulled back from the frame, and do not skirt a low deck tight to the ground with solid boards. A deck that cannot dry is a deck that rots from underneath, and you will not see it until a board goes soft. When the build is done, the maintenance routine in our wood deck maintenance guide covers the inspection and cleaning that keep a low deck sound.
Decking, rails, and steps
Lay deck boards perpendicular to the joists, starting from the house side on an attached deck so the last board lands cleanly at the rim. Leave a gap between boards for drainage and movement: about 1/8 inch for wet pressure-treated boards that will shrink as they dry, and about 1/4 inch for kiln-dried lumber. Two screws per board at every joist crossing hold the board flat without splitting it, and pre-drilling near board ends stops the splits that show up a month later. Stagger butt joints so they land on joists and do not line up in neighboring courses.
Check each board for crown, the slight arch along its length, and lay it crown side up so it sheds water instead of cupping. Sight down every board before screwing it, and set aside boards with big knots, twists, or splits for shorter cuts or blocking. A deck surface is only as flat as its worst board, and swapping one board now takes a minute.
Guard rails go on any deck surface more than 30 inches above grade in most codes, at a height of at least 36 inches, with balusters spaced so a 4-inch sphere cannot pass through. Rail posts need blocking and through-bolts into the frame, not just screws into the rim joist, because a rail takes a leaning adult’s full weight. Steps follow the same logic: consistent riser heights, treads that drain, and a handrail where the code requires one. A step that is a quarter inch taller than its neighbors trips people, so cut stringers from one template and check each riser as you go.
Finish the wood before the first rainy season if you can. Pressure-treated lumber needs time to dry first, often several weeks to a few months depending on weather, and a splash test tells you when it is ready: sprinkle water on the boards, and if it soaks in rather than beading, the wood will take a finish. Our guide to how to stain a wood deck walks through prep and application, and our stain frequency guide explains how often to recoat. For the long view, how long a wood deck lasts breaks down lifespan by wood type and upkeep, which is worth reading before you choose between treated pine and cedar.
Mistakes that show up a year later
| Mistake | Why it hurts | Do this instead |
|---|---|---|
| Ledger bolted through siding alone | The connection pulls out under load | Bolt into the rim joist, with flashing in shingle fashion |
| Footings above the frost line | Winter heave lifts and racks the frame | Dig below the local frost line, on undisturbed soil |
| Posts sitting on concrete or soil | Moisture wicks into the post end and rots it | Use a metal post base with a standoff |
| Plain steel nails in treated lumber | Corrosion eats the connection | Hot-dipped galvanized or stainless fasteners throughout |
| Boards gapped wide while still wet | Shrinkage opens wide, toe-catching gaps | Gap wet boards tight or at 1/8 inch |
| Low deck skirted tight to the ground | Trapped moisture rots the frame unseen | Leave side airflow and keep soil pulled back |
DIY or hire a pro?
A ground-level deck and a small attached deck on flat ground are realistic DIY builds for someone comfortable with a circular saw, a level, and a weekend of heavy lifting. The work is straightforward, the mistakes are visible early, and the materials are forgiving. A raised deck over 30 inches, a deck with a roof or hot tub load, a ledger into framing you cannot verify, or a site with a steep slope is a different job, and that is where a licensed builder earns the fee.
Honest self-check before you start: can you dig to frost depth in your soil, lift and hold a beam level, and read a span table without guessing? If any answer is no, hire the framing and do the decking yourself, or hire the whole build and keep the finishing. There is no prize for a deck that looks fine on day one and fails in year three. When you do hire, our guide to cleaning a wood deck is still the right place to learn the upkeep that protects the investment, since a pro-built deck needs the same cleaning and inspection as a DIY one.
Frequently asked questions
Yes, for a low freestanding deck. Strip the sod, lay fabric and compacted gravel, and set the frame on precast concrete pier blocks. Keep the frame off the soil, leave airflow under it, and use lumber rated for ground contact. The 2021 residential code exemption described above covers decks up to 200 square feet with a walking surface no more than 20 inches above grade, but confirm your town has adopted it.
Below your local frost line, and at least 12 inches deep where the ground does not freeze. Frost depth varies widely by region, from about a foot in warm zones to several feet in cold northern states, so use your building department’s figure, not a number from another state.
Usually yes for an attached deck or any deck above 30 inches, and often no for a small, low freestanding deck. Rules vary by town, so ask your building department before you build, and keep the answer with your project notes.
Sixteen inches on center is the standard for wood decking. Joist size then follows the span: in the American Wood Council tables, a Southern pine 2×8 at 16 inches on center spans 11 feet 10 inches, and a 2×10 spans 14 feet.
The ledger connection on an attached deck, and the footings on any raised deck. A badly flashed or weakly fastened ledger rots or pulls loose, and a shallow footing heaves in winter. Both failures are expensive and both are preventable with the steps in this guide.
A small ground-level deck can go up in a weekend once materials are on site. A raised attached deck usually takes several weekends for a DIY builder, counting digging, curing time for concrete, framing, and decking. Weather, soil, and inspection scheduling stretch both timelines.
After the wood has dried enough to absorb a finish, which often takes several weeks to a few months for pressure-treated lumber. Use the splash test: if sprinkled water soaks into the boards instead of beading, the wood is ready. Staining damp wood traps moisture and gives a blotchy finish.
Sources
- Decks.com guide to deck footing depth and frost lines, covering frost zones, the 12-inch minimum where ground does not freeze, the call-811 reminder, and the 2021 residential code exemption for small freestanding decks on pier blocks.
- American Wood Council Prescriptive Residential Wood Deck Construction Guide, based on the 2015 International Residential Code, covering joist and beam spans, 6×6 minimum posts, flashing thickness, corrosion-resistant fasteners, and the 40 pound live load and 10 pound dead load design basis.
- This Old House guide to building a small deck, covering the step sequence for a simple entry-level deck, from sheathing inspection and flashing through framing, posts, and stairs.
