

Maintaining a wood deck comes down to one job done on schedule: keeping the wood dry enough, long enough, for rot to never get a foothold. Sweep it, clear the gaps, check the spots you cannot see from a chair, and recoat when water stops beading. Do that four times a year and a deck that should last decades usually does. Skip it and the damage starts quietly, under boards and behind the ledger, where nobody looks until a board feels soft underfoot.
Wood deck maintenance is the seasonal routine of cleaning, inspecting, and recoating a wood deck so moisture never sits on it long enough for fungi to break the wood down. This guide gives you that routine season by season, with the rot checks that matter most and the jobs worth handing to a pro. If you want the wider inspect, clean, and protect walkthrough, our broader wood deck maintenance guide covers the same ground in more depth.
Contents
- Why a deck rots even when it looks fine
- The 10-minute screwdriver test
- Spring: inspect, then deep clean
- Summer: sun, airflow, and foot traffic
- Fall: the season that prevents most rot
- Winter: snow and ice without wrecking boards
- The jobs you only do every few years
- What to do yourself, and what to hand to a pro
- The seasonal routine at a glance
- Frequently asked questions
- Sources
Why a deck rots even when it looks fine
Wood rot is decay caused by fungi that feed on wood fibers, and it only takes hold where wood stays damp. A deck can look solid from above while the framing underneath is quietly going soft, because the worst moisture sits where air cannot reach it. That is why a routine built around drying beats a routine built around scrubbing.
The Journal of Light Construction guide to decks that resist rot puts a number on it: wood becomes susceptible to rot starting around 16 percent moisture content, and rot thrives at 21 percent or higher. A board that dries between rains stays below that line. A board with wet leaves packed against it, or a joist top that never sees sun, can sit above it for weeks. The same guide calls those spots collection zones, places where two pieces of material meet and organic matter and moisture pile up together.
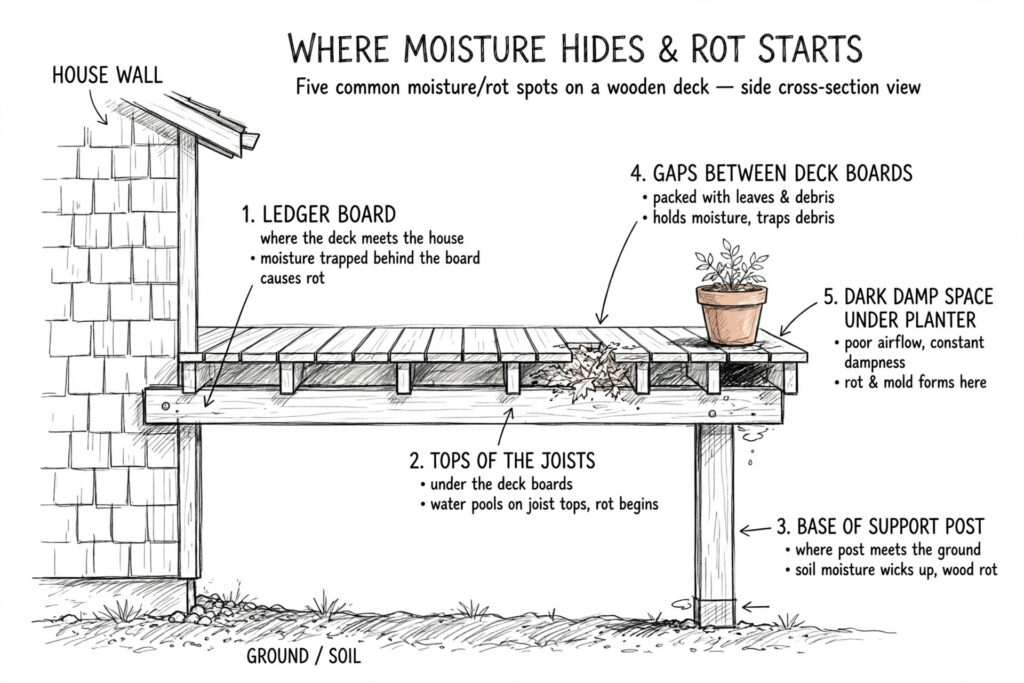
Five traps cause most deck rot, and every one of them is checkable without taking the deck apart:
| Moisture trap | Why it rots | What to do about it |
|---|---|---|
| Ledger board, where the deck meets the house | Water and debris collect against the house wall, and failed or missing flashing lets it sit against framing | Keep the joint clear of debris, look for staining or softness at the ends, and get flashing problems fixed by a pro |
| Tops of joists, under the boards | Water drips through the gaps and pools on the flat joist tops, where it dries slowest | Clear the gaps each fall so water falls through instead of sitting, and cap joist tops with membrane tape when boards are off |
| Post bases, where posts meet soil or concrete | End grain wicks moisture up from the ground, and soil piled against a post never dries | Keep soil and mulch pulled back, grade water away, and watch for softness at the base |
| Gaps between deck boards | Packed leaves and dirt hold water on the boards and on the joists below | Scrape gaps clean with a putty knife every fall, and again in spring if they have refilled |
| Under planters, mats, and furniture | Anything sitting flat on the boards traps a damp patch that never sees sun or air | Raise planters on feet, move them now and then, and lift mats after rain |
Notice what is missing from that list: the middle of a board in full sun. Sun and wind are a deck’s best friends. Almost every rot story starts in shade, in a joint, or under something that never moves.
The 10-minute screwdriver test
The screwdriver test is the fastest way to tell surface weathering from real rot. Press a flat screwdriver into the wood at the spots that stay wettest and see how it responds. Sound wood resists and may dent slightly. Rotted wood lets the tip sink in with little force and feels soft, spongy, or crumbly. Do this twice a year, in spring and fall, and you will catch most problems while they are still small.
Probe these spots in order: the ends of the ledger board where you can reach them, a few joist tops through the board gaps if you can see them, the base of each post, the cut ends of boards near stairs and edges, and any board that looks darker than its neighbors. Check under planters and around the grill too, since those patches hide damage longest. If a deck board is soft but the framing under it is sound, replacing that one board is a normal repair. If a joist, beam, post, or the ledger itself is soft, stop using that part of the deck and call a contractor before anyone loads it with furniture or a crowd. Structural softness is not a weekend fix.
Do not confuse rot with graying, cupping, or surface mold. Gray wood is sun-weathered but often still solid underneath. Our guide to why deck boards cup explains the moisture imbalance behind that shape, and our guide to green growth on a deck helps you name the film before you clean it. Softness under the screwdriver is the line between cosmetic and structural, and it is worth learning by feel on a sound board first so you know what solid feels like.
Spring: inspect, then deep clean
Spring is the inspection season. Winter leaves behind popped fasteners, cracked boards, and the debris that spent months holding moisture against the wood, so the spring pass is about finding that damage before the deck gets heavy summer use.
- Walk the whole deck slowly and look for loose boards, popped nails or screws, wobbly rails, and cracked or split boards.
- Run the screwdriver test on the ledger ends, post bases, and any board that looks dark or soft.
- Clear the gaps between boards with a putty knife or a narrow gap tool, and sweep everything off.
- Wash with a wood-safe deck cleaner and a stiff brush, working in small sections and rinsing as you go. Keep pressure low if you use a washer, and always work along the grain so you do not fuzz the surface.
- Let the deck dry fully, then reset popped fasteners and replace any board that failed the screwdriver test.
Thompson’s WaterSeal gives the same order in its deck cleaning and staining guide: check boards for rot or bad cracks first, then clean in small sections, rinse well, and let the wood dry before any coating goes on. Cleaning a rotten board just gives you a cleaner rotten board, so the inspection comes first. For the full method, including cleaner choice and pressure settings, see our guide on how to clean a wood deck.
Summer: sun, airflow, and foot traffic
Summer maintenance is light but steady. The deck is in daily use, the sun is breaking down the finish, and anything that traps moisture is doing its worst work in the heat.
Sweep weekly in summer, or at least often enough that leaves and dirt never form a mat on the boards. Move planters and heavy furniture to a new spot every few weeks so no single patch stays damp and shaded all season. Put planters on feet or wheeled caddies rather than flat on the boards, and use pads under furniture legs to stop scratches that later hold water. Trim back any branch or shrub that touches the deck or shades it all day, since shade is what keeps a damp patch damp. A little more sun on the boards is free drying time.
Watch the finish through summer rather than the calendar. Sprinkle water on a few boards: if it beads, the coating is still working. If it soaks straight in and darkens the wood, recoating belongs on the fall or next spring list, not in the middle of a heat wave. Sun fading on its own is cosmetic. Fading plus water soaking in means the protection is gone, and that is the combination to act on.
Fall: the season that prevents most rot
Fall is the most important maintenance season for rot prevention. Leaves fall, rain returns, and everything you leave on the deck now will sit there wet through winter. A thorough fall pass does more for a deck’s lifespan than any other single visit.
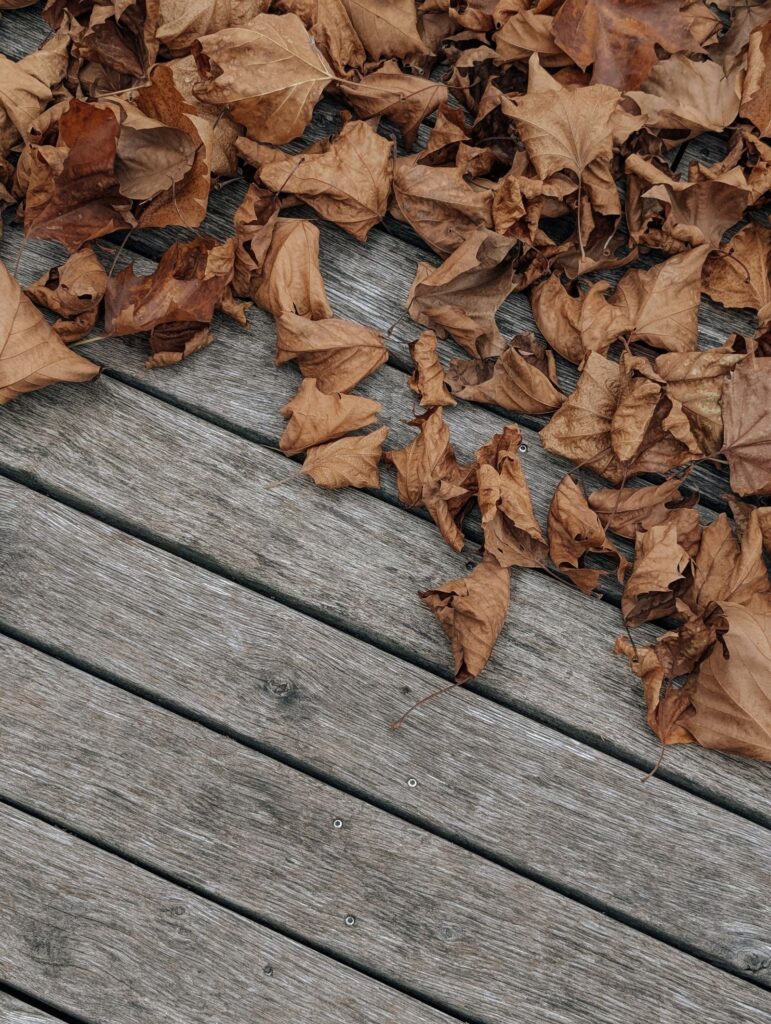
- Clear leaves off the deck promptly and often, not just once at the end of the season. Wet leaves stain boards and hold moisture exactly where rot starts.
- Scrape the board gaps clean again, even if you did it in spring. Fall debris refills them fast.
- Check the ledger flashing before the wet season. Look for rust, lifted edges, or debris packed into the joint, and do not caulk over a flashing problem: caulk traps the moisture that is already in there and makes the rot worse. A failed flashing detail is a contractor job.
- Clean the gutters and downspouts near the deck. An overflowing gutter pours a steady stream onto the boards below, and no finish keeps up with that.
- Run the screwdriver test one more time, tighten or replace fasteners after a summer of use, and store or cover furniture and grills for winter.
If you only have time for one maintenance visit in a year, make it this one. Spring finds damage, but fall prevents it.
Winter: snow and ice without wrecking boards
Winter care is mostly about what not to do. Snow sitting on a deck is less of a problem than the tools and chemicals people use to remove it, so keep the routine gentle.
Clear snow with a plastic shovel, not a metal one, and keep the blade slightly above the boards so you do not scrape the finish off. Work along the boards rather than across them. For ice, pick a de-icer marketed as safe for wood rather than plain rock salt, which can damage the finish and corrode fasteners, and use the smallest amount that does the job. Skip the tarp over the whole deck: a cover that traps moisture against the boards all winter creates the exact damp, airless conditions rot fungi like. If you must cover furniture, cover the furniture, not the deck.
After a thaw, walk the deck and look for standing water, especially near the house wall and under anything that stayed put all winter. A puddle that lingers for days after rain points to a drainage or grading problem under or around the deck, and that is worth fixing before spring rather than after.
The jobs you only do every few years
Most decks need a recoat every one to three years, depending on sun, climate, and traffic, and the water-bead test tells you when, not the calendar. When water stops beading, plan the recoat for a stretch of dry, mild weather and follow the product label for prep and drying time. Stain timing detail, including how the interval changes by stain type, lives in our guide to how often to stain a deck, and the choice between the two finishes is covered in our deck stain vs sealer comparison. When you are ready for the job itself, our guide on how to stain a wood deck walks through prep, sanding, and application. If you are starting from scratch rather than maintaining an existing deck, our guide to how to build a wood deck covers footings, the ledger, framing, and the simpler ground-level build.
Three less frequent jobs pay for themselves. First, when deck boards come off for any reason, cap the exposed joist tops and beam tops with self-adhering membrane tape, which sheds water off the flat tops where rot starts. Second, brush preservative onto any fresh cut end before it goes back in, since cutting exposes untreated wood inside even pressure-treated lumber. Third, if a post sits straight in soil or on a flat pad, ask a contractor about a standoff base that lifts the post end clear of standing water. Each of these is cheap at the moment the deck is already open, and each is expensive to retrofit later.
What to do yourself, and what to hand to a pro
Most seasonal maintenance is honest DIY work. The line sits where structure, water entry into the house, or safety is involved, and crossing it to save money usually costs more later.
| Job | DIY or pro | Why |
|---|---|---|
| Sweeping, gap clearing, washing | DIY | Simple, safe, and the highest-value habit in this guide |
| Screwdriver test and fastener checks | DIY | Anyone can learn the feel of sound wood in a few minutes |
| Replacing a single deck board | DIY, if the framing is sound | Straightforward once you confirm the joists under it are solid |
| Recoating with stain or sealer | DIY, with label directions | Prep and dry weather matter more than skill, and the job rewards patience |
| Ledger flashing repair or replacement | Pro | A bad flashing fix traps water against the house framing and hides the damage |
| Soft joists, beams, posts, or ledger | Pro | Structural members carry the deck and the people on it, and repairs may need permits |
| Stairs or railings that move | Pro | Both are fall risks, and a wobbly rail often means the framing behind it is failing |
The seasonal routine at a glance
Here is the whole year on one table. Stick it on the fridge or set a phone reminder for the two big visits, spring and fall, and the rest mostly takes care of itself.
| Season | Must-do jobs | Watch for |
|---|---|---|
| Spring | Full inspection, screwdriver test, gap clearing, deep clean, fastener reset | Winter damage, soft boards, popped fasteners |
| Summer | Weekly sweeping, move planters and furniture, trim touching vegetation, water-bead test | Fading finish, damp patches under planters, loose fasteners |
| Fall | Leaf clearing, gap clearing, ledger flashing check, gutter cleaning, second screwdriver test | Packed gaps, overflowing gutters, rusted flashing |
| Winter | Gentle snow clearing with a plastic shovel, wood-safe de-icer only, no full-deck tarp | Standing water after thaws, ice damage to the finish |
| Every 1 to 3 years | Recoat when water stops beading; tape joist tops and treat cut ends when boards are off | Finish wear, exposed joist tops during any board work |
Done this way, maintenance stops feeling like a project and starts feeling like housekeeping. A deck that dries between rains, gets its gaps cleared before winter, and gets recoated when the bead test says so will outlast a neglected deck by years, and our guide to how long a wood deck lasts shows just how much upkeep changes that number. The rot never gets its chance because the wood never stays wet long enough to give it one.
Frequently asked questions
Inspect it twice a year, in spring and fall, sweep it weekly in the heavy-use months, and deep clean it at least once a year. Recoat every one to three years, when the water-bead test shows water soaking in instead of beading.
Press a flat screwdriver into the wood at the dampest spots. Sound wood resists, while rotted wood lets the tip sink in and feels soft, spongy, or crumbly. Gray color alone is usually sun weathering, not rot.
Not usually. Most finishes last one to three years depending on sun, climate, and traffic. Use the water-bead test instead of the calendar: if water beads, the coating is still working, and if it soaks in, it is time to recoat.
Water that stays put. Leaves packed in board gaps, debris against the ledger, soil against post bases, and planters sitting flat on boards all hold moisture against wood long enough for fungi to take hold. Keeping those spots clear and dry is the core of prevention.
No. A tarp over the whole deck traps moisture against the boards and creates the damp, airless conditions rot fungi like. Clear snow gently with a plastic shovel instead, and cover furniture pieces individually if you cover them at all.
Yes, if only the board is soft and the framing under it is sound. Replace the board, treat any fresh cut ends with preservative, and recheck the joists. If a joist, beam, post, or the ledger is soft, stop using that section and call a contractor.

1 Comment
Pingback: How Long Does a Wood Deck Last? Lifespan by Wood Type