

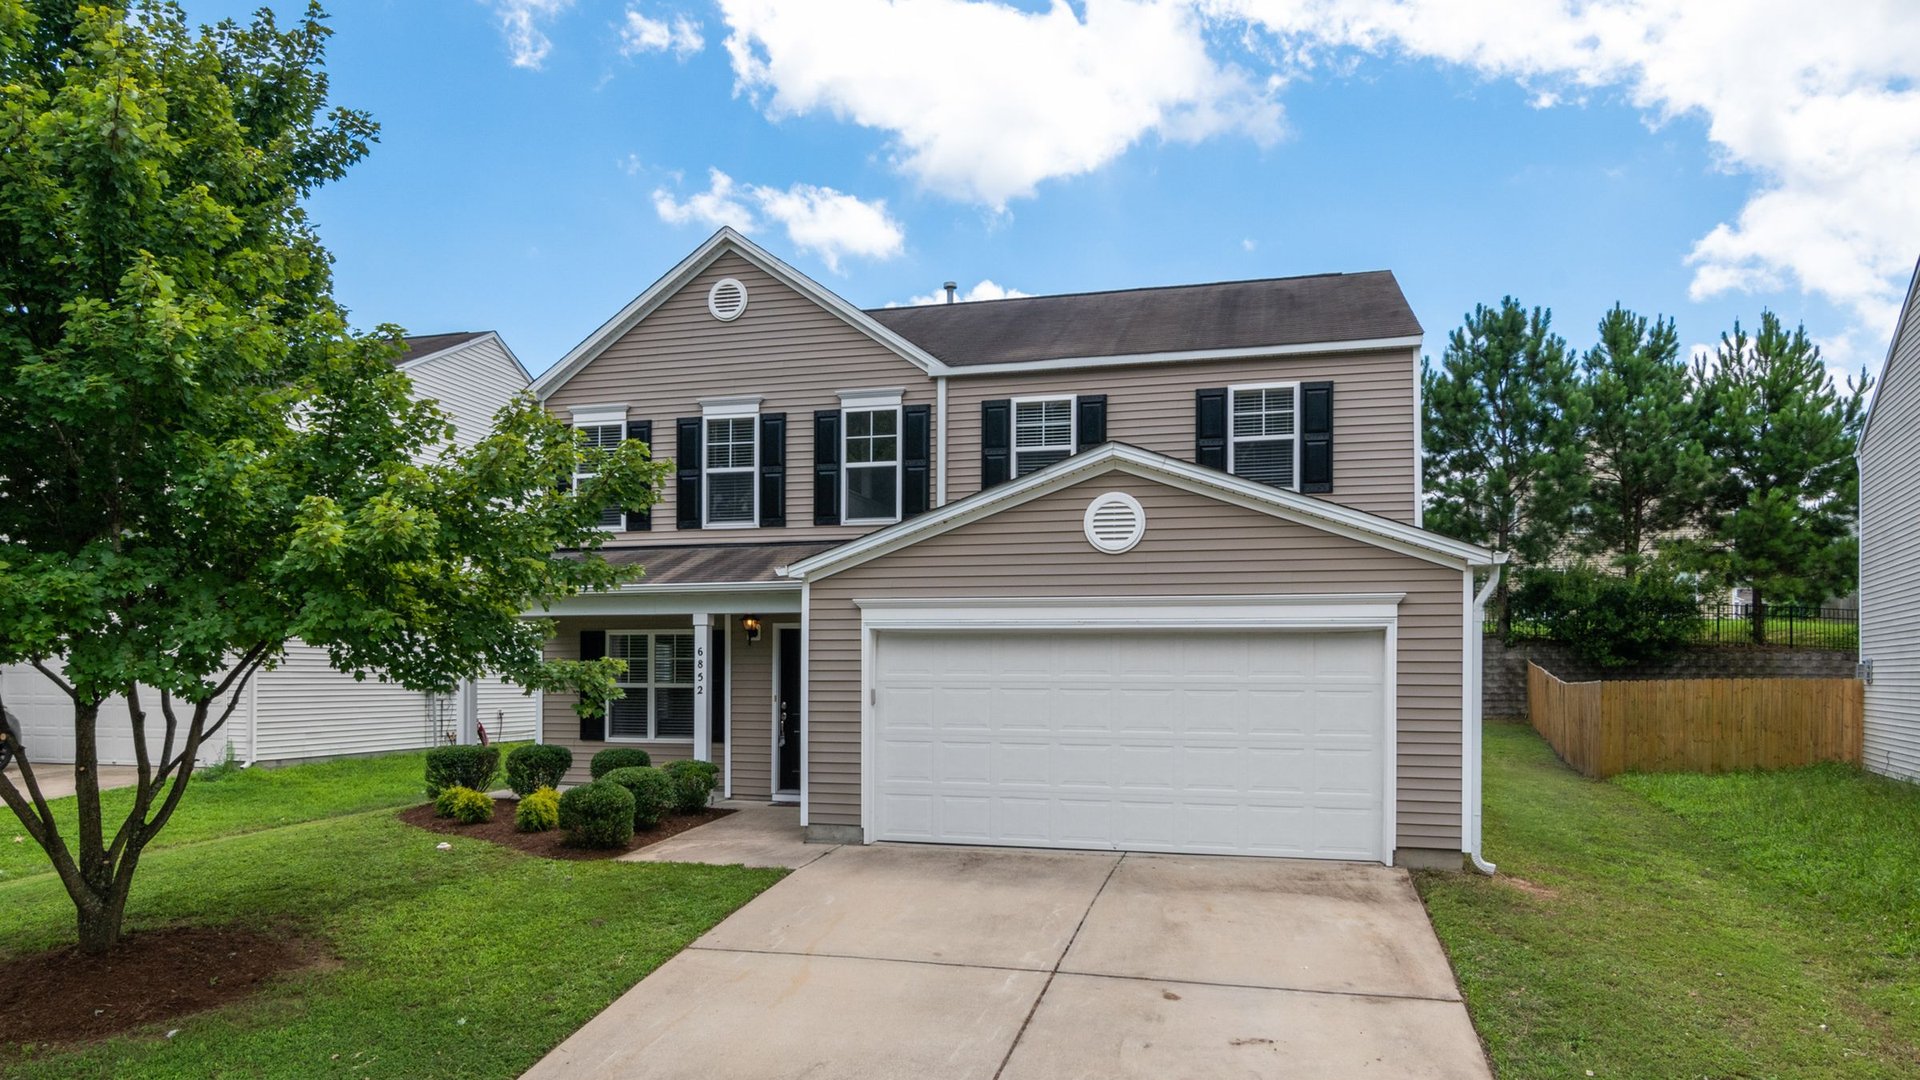
Vinyl siding has a reputation for being nearly maintenance-free, and honestly it earns most of it. But “low maintenance” is not “no maintenance.” A few years of dust, pollen, tree sap, and mildew turn even good siding dull, streaky, and a little embarrassing. The good news: the fix is one of the cheapest, simplest jobs on a house.
The safe way to clean vinyl siding is a bucket of warm soapy water, a soft-bristle brush, and a garden hose. Scrub from the bottom up so dirty drips don’t streak the clean sections below, then rinse from the top down. Skip the pressure washer if you can; the siding’s own manufacturer doesn’t recommend it. One afternoon of steady work handles dirt, grime, and mildew on most homes.
Last updated: October 23, 2026
On this page
- First, figure out what you’re actually cleaning
- What you’ll need
- Three cleaning recipes that actually work
- How to clean vinyl siding, step by step
- What manufacturers say about pressure washers
- Stubborn stains that soap can’t fix
- Cleaners to keep away from vinyl siding
- When to call a pro
- Frequently asked questions
- Sources
First, figure out what you’re actually cleaning
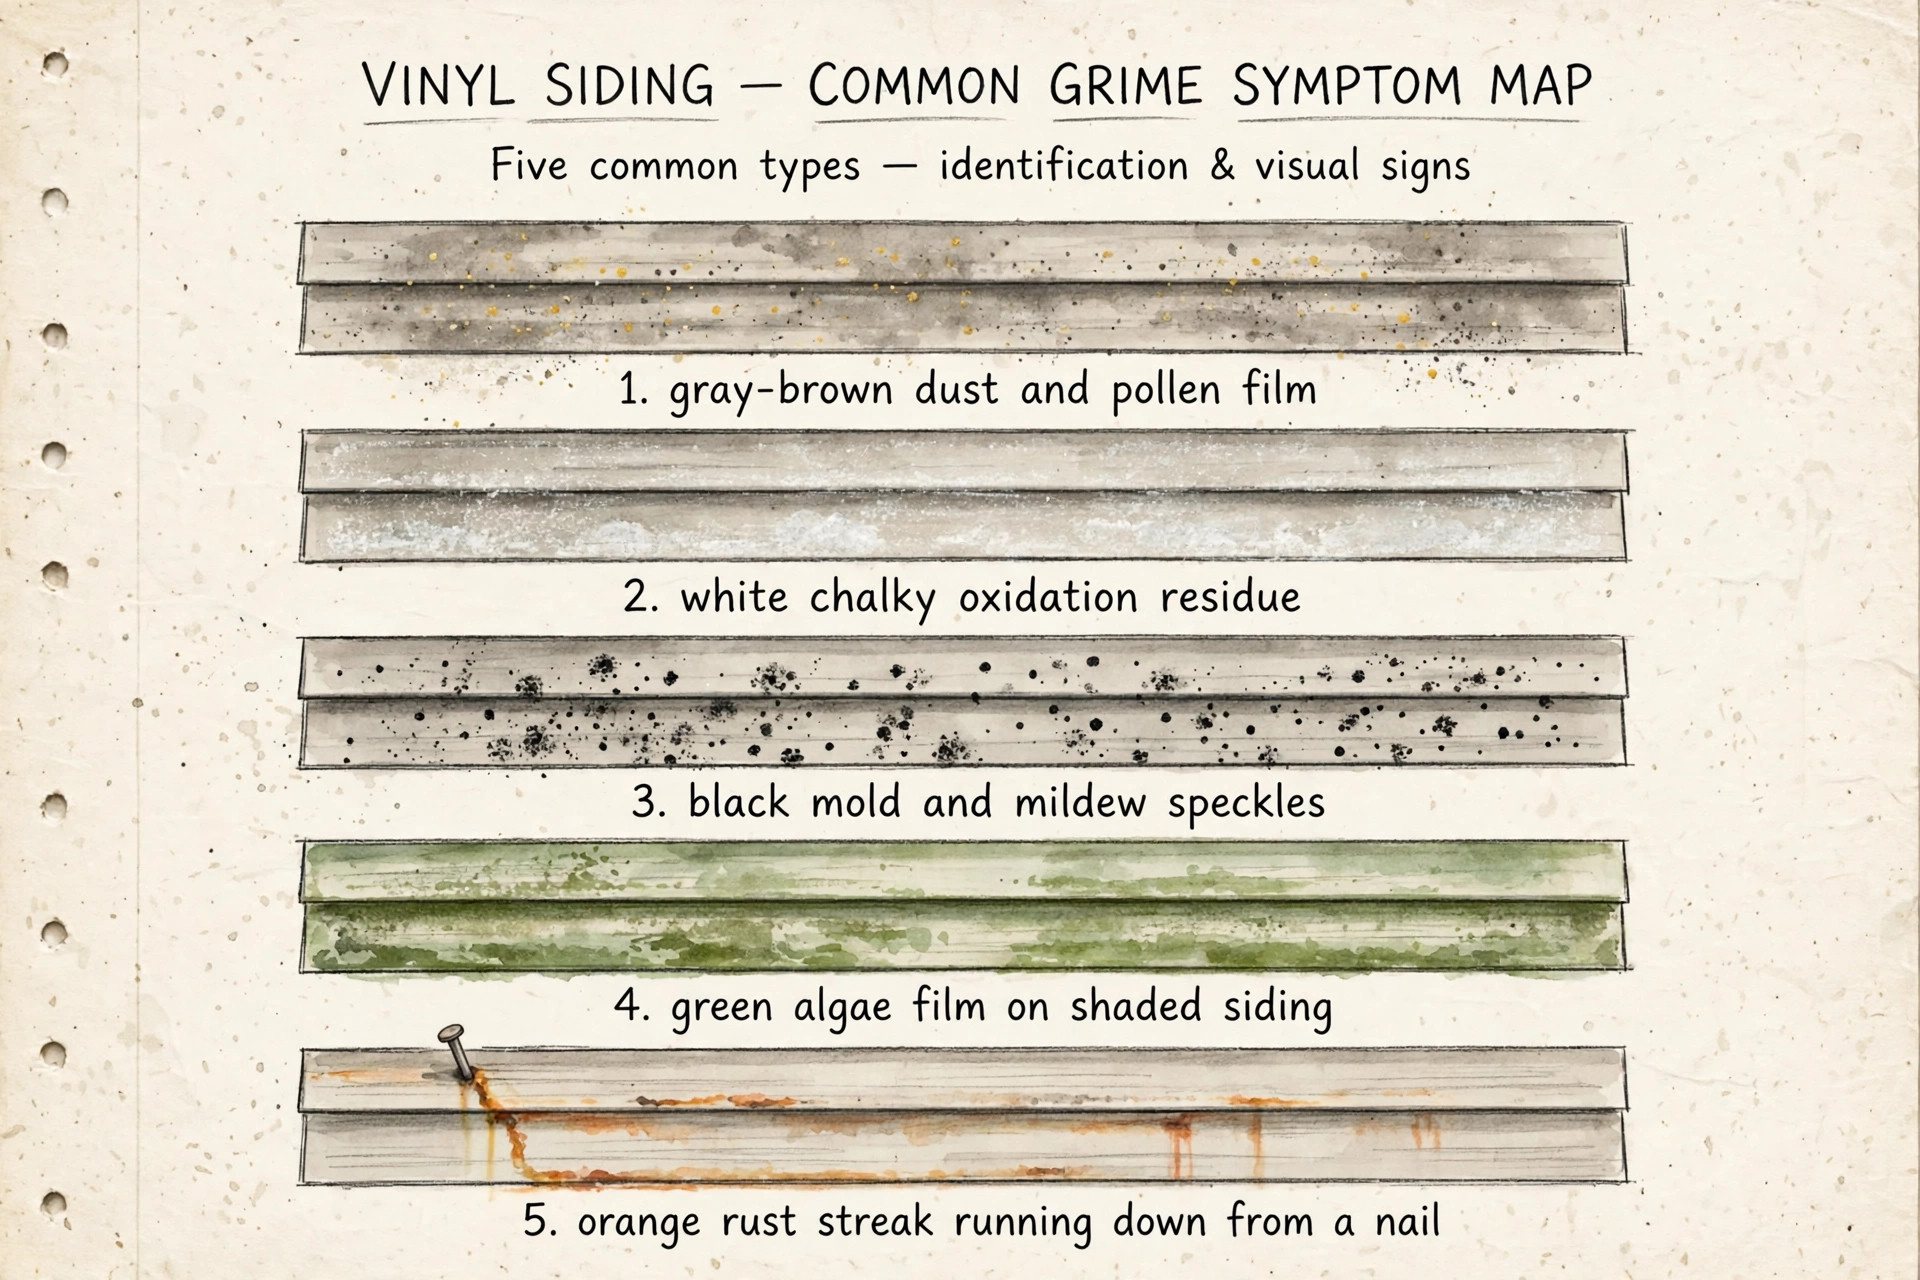
Before you mix a bucket of anything, take a slow walk around the house and look at what’s actually on the siding. Vinyl siding shows several different kinds of grime, and each one wants a slightly different treatment. Using the wrong approach wastes your afternoon at best, and at worst it scratches or discolors panels that were fine.
| What you see | What it probably is | The right move |
|---|---|---|
| Gray or brown film, dusty to the touch | Ordinary dirt, pollen, and road grime | The basic soap wash below |
| Dull, chalky residue that rubs off on your finger | Chalk from weathering (often early oxidation) | Soap wash first; if the chalk keeps coming back, read our guide on telling oxidation apart from dirt |
| Black speckles or splotches, especially under eaves | Mold, mildew, or artillery fungus | The mildew recipe below; identify the black spots first so you treat the right thing |
| Green or yellow-green film, usually on shaded walls | Algae | Gentle wash; we have a full guide to removing green algae from vinyl siding without damage |
| Orange-brown streaks under nails or fixtures | Rust | Spot-treat with a rust remover made for vinyl (see the stain table) |
| Sticky dots or black tarry smears | Sap or tar | Baking soda paste or a tar remover, gently |
Here’s the thing most cleaning guides skip: if your finger comes away chalky, that’s not dirt you can scrub off. It’s the siding’s surface breaking down from years of sun. Soap will brighten it for a week and then it looks the same again. Oxidation gets its own treatment, and sometimes its own budget. Don’t spend a whole weekend fighting what is really a restoration or replacement decision.
Also note the sides of the house. North-facing walls and spots under trees stay damp longer, so they grow mold and algae faster. Eaves and porch ceilings collect mildew because rain never rinses them. Plan to spend most of your time on those areas, and don’t be surprised when the sunny south wall needs barely a rinse.
What you’ll need
You don’t need much, and that’s the point. Everything on this list is either in your garage or costs less than a takeout dinner.
| Item | Why it matters |
|---|---|
| Soft-bristle brush, ideally on a long handle or extension pole | Reaches the second story without a ladder; soft bristles lift grime without dulling the finish |
| Garden hose with an adjustable spray nozzle | Your rinse tool; you want a firm fan spray, not a jet |
| Two buckets | One for solution, one for clean rinse water so you’re not re-dipping a dirty brush |
| Pump sprayer (1-2 gallons) | Even application on tall walls and mildew spots; worth the $15 |
| Stepladder and a spotter | For peaks and tight spots; never lean a ladder directly on the siding if you can avoid it |
| Rubber gloves and safety glasses | Bleach recipes splash; eyes and skin first |
| Plastic sheeting | Drapes over shrubs, flower beds, and outdoor lights before you start |
Skip the wire brushes, scouring pads, and anything labeled “abrasive.” They leave micro-scratches in the vinyl’s finish, and grime settles into those scratches faster next time. You end up cleaning more often, not less.
Three cleaning recipes that actually work
The internet is full of miracle ratios. These three come from the siding industry’s own guidance, and they cover every situation a homeowner runs into.
| Recipe | Best for | Mix | Notes |
|---|---|---|---|
| Routine wash | Dirt, dust, pollen, light grime | 1 gallon warm water + a squirt of dish soap or 1/3 cup powdered laundry detergent | The workhorse. Do 90% of your cleaning with this. |
| Mildew wash (manufacturer recipe) | Black mildew spots, shaded damp walls | 1/3 cup powdered laundry detergent + 2/3 cup trisodium phosphate (TSP) or TSP substitute + 1 quart of 5% household bleach + 3 quarts water | This is CertainTeed’s own mildew formula. The caution is theirs too: stronger concentrations can damage vinyl. |
| Plant-safe wash | Homes with prized landscaping, or if bleach makes you nervous | 1 gallon warm water + 1 cup oxygen bleach (sodium percarbonate) | Gentler on plants and the finish; needs a longer dwell time, 10-15 minutes. |
A few rules that apply to all three:
- Never mix bleach with ammonia or with anything containing ammonia. The fumes are genuinely dangerous. Read every label before combining products.
- Don’t use undiluted bleach. Full-strength chlorine bleach can discolor vinyl and weaken its surface. The mildew recipe above is already the strongest you should go.
- Rinse your plants before and after. A quick pre-soak with plain water keeps leaves from absorbing the solution, and a rinse after washes it off. If your beds are right against the house, drape the plastic sheeting too.
- Test every recipe in a hidden spot first, behind the garage, low on a side wall. Give it ten minutes, rinse, and check the finish before committing to the whole house.
How to clean vinyl siding, step by step
The full routine for cleaning vinyl siding without damage: about 3 to 5 hours for an average two-story home, using the soap wash or mildew recipe from the table above.
-
Step 1: Pick the right day
Work on an overcast day, or in the early morning or late afternoon. Direct hot sun dries your solution on the siding before it finishes working, and dried soap leaves streaks and a dull film. If the forecast is above 85°F, start early.
-
Step 2: Suit up and protect the surroundings
Gloves and glasses on. Move patio furniture, grills, and toys away from the walls. Drape plastic over flower beds, shrubs, and outdoor light fixtures. Close all windows tight.
-
Step 3: Pre-rinse the wall with the hose
Wash loose dust and cobwebs off first. This also cools hot siding so your solution doesn’t flash-dry. Keep the spray aimed level or downward, never upward into the laps.
-
Step 4: Apply the solution from the bottom up
Dip your brush or fill your pump sprayer and work a section about ten feet wide, starting at the bottom of the wall and moving upward. This is the trick the pros insist on: dirty runoff drips onto still-dirty siding below instead of streaking across your finished work.
-
Step 5: Let it dwell, 5 to 10 minutes
The solution needs contact time to loosen grime and kill mildew. Don’t let it dry on the surface, though. If a section starts drying, mist it lightly with the hose or reapply.
-
Step 6: Scrub gently, side to side
Follow the horizontal lines of the panels. You don’t need pressure; let the brush and the soap do the work. Pay attention to the bottom lip of each panel, where grime collects, and to corners and trim.
-
Step 7: Rinse from the top down
Once a section is scrubbed, rinse it with the hose starting at the top and working down, so the clean water carries the last of the soap away. Rinse each section before moving on; don’t let soap sit.
-
Step 8: Repeat section by section around the house
Ten-foot sections keep the work manageable and keep the solution wet. Work your way around, saving the worst walls (usually north-facing) for when you’re in the groove.
-
Step 9: Detail the seams, corners, and trim
Run the brush along corner posts, J-channels, and window trim where algae and dirt hide. These small areas make the biggest visual difference.
-
Step 10: Final rinse and walk-around
Once everything’s done, give the whole house a last rinse. Then walk around at a distance and look for streaks or missed spots while the siding is still wet; they’re easier to catch that way.
The whole job runs about 3 to 5 hours for an average two-story home, including setup and cleanup. If you’re scrubbing far longer than that, the siding probably needs something beyond cleaning; check the stain table and the pro section below.
For a broader view of the same job on other materials, our exterior house cleaning guide by surface walks through brick, wood, and fiber cement too.
What manufacturers say about pressure washers
Here’s where our advice splits from most of the internet. Search this topic and you’ll find guide after guide saying “use 1,300 to 1,600 PSI and you’ll be fine.” The companies that make the siding say otherwise.
CertainTeed, one of the largest vinyl siding manufacturers in the country, is blunt about it: they do not recommend power washing vinyl or polymer siding, because it can force water behind the panels, damage the material, and cause discoloration. Their recommendation is a garden-hose house wash instead.
Why the strong language? Vinyl panels overlap and interlock. They’re designed to shed rain falling straight down, not a jet of water blasted upward or sideways. A pressure washer aimed at the wrong angle pushes water through the weep holes and under the laps, where it soaks the sheathing. You can’t see it happening, and the wall can stay damp enough to grow mold inside for weeks.
If you already own a pressure washer and insist on using it, keep it as gentle as possible:
- Stay at or below 1,500 PSI, and use the widest nozzle you have (25 to 40 degrees).
- Hold the wand at least 12 to 18 inches from the surface.
- Spray downward or level only, never upward into the laps. Keep the stream moving; don’t linger on one spot.
- Test on a hidden area first and check for cracking, warping, or water sneaking behind the panels.
Honestly? For vinyl, a $15 pump sprayer and a brush do the job just as well with none of the risk. If you’re comparing methods across materials, our breakdown of soft washing vs. pressure washing by surface explains which approach suits what.
Stubborn stains that soap can’t fix
Most siding grime surrenders to soap and a brush. The exceptions below need a targeted product. The stain chart the industry publishes has been the reference for years; here it is in plain form.
| Stain | What to try |
|---|---|
| Bubble gum | Household cleaners like Fantastik or Murphy’s Oil Soap, or a 30% vinegar, 70% water mix |
| Crayon or felt-tip pen | Lestoil, or Fantastik, Lysol, or Windex on a soft cloth |
| Tar | Soft Scrub applied gently with a soft cloth |
| Motor oil or lithium grease | Fantastik, Murphy’s Oil Soap, or Windex |
| Rust streaks | Fantastik, Murphy’s Oil Soap, or Windex; treat the source (a rusting nail or fixture) or it comes back |
| Paint drips | Soft Scrub or a non-abrasive scrub pad, gently; latex drips sometimes lift with careful scraping once softened |
| Pencil marks | Soft Scrub |
| Lipstick | Fantastik or Murphy’s Oil Soap |
Two rules with every spot treatment: test it in an inconspicuous spot first, and use the gentlest option that works. If a stain laughs at everything in the chart, ask your siding contractor for a cleaner formulated for your specific product. CertainTeed gives exactly that advice, and it’s a good one: the manufacturer knows what its finish can tolerate.
Cleaners to keep away from vinyl siding
Vinyl is tough, but certain chemicals attack its surface or finish. Norandex’s vinyl siding care guide, which reproduces the Vinyl Siding Institute’s cleaning guidance, warns against all of these:
- Organic solvents (acetone, mineral spirits, and the like; also strong soaps or detergents that contain organic solvents)
- Undiluted chlorine bleach (the diluted manufacturer recipes, like the mildew wash above, are the exception)
- Liquid grease remover
- Nail polish remover
- Furniture polish or furniture cleaner
Add a few common-sense entries of our own: abrasive powders and scouring pads, steel wool, and oven cleaner. All of them dull or scratch the finish. And as the manufacturer says, stronger-than-recommended bleach concentrations can damage the siding, so measure the mildew recipe instead of eyeballing it.
When to call a pro
Most vinyl siding cleaning is a satisfying Saturday job. Hand it to a professional when:
- The chalk won’t quit. If the whole house chalks up within weeks of washing, the finish is oxidizing. A pro can assess whether a restoration wash (sometimes with a specialized oxidation remover) or new siding is the honest answer.
- The siding is old and brittle. Vinyl gets more fragile with age, especially after 25 to 30 years of sun. If panels crack when you flex them gently, let someone insured handle the ladders and the scrubbing.
- It’s a tall or steep job. Second-story peaks, three-story walls, and steep grades are ladder-accident territory. A pro crew with the right equipment finishes in half the time and none of the risk.
- Stains survived two rounds. If you’ve treated a stain twice with the right products and it’s still there, stop before you damage the finish trying a third thing.
- You suspect water behind the siding. Soft spots, buckling panels, or a musty smell near the walls suggest the problem is underneath, not on the surface. That needs a contractor, not a bucket.
A professional house wash for an average home usually runs in the low hundreds of dollars. Against a weekend of your own labor, that math is worth doing honestly.
Frequently asked questions
Once a year is the industry standard; CertainTeed recommends an annual wash to prevent buildup. Clean twice a year if your home sits in the woods, faces north under trees, or lives in a humid climate where mildew is aggressive. A quick hose-down in spring and a real wash in fall works well for most houses.
Yes. A small squirt of plain dish soap in a bucket of warm water is one of the safest cleaners you can use, and manufacturers list dish soap among their recommended cleaners. Just avoid varieties heavy with moisturizers, dyes, or perfume, and rinse well, especially around plantings.
Undiluted bleach can, yes. It can discolor the finish and weaken the surface over time. But the diluted bleach in the mildew recipe above (one quart of 5% bleach in a gallon of mix) is the manufacturer’s own formula and is safe when mixed as written and rinsed thoroughly. When in doubt, oxygen bleach is the gentler alternative.
It’s better not to. Hot sun dries cleaning solution on the panels before it finishes working, which causes streaking and a soapy film. Wash on an overcast day, or work the shady side of the house in the morning and the other side as the shade moves. If you must wash in sun, work in small sections and rinse fast.
That’s weathering of the vinyl’s surface, commonly called chalk or early oxidation, and soap won’t fix it permanently. Our guide on oxidation vs. dirt shows you how to tell it apart from grime and what your options are.
Mold feeds on the dirt coating, so the yearly wash is your first defense. Beyond that, trim shrubs and branches so the wall gets airflow and dappled light, keep mulch a few inches away from the foundation, and make sure gutters aren’t dripping onto the wall. Shaded walls that stay wet will always be the first to spot up.
Maybe, but not always. Under-eave black spots can be mold, mildew, or artillery fungus, a mulch-dwelling fungus that fires sticky black dots onto siding and won’t wash off with normal cleaners. Each one needs different treatment, so identify your black spots before you scrub.
Sources
- CertainTeed’s guide to cleaning vinyl siding, cause-by-cause cleaning advice, the mildew recipe, and the manufacturer’s stance on power washing.
- Norandex’s vinyl siding care and maintenance guide, which reproduces the Vinyl Siding Institute’s cleaning guidance, the cleaners to avoid, and the stain-treatment chart.
- Journal of Light Construction on cleaning vinyl siding, the VSI stain-cleaner chart in its published form.
- Iowa State University Extension’s guide to cleaning house siding, with cleaning mixes, the ammonia warning, plant protection, and yearly washing.

2 Comments
Pingback: Exterior House Cleaning Guide by Surface | Home Exterior Lab
Pingback: Siding Oxidation vs. Dirt: How to Tell the Difference