


Last updated: October 24, 2026
On this page
- What a clean cut in vinyl siding actually means
- The tools that cut vinyl siding, compared
- The cold-weather rule: cut warm, or go slow
- Measure and mark: the 1/4-inch rule
- How to cut vinyl siding, step by step
- The backward-blade trick, explained
- Cutting panels that are already on the wall
- Common mistakes that ruin vinyl cuts
- When to hand the job to a pro
- Frequently asked questions
- Sources
What a clean cut in vinyl siding actually means
Clean cutting, for vinyl, is not about a polished edge. It is about a cut that lets the panel do its job after it is installed. Vinyl siding hangs on the wall rather than being fastened tight to it; each panel needs to slide a little side to side as temperatures change. CertainTeed’s own installation guide lists its three recommended cutting methods (score-and-snap for rip cuts, snips or shears for fitting around windows and doors, and a reversed-blade circular saw for cross cuts) and treats the expansion gap as part of every one of them.
Three qualities define a good cut. First, length: the panel must end a quarter inch short of whatever channel, corner post, or trim receives it, so heat expansion has somewhere to go. Second, edge condition: ragged edges snag, split later, and look sloppy where they peek out of trim. Third, placement: cut ends belong hidden inside J-channel, corner posts, or under the factory edge of an overlapping panel, never out in the open. If you are fitting new pieces into an existing wall, our guide to the types of vinyl siding profiles will help you match the panel style before you start cutting.
The tools that cut vinyl siding, compared
Manufacturers and pros reach for the same three tools. Each one owns a different type of cut, and mixing them up is the most common reason beginners get ragged edges.
| Tool | Best for | Cut quality | Safety note |
|---|---|---|---|
| Aviation snips / tin snips | Short cross cuts, curves, notches around windows and fixtures | Clean if you don’t fully close the blades at the end of each stroke | Gloves recommended; cut edges are sharp and snip handles pinch |
| Utility knife (score-and-snap) | Long rip cuts along a panel’s length | Smoothest long straight edge; quiet and dust-free | Score face-up with medium pressure, never toward your body; bend to snap |
| Circular saw with fine-tooth plywood blade, mounted backward | Fast repeated cross cuts, angled gable cuts, batches of same-length pieces | Shatter-free when the blade is truly reversed and the feed is slow | Safety glasses mandatory; only cut vinyl with a reversed blade, never anything else |
| Miter saw (fine-tooth blade, reversed) | Square ends and angle cuts on short pieces | Same clean edge as the circular saw | Same glasses rule; keep small cutoffs well clear of the blade |
A few honest notes on this table. The utility knife is the cheapest route to a clean cut and the one most DIYers should learn first: score the face-up panel with medium pressure along a straightedge, then bend it back and forth along the score line until it snaps. A miter saw is just the circular saw’s more precise cousin; Fine Homebuilding’s panel installation guide applies the same backward-blade rule to chopsaws and radial-arm saws. And the snap-lock punch, which is not a cutting tool at all, still belongs in this conversation: it puts locking tabs on the cut edge of the top course under windows and eaves, so the panel you just trimmed actually stays put.
The cold-weather rule: cut warm, or go slow
Vinyl is a thermoplastic, which means cold makes it brittle. Every manufacturer guide I have opened says the same thing in different words: the lower the temperature, the slower the feed rate. CertainTeed’s guide states it as a rule of thumb for saw cuts; the Home Depot installation guide (which follows ASTM D4756, the installation standard) says to cut slowly for a clean edge regardless of tool.
Two practical consequences follow. First, the expansion gap grows as the temperature drops. At moderate temperatures above 40 degrees, leave 1/4 inch between the panel end and the inside of the receiving channel. Below 40 degrees, the manufacturer spec increases that gap to 3/8 inch. Fine Homebuilding’s field guide goes further: over 90 degrees, 1/4 inch; below 30 degrees, a full 1/2 inch; gauge accordingly between those extremes. Second, in cold weather every cut is a crack risk. If you can wait for a warmer day, wait. If you cannot, cut one panel at a time, feed the saw slowly, and let the score-and-snap method do more of your work, since it puts the least shock into the plastic.
Measure and mark: the 1/4-inch rule
Every cut starts as a measurement, and vinyl has its own arithmetic: measure the distance between receiving channels, then subtract the expansion gap. In normal weather that means 1/4 inch off the total length; in cold weather, 3/8 inch. A panel that butts hard against the trim will buckle when summer comes; a panel cut a touch short disappears into the channel and never shows the gap.
Mark the cut line on the underside of the panel (the face that hides once installed), so any pencil or marker residue stays out of sight. Use a carpenter’s square to keep the line true, and for snip cuts, CertainTeed recommends starting at the top lock and cutting toward the bottom of the panel. For notch cuts under windows, the same arithmetic applies horizontally: window width plus 1/4 inch on each side, measured with a scrap of siding as a template (more on that in the steps). If this cutting is part of a full wall job, the layout and sequencing in our step-by-step installation walkthrough will tell you which panels to cut first and how the laps should stagger.
How to cut vinyl siding, step by step
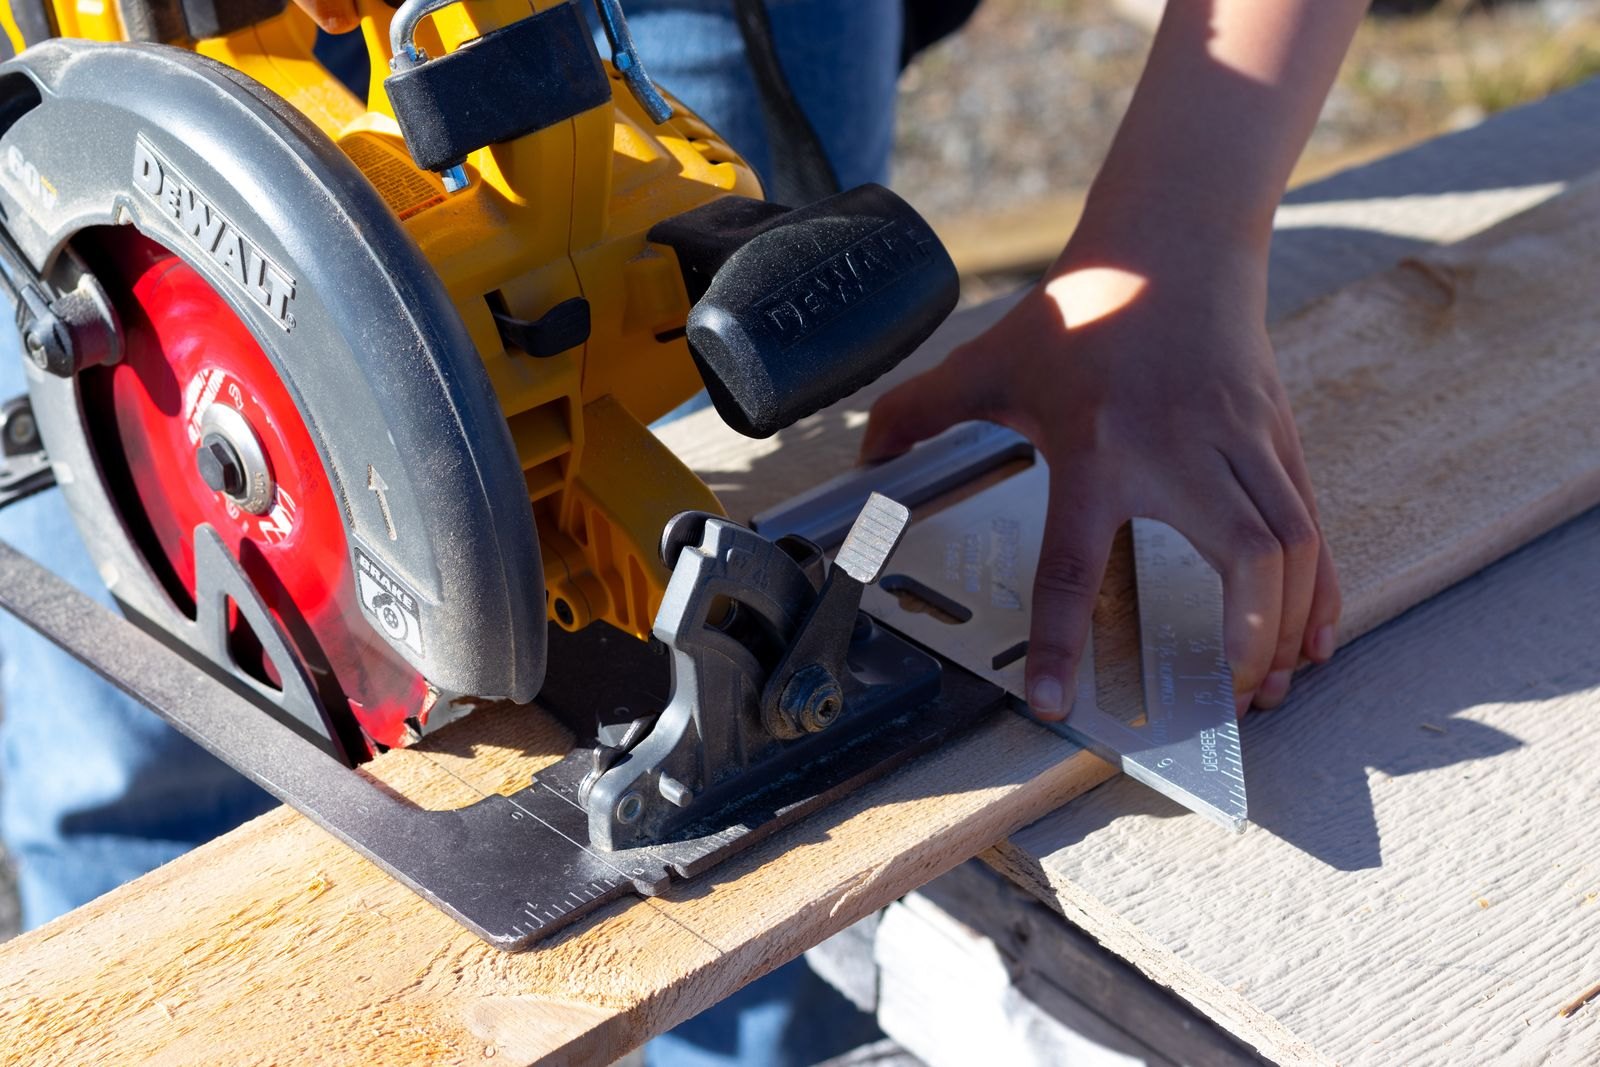
The three manufacturer-recommended cutting methods in one sequence: score-and-snap for rip cuts, tin snips for notches and short cuts, and a reversed-blade circular saw for fast straight cuts, with the expansion gap built into every measurement.
-
Step 1: Lay the panel flat on a stable work surface
Sawhorses or a work table at waist height work best. Let the section you will cut off hang just past the edge of the table. Never cut a panel held in midair; flexing while you cut is how edges wander and crack.
-
Step 2: Measure between the receiving channels and subtract the gap
Hook your tape in the J-channel or corner post on one end and read the distance to the other. Subtract 1/4 inch in normal weather (3/8 inch below 40 degrees). That number is your panel length.
-
Step 3: Mark the cut line with a square
Draw the line on the underside of the panel. Double-check it against the gap on the wall before you pick up a tool. The old line about measuring twice exists because siding offcuts are not free.
-
Step 4: For long rip cuts, score and snap
Face the panel up. Run a sharp utility knife along a straightedge with medium pressure, several passes; you do not need to cut through. Then bend the panel back and forth along the score line until it snaps apart cleanly. This is the quietest method and the one manufacturers recommend for lengthwise cuts.
-
Step 5: For short cross cuts and curves, use tin snips
Start at the top lock and cut toward the bottom of the panel, following your marked line. Here is the pro detail most guides skip: do not close the blades completely at the end of each stroke. Stopping just short of a full close keeps the edge smooth instead of pinched and ragged.
-
Step 6: For fast or repeated straight cuts, use a circular saw with the blade reversed
Fit a sharp fine-tooth plywood blade and install it backward, teeth facing the opposite direction. Cut one or two panels at a time, face up, and feed slowly. The backward blade scrapes rather than bites, which is exactly why the edge comes out smooth instead of shattered. The lower the temperature, the slower the feed.
-
Step 7: Duplicate the factory notch on overlap cuts
Siding panels overlap about an inch where they join in a course, and factory ends have notches to make that lap sit flat. Whenever you cross-cut a panel that will land in an overlap area, snip a matching 1-inch notch into your cut end so it nests the same way. Cut ends that cannot be notched go into J-channel or corner posts instead.
-
Step 8: For window and door notches, template it
Hold the panel under the window and mark the opening width plus 1/4 inch per side. Lock a scrap of siding into the course below and slide it against the window edge to transfer the height mark. Cut the verticals with snips and the horizontal with the score-and-snap method, then use a snap-lock punch to put tabs 1/4 inch down from the cut edge every 6 inches, tabs facing out, so the panel locks into the undersill trim.
-
Step 9: Finish the edge and test-fit
Look along the cut for burrs or barbs and trim them with the utility knife. Slide the panel into its channels dry, without nailing, and confirm the ends sit loose with a visible small gap. If anything binds, trim, don’t force.
The backward-blade trick, explained
The reversed saw blade is the most counterintuitive trick in siding work, and it deserves its own explanation because the SERP is full of half-versions. A normal blade’s teeth bite into the vinyl and rip it upward, which is why forward-cut vinyl chips, cracks, and sometimes shatters at the edge. Mounted backward, the teeth meet the plastic with their dull backs instead of their cutting edges. The blade scrapes and abrades its way through rather than slicing, generating less heat and never grabbing the material.
Three details make it work in practice. First, the blade must be a fine-tooth plywood-style blade; a coarse framing blade reversed will just batter the panel. Second, feed slowly, and slower in cold weather, per the manufacturer’s own rule. Third, and this matters for safety: never use a reversed blade to cut anything other than vinyl. A reversed blade on wood binds and kicks back, which is why the Home Depot guide calls this out explicitly.
Cutting panels that are already on the wall
Sometimes the cut is not a new panel but a damaged section that has to come out. The Journal of Light Construction’s builder’s guide to vinyl siding describes the technique, which comes from a This Old House demonstration by contractor Tom Silva: score the face of the damaged panel with a utility knife against a square, unlock the courses around it with a zip tool, and snip through the panel’s locked butt edge with aviation snips. Measure the opening, cut the replacement a couple of inches longer, snip the nailing flange back at both ends, and slide it in with the usual expansion room.
The video below shows Silva working through exactly this repair. Watch how he scores before snipping, leaves the replacement loose enough to move, and re-locks the courses with the zip tool.
Common mistakes that ruin vinyl cuts
I have seen every one of these on real walls, and each is easy to avoid once you know it exists.
- Cutting the panel too tight. The number one error. A panel cut dead-on to the channel width looks perfect in April and buckles in August. The 1/4-inch gap (3/8 in the cold) is not sloppy workmanship; it is the manufacturer’s specification.
- Running the saw blade forward. A standard blade orientation on vinyl gives chipped, heat-melted edges. If the cut edge looks fuzzy or cracked, check the blade direction first.
- Cutting in the cold without adjusting. Below 40 degrees, vinyl turns brittle and panels need the wider gap. Snips can crack the plastic in freezing weather; score-and-snap or a slow reversed saw pass is safer.
- Closing the snips all the way on every stroke. That final full close pinches the vinyl and leaves a jagged bite in the edge. Stop the stroke just short of fully closed.
- Leaving cut ends exposed. Plan every cut so the ends land inside J-channel, corner posts, or under a factory overlap. An exposed cut end is a water entry and an eyesore.
- Forgetting the snap-lock tabs on ripped courses. The panel you rip to width under a window or eave has no locking hem anymore. Without punched tabs, it will not stay in the undersill trim.
- Cutting face-up measurements into the visible face. Mark on the underside. Pencil lines on the show face do not always come off, and marker never does.
When to hand the job to a pro
Cutting siding for a shed wall, a repair patch, or a few panels around a new window is solid DIY territory. Call a siding contractor when the situation moves past cutting and into judgment calls.
- Two stories and up. Cutting is easy at ground level; handling 12-foot panels on staging or a tall ladder is where accidents happen.
- Whole-house reside. Production crews cut and hang a house in days with gable-angle templates, batch-cut saws, and a feel for the material. Your weekends are worth more than the learning curve.
- Cold-weather deadlines. If the panels must go up in winter and the wall is complex, a crew that cuts vinyl in the cold every day is the safer bet than your first brittle-weather attempt.
- Matching old siding. Faded profiles are hard to match and unforgiving to cut wrong, since every replacement panel is a special order. If a color match is impossible, some homeowners choose painting vinyl siding instead of chasing discontinued stock; a contractor can advise honestly which route costs less.
- Asbestos or lead underneath. If the wall you are cutting around sits over old asbestos siding or pre-1978 painted surfaces, stop and get testing before disturbing anything. That is regulated work, not a DIY cutting project.
Frequently asked questions
Tin snips for short cuts and notches, a utility knife (score-and-snap) for long rip cuts, and a circular saw with a reversed fine-tooth blade for fast repeated straight cuts. CertainTeed’s installation guide lists exactly these three methods as its recommendations. Match the tool to the cut rather than forcing one tool to do everything.
Yes, and it is the fastest way to cross-cut panels. Fit a sharp fine-tooth plywood blade and install it backward so the teeth face away from the rotation direction, then cut slowly. The reversed blade scrapes instead of biting, which gives a smooth, shatter-free edge. Only cut vinyl this way; never use a reversed blade on wood.
Slowly, and with wider gaps. Vinyl gets brittle as temperatures drop, so feed the saw slower than you think you need to, cut one panel at a time, and widen the expansion gap to 3/8 inch when it is below 40 degrees (per the manufacturer spec). Score-and-snap is often safer than snips in the cold since it shocks the plastic less. Below freezing, wait for a warmer day if you can.
Leave 1/4 inch between the panel end and the inside of the receiving channel at normal temperatures, per the manufacturer installation spec. When installing below 40 degrees, increase that to 3/8 inch. The panel needs this room to expand in summer heat; a tight panel buckles.
Usually one of three causes: the weather is cold and the vinyl is brittle, the saw blade is running forward instead of reversed, or the feed rate is too fast. Check the blade direction first, then slow down. Score-and-snap avoids the problem entirely on straight cuts.
Yes. Score the panel face with a utility knife against a square, unlock the surrounding courses with a zip tool, and snip through the locked butt edge with aviation snips. The This Old House repair demonstration shows the full sequence. Leave your replacement panel slightly long at first, then trim to fit with the expansion gap.
You need one when you rip a panel to width for the top course under a window or eave. Ripping removes the locking hem, so punch tabs 1/4 inch down from the cut edge every 6 inches, tabs facing outward, and they will grip the undersill trim. For ordinary cross cuts that end in J-channel, no punch is needed.
Sources
- CertainTeed’s Vinyl and Polymer Siding Installation Guide: the three recommended cutting methods, the 1/4-inch and 3/8-inch expansion gaps, and the nail-slot rules.
- Fine Homebuilding’s guide to installing vinyl siding panels: the backward-blade cutting tip, temperature-dependent end clearances, notch cuts, and snap-lock punch placement.
- The Home Depot vinyl siding and accessories installation guide: score-and-snap technique, the reversed fine-tooth blade guidance, the snip-stroke tip, and safety goggles for cutting operations.
- This Old House’s vinyl siding repair guide: score-and-snip technique for cutting damaged sections, with the video demonstration by Tom Silva.

3 Comments
Pingback: How to Install Vinyl Siding (Step-by-Step DIY Guide)
Pingback: What Is Vinyl Siding? Types, Materials & Protection Guide
Pingback: How to Remove Vinyl Siding Without Cracking It