

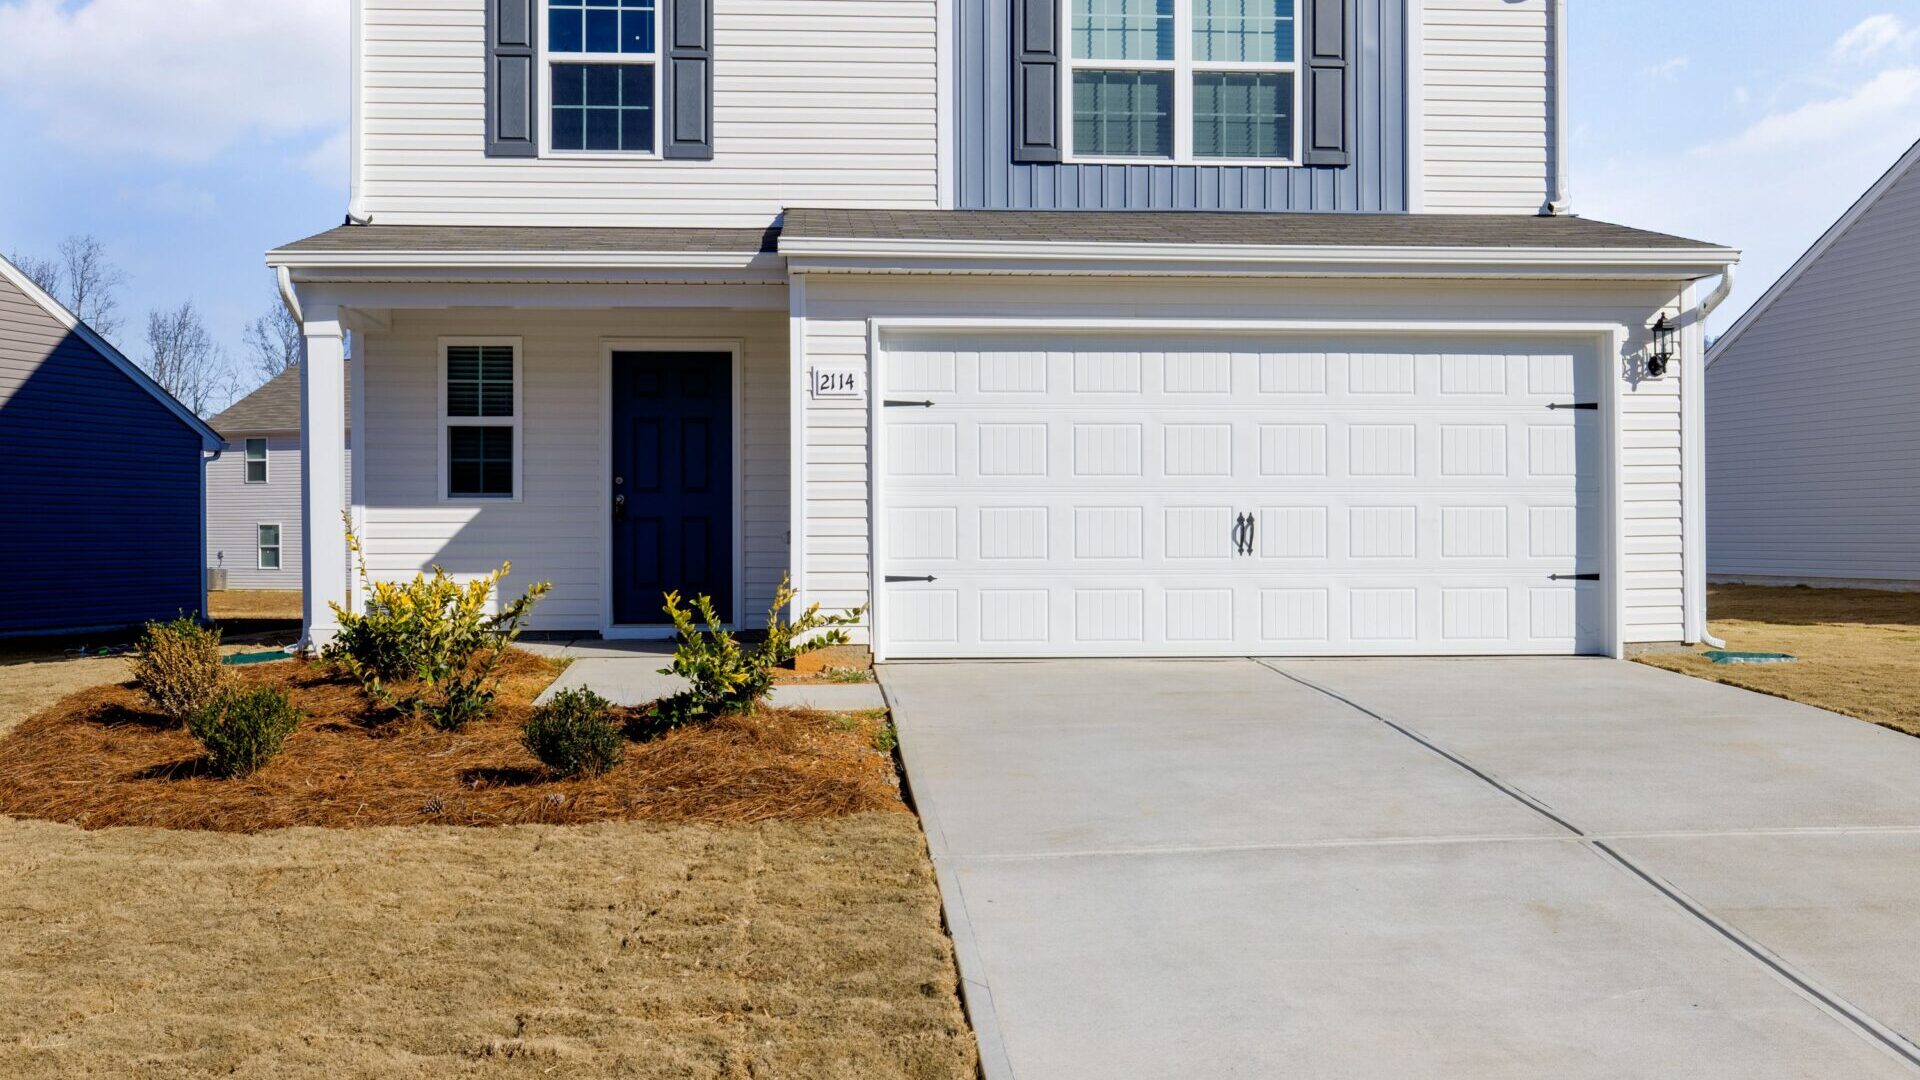
Most vinyl siding damage falls into one of three repairs, and picking the right one is the whole job. A pinhole or hairline crack gets a fill. A hole up to a few inches across gets a patch cut from matching siding. A panel that is cracked end to end, buckled, or broken at the lock gets replaced, either in part or in full. Do the repair that matches the damage, keep the nails loose enough for the panel to move, and the fix disappears from the curb. Do a bigger repair than you need, or nail the new piece tight, and you trade a small eyesore for a wavy wall.
Vinyl siding is a system of thin, hollow panels that hang loosely on a wall so they can expand and contract with temperature. Each panel locks into the one below it and is nailed only through a slotted strip at the top, which is why a repair is rarely about glue alone. You have to respect the lock, the slots, and the gaps at the ends, or the repair will buckle the first hot week after you finish it. This guide walks through all three repairs in the order you should consider them, plus the color matching tricks that make or break the result.
Last updated: October 24, 2026
On this page
- Read the damage before you pick a repair
- Which repair fits your damage
- Tools and materials
- Small damage: the fill
- Medium damage: the patch
- Big damage: replace the panel or a section of it
- Matching the color so the repair disappears
- What to check underneath before you close it up
- Mistakes that turn a repair into a second repair
- DIY or hire a pro
- Keep it from happening again
- Frequently asked questions
- Sources
Read the damage before you pick a repair
Vinyl siding damage is a diagnosis problem before it is a repair problem. A hole and a crack can look alike from the sidewalk and need completely different fixes, and a buckled panel is often not damaged at all in the way you think. It is usually nailed too tight or trapped at the ends, which means replacing it with a new panel nailed the same way just repeats the failure. Spend ten minutes reading the wall first, and the repair picks itself.
Walk the damaged area and press gently around it. Healthy vinyl flexes a little and springs back. Brittle vinyl, the kind that has baked in the sun for twenty years or sat through too many winters, feels stiff and may show white stress marks where it has been forced. Note that now, because brittle panels crack when you unlock them, and that changes whether you patch in place or plan a full replacement. If you are still learning the parts, our guide to what vinyl siding is made of and how its profiles work lays out the panel, the lock, and the wall assembly before you touch a tool.
| What you see | What it usually means | First move |
|---|---|---|
| Tiny pinhole, nail hole, or hairline crack | Impact or a fastener hole, surface only | Fill it. No panel work needed. |
| Round hole from a stone, ball, or hail, up to a few inches | Local impact, rest of the panel sound | Patch it with matching siding. |
| Crack running across the face or along the lock | Stress crack, or cold-weather break | Replace the section. Cracks keep travelling. |
| Panel bowed out or wavy in the middle | Nailed too tight, or trapped at the ends, so heat expansion has nowhere to go | Check the nails and end gaps before replacing anything. |
| Panel loose, rattling, or hanging open at the bottom | Lock popped, or nails missed the framing | Often a simple relock, no new material needed. |
| Soft, dark, or stained wall behind a hole | Water has been getting in for a while | Stop and inspect the sheathing before you cover it. |
| Warping near a grill, fire pit, or reflective window | Heat damage, the vinyl itself has deformed | Replace the panel and move or shield the heat source. |
Two checks matter more than the rest. First, flex the panel a few feet away from the damage, where it is still whole. If it bends and returns, you can unlock and patch with confidence. If it snaps or crackles, plan for a replacement and handle every panel on that wall like glass. Second, look at the wall behind the damage through the hole with a flashlight. Dry sheathing and clean house wrap mean a straightforward repair. Dark stains, soft wood, or mold mean the siding was the symptom, not the disease, and covering it with a neat patch just hides a leak.
Which repair fits your damage
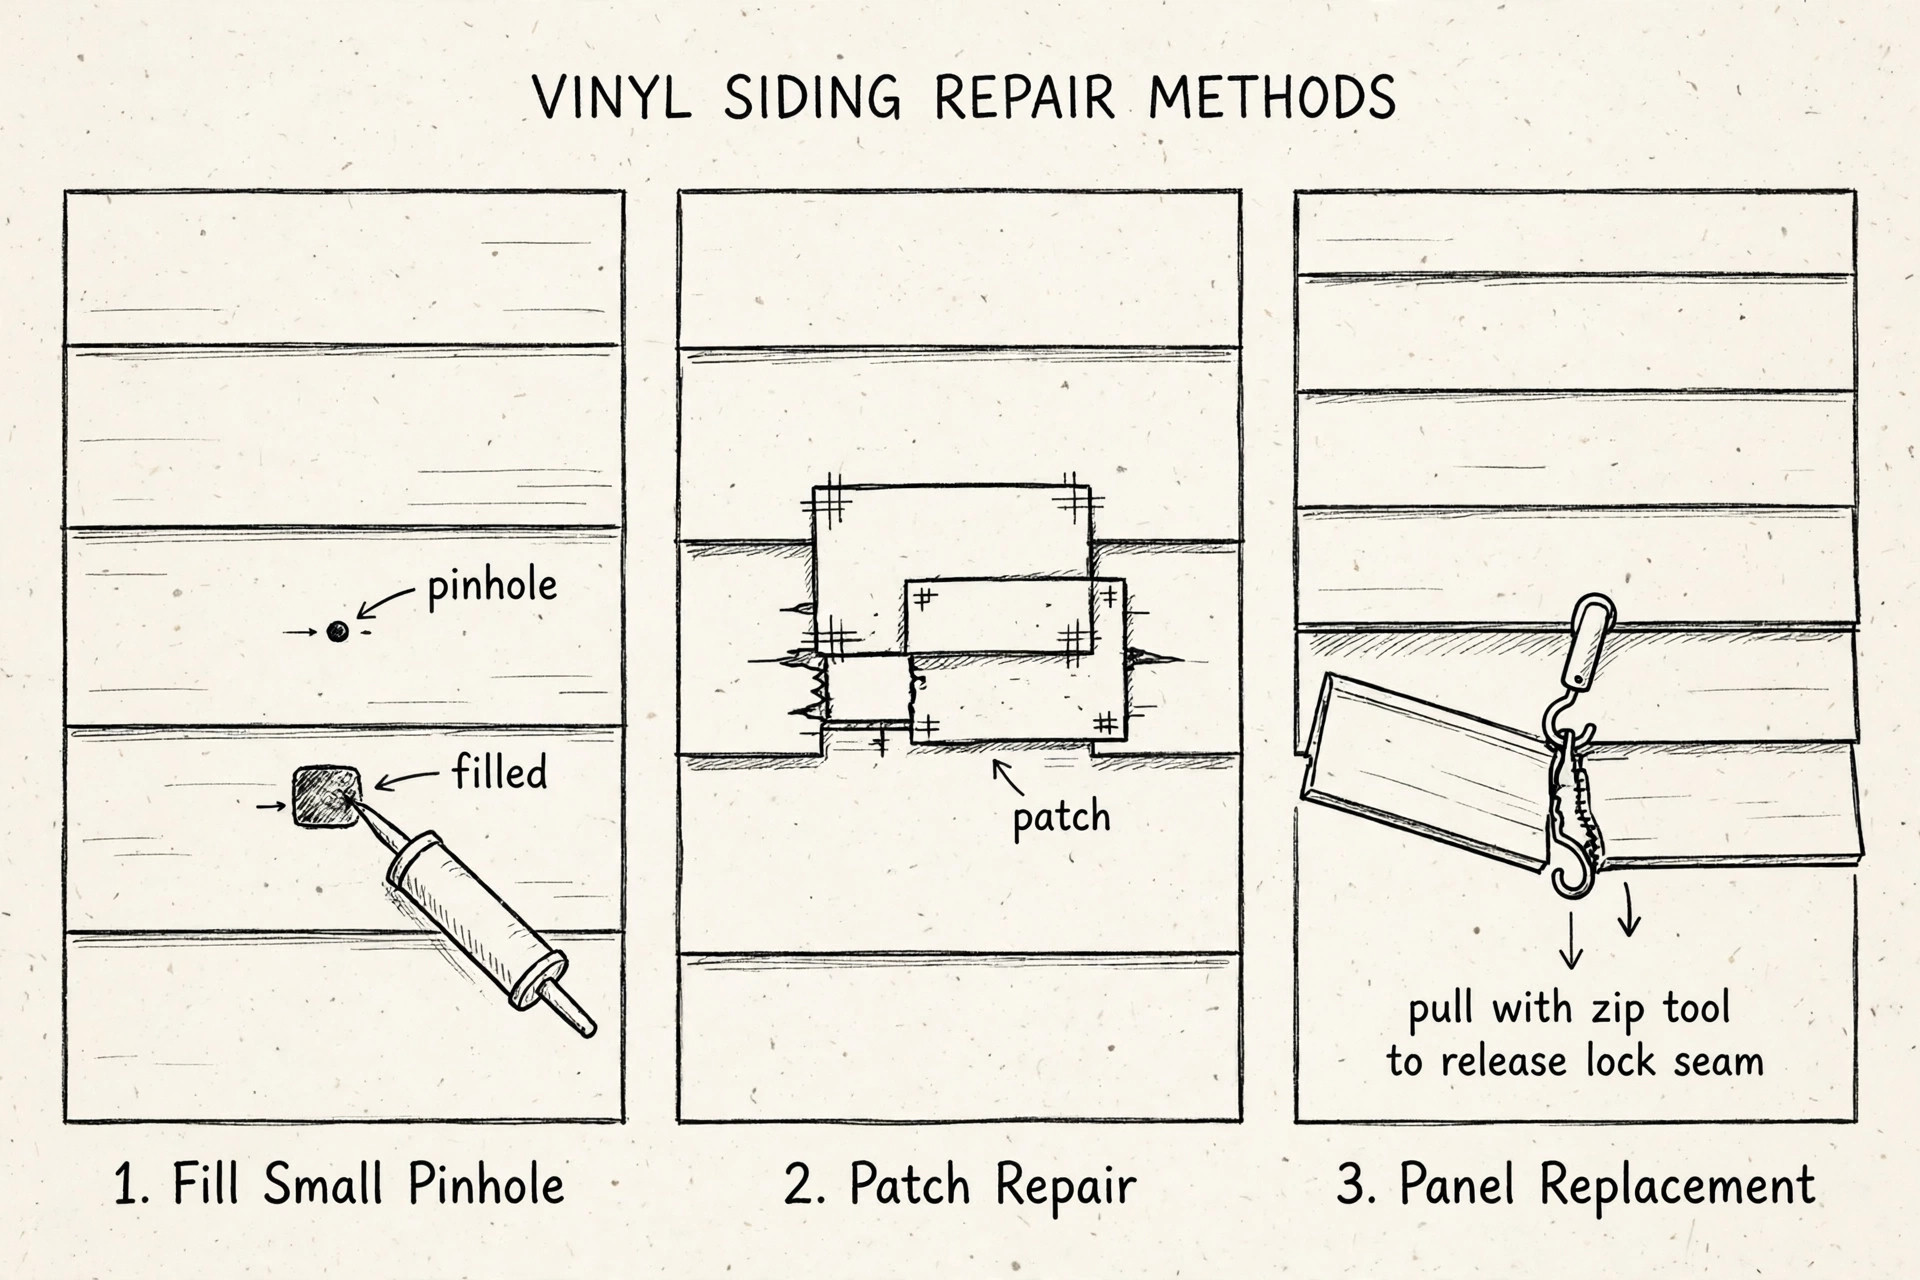
Small damage is any hole or crack you can cover with a fingertip, roughly under half an inch. A fill works here because there is almost no missing material and the panel still carries its own load. Medium damage runs from about half an inch to a few inches across, where a fill would sag or shrink out of the hole. A patch works here because a piece of real siding bridges the gap with the same profile and thickness. Big damage is anything longer than that, any crack that runs through the lock, or any panel that has buckled, warped, or gone brittle. That panel, or a section of it, has to come out.
| Repair | Damage size | Time for one spot | Skill needed |
|---|---|---|---|
| Fill with exterior caulk or filler | Under about 1/2 inch | 20 to 30 minutes, plus cure time | Beginner |
| Patch from matching siding | About 1/2 inch to a few inches | 1 to 2 hours | Comfortable with a utility knife and snips |
| Section replacement (cut-out panel piece) | Up to about 2 feet of damaged length | 2 to 3 hours | Comfortable with a zip tool and nailing |
| Full panel replacement | Whole panel cracked, buckled, or brittle | 2 to 4 hours for one panel | Comfortable with a zip tool, cutting, and nailing |
The mistake most people make is jumping one size up. A patch over a pinhole leaves a visible rectangle where a dab of caulk would have vanished. A full panel swap for a two-inch hole wastes an afternoon and risks cracking two good panels on the way in. Work from the smallest repair that will hold, and only step up when the damage, or the condition of the panel, forces you to. If the panel is already brittle, step up sooner: a patch glued to crumbling vinyl will not stay put.
Tools and materials
You do not need a full siding crew’s kit for a single repair. The short list below covers all three repairs, and the only specialty tool on it is the zip tool. Buy one before you start. Trying to pry a lock open with a screwdriver is the fastest way to crack the panel above the one you are fixing, and it turns a one-panel job into a two-panel job.
| Tool or material | What it does | Needed for |
|---|---|---|
| Zip tool (unlocking tool) | Hooks the buttlock and unzips the seam | Patch and panel replacement |
| Utility knife with fresh blades | Scores and cuts panels cleanly | All three repairs |
| Aviation snips | Snips through the rolled lock edge | Patch and panel replacement |
| Framing square or straightedge | Keeps cut lines square | Patch and section replacement |
| Cat’s paw pry bar | Pulls nails without tearing the nailing hem | Panel and section replacement |
| Hammer | Drives roofing nails into the slots | Patch and panel replacement |
| Galvanized roofing nails | Fasten the new piece through the slots | Patch and panel replacement |
| Exterior-grade caulk or vinyl filler, color matched | Fills pinholes and hairline cracks | Small fill |
| Matching siding, spare panel or offcut | Becomes the patch or the replacement | Patch and panel replacement |
| Tape measure and pencil | Measures the patch and the panel | All three repairs |
| Work gloves and eye protection | Cracked vinyl cuts, and snips throw sharp bits | All three repairs |
| Stable ladder, only if the damage is up high | Reaches the course safely | Any repair above comfortable reach |
On matching siding, start with your own house. Check the garage, the shed, and any leftover lengths from the original install. A spare panel from your own wall beats a new panel from the store for color, because it has faded at the same rate as the wall around the damage. If you have no spares, take a small sample, or a photo in daylight, to a siding supplier and ask them to match the profile and color. Profile matters as much as color: a patch with the wrong exposure line will read as a repair from across the street even if the color is perfect.
Small damage: the fill
A pinhole or hairline crack is a weather-sealing job, not a carpentry job. Water and insects use a pinhole the same way they use a big hole, just slower, so the point of the fill is to seal it flush and keep it sealed through a summer of expansion. Exterior-grade caulk or a vinyl repair filler both do that, as long as the surface is clean and dry when you apply them.
Clean the spot with soap and water, and let it dry fully. A damp surface is the most common reason a fill pops out a month later. Press the caulk or filler into the hole with a putty knife, not just across it, so it keys into the opening. Smooth it flush with the panel face, wipe the excess with a damp cloth, and leave it alone until it cures, following the product label for cure time. If the caulk is paintable and the color is off, a coat of exterior paint matched to the siding finishes it. Vinyl siding itself is not usually painted, but a small filled spot takes paint better than it takes a visible white dot, and our guide to whether you can paint vinyl siding, and what fails when you try covers when paint is a reasonable call and when it is not.
Do not fill a crack that runs. A hairline crack across a flat face is one thing. A crack that starts at a nail slot, follows the lock, or grows when you flex the panel is a panel that is failing, and filler will just crack along with it. If you are not sure, flex the panel gently near the crack. If the crack opens or lengthens, skip the fill and go straight to a section replacement.
Medium damage: the patch
A patch is a piece of real siding laid over the hole, cut so its profile lines up with the panel it covers. Done well, it reads as part of the wall from a few feet away. Done badly, with the wrong profile or a crooked cut, it reads as a bandage. The difference is almost entirely in the cutting and the test fit, so do not rush those two steps.
Cut the patch from matching siding, larger than the hole by at least an inch on every side. Trim off the top nailing strip of the patch piece, since the patch sits on the face of the panel rather than hanging from the wall, and trim the bottom rolled edge so the patch lies flat. Hold the patch over the hole and check the profile: the fold lines of the patch should sit on the fold lines of the panel beneath, and the edges should lie flat without rocking. Trim a little at a time until the fit is snug. A patch that rocks on a high spot will never glue down flat.
Clean and dry both surfaces, then run exterior-grade adhesive or sealant on the back of the patch and around the edge of the hole. Press the patch firmly into place, starting at one corner and working across so you do not trap air under it, and hold it until it grabs. Wipe away excess adhesive at once, before it skins over, and leave the patch untouched until it cures. If the patch sits over a nail slot or a seam, do not nail through the face of the patch to hold it: face nails in vinyl siding split the panel and trap it against expansion. Adhesive and a good fit are what hold a patch, and if the fit is wrong, recut the patch instead of nailing it down.
The patch method has one honest limit. It covers the hole, but it adds a second layer of vinyl over the panel, which shows as a slight shadow line up close. On a back wall or a high course, nobody will notice. On the front wall at eye level, a section replacement usually looks better, and that is the trade to weigh before you glue anything down.
Big damage: replace the panel or a section of it
When a panel is cracked end to end, buckled, heat warped, or brittle, patching is throwing good material after bad. The panel has to come out, either in full or as a cut-out section, and a new piece has to go in its place. This is the repair that most guides rush, and rushing is what cracks the good panels around the bad one. The sequence matters: unlock first, cut second, pull nails third, and never pull a locked panel off the wall.
For a section replacement, the damaged length comes out and a new piece goes in its place, which saves you from disturbing the full panel and its trim ends. This Old House’s repair guide, demonstrated by general contractor Tom Silva, uses exactly this approach: score and cut the damaged section out, trim the replacement piece so it overlaps the opening, and relock the course above with a zip tool. For a full panel, the same sequence applies, except the whole panel slides out of its trim channels once the nails are out. Our guide to removing vinyl siding without cracking it covers the full removal sequence in detail, including the stuck-seam cases.
Replace a damaged vinyl siding panel by unlocking the course above it, cutting out the damaged section, fitting a matching replacement, and nailing it loosely so it can still expand and contract.
- Step 1: Unlock the course above the damage
Slide the zip tool under the bottom edge of the panel above the damaged one, hook the back lip of its buttlock, pull down gently, and slide the tool along the seam to open the lock. Lift that panel up and out of the way. If you are replacing a full panel, unlock its full length the same way.
- Step 2: Cut out the damaged section
For a section replacement, use a framing square and a utility knife to score vertical cuts through the face of the damaged panel on both sides of the damage, keeping the opening at least 2 inches shorter than your replacement piece. Cut through the rolled bottom edge with aviation snips, and pull the damaged piece free.
- Step 3: Pull the nails from the damaged piece
With the course above lifted, the nailing hem of the damaged piece is exposed. Pull each nail with a cat’s paw, straight out, so you do not tear the hems of the panels around it. Collect the nails as you go, off the lawn and out of the mower’s path.
- Step 4: Cut and trim the replacement piece
Cut the replacement to the length of the opening plus the overlap, and trim about 2 inches of the top nailing strip and the bottom rolled edge from each end of the replacement, so it can slide into place without binding. Test fit it before you nail anything: it should sit flat, with its profile lines matching the panels around it.
- Step 5: Slide the replacement into place
Slide the replacement piece into the opening, snapping its bottom edge into the lock of the panel below. Check the alignment at both ends and at the courses above and below before you reach for the hammer.
- Step 6: Nail it loosely, centered in the slots
Drive galvanized roofing nails through the center of the nailing slots, leaving about the thickness of a dime between the nail head and the vinyl. The panel must still slide side to side by hand after nailing. The Vinyl Siding Institute’s installation manual gives the same rule: nails centered in the slots, a small gap under each head, and a 1/4 inch gap at trim and corner channels, growing to 3/8 inch when installing below 40 degrees.
- Step 7: Relock the course above
Use the zip tool to hook the bottom edge of the course above and pull it down until it snaps over the top edge of the new piece, working along the full length of the seam. Tug gently along the seam to confirm the lock is engaged everywhere, not just at the ends.
- Step 8: Check the panel moves and the seams sit flat
Push the new panel sideways by hand. It should slide a little in its slots. Check that the overlaps sit flat, the ends have their expansion gaps, and no lock is popped open. If the panel will not move, a nail is too tight: back it out a fraction, do not drive it deeper.
For a full panel replacement, the only difference is scale. Once the course above is unlocked and the damaged panel’s nails are out, the panel slides sideways out of its J-channels and corner posts, toward the open end, and the new panel slides in the same way. If a panel end will not slide, loosen the trim on that side before you force it. Forcing a panel end out of a nailed channel is how good panels get cracked at the corner, and a cracked corner post turns a panel job into a trim job. If you need to cut the new panel to length, our guide to cutting vinyl siding cleanly covers the scoring, snipping, and cold-weather rules.
Matching the color so the repair disappears
Color matching is where most vinyl siding repairs fail, and it fails for a reason nobody warns you about: vinyl fades. A brand-new panel in the original color will not match a wall that has spent ten years in the sun, and the mismatch will be obvious on the front of the house even if the profile is perfect. The fix is to match the faded wall, not the original color chip.
The best source of matching material is your own house. This Old House’s repair guide makes the same point: take the patch or replacement piece from an inconspicuous area of the house, such as a side wall behind a shrub or a course under a porch roof, where the siding has faded at the same rate. Then put a brand-new panel in that inconspicuous spot, where the mismatch will not be noticed. This swap, old panel to the repair and new panel to the hidden spot, is the single best trick in this guide, and it costs nothing but an extra hour.
When no spare panel exists anywhere on the house, take a sample to a siding supplier and compare it in daylight, not under store lights. Hold the sample against the wall at the repair spot, at arm’s length, and look at it from the sidewalk distance, not from six inches away. A match that looks right up close and wrong from the curb is a failed match. If the closest available color is still visibly off, two honest options remain: put the new panel in the least visible spot on that wall and move a faded panel to the repair, as above, or paint the repair area to blend it, accepting the paint maintenance that comes with it. What you should not do is patch a front-wall repair with a panel that is two shades off and hope nobody notices. Everybody notices.
| Matching source | How close the match is | When to use it |
|---|---|---|
| Spare panel from your own install | Very close, same age and fading | Whenever you have one, first choice |
| Panel swapped from a hidden wall area | Very close, same age and fading | Front-wall repairs with no spares |
| New panel from a supplier, matched by sample | Close, but usually a shade off on old walls | Back walls, high courses, or when no swap is possible |
| New panel, color chip only | Unreliable on faded walls | Only for a full wall replacement, not a spot repair |
| Paint blended over the repair | Can blend well, but needs recoating over time | Last resort for a visible repair with no match |
What to check underneath before you close it up
Every panel replacement opens a window into the wall, and it would be wasteful not to look through it. The siding is a rain screen, not a waterproof shell, so some dampness behind it is normal. What is not normal is soft wood, dark staining that spreads, mold growth, or house wrap that is torn, missing, or folded the wrong way at a seam.
With the damaged panel out, check the sheathing with your hand and a flashlight. Dry, firm wood with a clean house wrap means you can close up and move on. Soft spots, crumbling edges, or a musty smell mean water has been getting past the siding for longer than the hole has been visible, and the repair should wait until the leak path is found. Check above the damage, not just at it: water runs down inside a wall, so the entry point is often a course or two higher, at a window flashing, a J-channel joint, or a fixture mount. If the framing is soft or the rot spreads past a small area, that is pro territory. A siding repair cannot fix a rotted wall, and closing it up just resets the clock on the next failure.
Also check the house wrap while you are in there. It should lie flat, overlap downward like shingles, and sit behind the trim. If it is torn at the repair spot, patch it with house wrap tape or a small piece of wrap taped on all four sides, shingle style, before the new panel goes on. If the wrap is missing entirely on an old house, note it and talk to a contractor about the wall as a whole. Adding wrap to one small opening will not fix a wall that never had it.
Mistakes that turn a repair into a second repair
Most failed vinyl siding repairs fail the same few ways, and all of them are avoidable. Nailing tight is the first. A panel nailed hard against the wall cannot expand, so it buckles on the first hot spell, and the buckle looks worse than the hole you fixed. Leave the dime’s thickness under every nail head, and confirm the panel slides by hand before you relock the course above it.
Caulking the panel to the trim is the second. Vinyl siding is designed to move behind its trim, and caulk locks it in place, which causes the same buckling as tight nailing, plus a cracked caulk line that traps water. Leave the expansion gaps open at J-channels and corner posts. The third mistake is working cold. Vinyl turns brittle as temperatures drop, and a panel that unlocks cleanly on a mild day can snap on a cold one. Pick a mild, calm day for the work, and if you cannot wait, go slower and support every panel along its full length.
The fourth mistake is cosmetic but real: skipping the test fit. A patch or replacement that is nailed in before it is test fitted will show its misalignment for years, and fixing it means doing the whole job again. Fit first, nail second, every time. And the fifth is a safety one: working high on a ladder while handling a long, floppy panel in the wind. Panels catch wind like sails. If the damage is on the second story, use scaffolding or hire the job out, and never work off the top steps of a ladder to reach one more course.
DIY or hire a pro
A fill, a patch, and a single panel replacement at ground level are solid DIY work for anyone comfortable with a utility knife and a ladder. The job changes character when the damage climbs, spreads, or reaches the structure underneath. Use the table below as a plain guide.
| Situation | DIY or pro? | Why |
|---|---|---|
| Pinhole, hairline crack, or small patch at ground level | DIY | Low height, small materials, easy to control. |
| One panel or one section at ground level | DIY | The zip tool sequence is learnable in an afternoon. |
| Second story, or a steep slope below | Pro, or scaffolding | Long panels on a ladder are where injuries happen. |
| Damage across many panels, or a whole wall | Pro crew | Speed, staging, and matching at scale. |
| Rot, mold, or soft framing underneath | Pro assessment | The siding is not the problem anymore. The wall is. |
| Damage at corners, trim, or around windows | DIY with care, or pro | Trim work is fiddly, and a cracked corner post adds a second job. |
| Discontinued siding with no match available | Pro, or a supplier consult first | A contractor or supplier can source or suggest a blend strategy. |
If you hire the job out, ask how the contractor plans to match the color, whether they will swap a faded panel from a hidden wall, and whether they nail loosely for expansion. Those three answers tell you more about the quality of the work than the quote does. If you are weighing a repair against a bigger change, our guide to how long vinyl siding lasts by climate and care helps you judge whether one more repair is money well spent or the start of a residing conversation.
Keep it from happening again
Most vinyl siding damage is preventable, and the prevention is mostly boring maintenance. Keep lawn equipment and string trimmers away from the wall, or fit a trim guard, since mower-thrown stones cause a large share of small holes. Trim shrubs back so branches do not rub the siding in the wind, and move grills and fire pits well clear of the wall, since heat warping is permanent and no repair fixes the source.
Inspect the wall once a year, ideally in spring, and look for loose locks, popped nails, and small cracks while they are still small repairs. Clean the siding on a regular schedule, since dirt hides early damage and a clean wall is easier to read. Our guide to cleaning vinyl siding safely covers the wash method that will not force water behind the panels. And when a panel does get damaged, fix it promptly. A small hole left through a wet season becomes a stained wall and a soft spot behind it, and that turns a twenty-minute fill into a panel replacement with a wall repair behind it.
Frequently asked questions
Yes, for most small and medium damage. Pinholes and hairline cracks take a fill, and holes up to a few inches across take a patch cut from matching siding. You only need a full panel replacement when the panel is cracked end to end, buckled, heat warped, or brittle, or when the lock itself is broken.
Cut a patch from matching siding that is larger than the hole by at least an inch on every side, trim off its nailing strip and bottom rolled edge, and test fit it so its profile lines match the panel beneath. Glue it down with exterior-grade adhesive, press it flat from one corner across, and wipe away the excess before it cures. Do not face-nail the patch, since face nails split vinyl and trap it against expansion.
Unlock the course above with a zip tool, score and cut out the damaged section, pull its nails with a cat’s paw, and fit a replacement piece trimmed about 2 inches shorter at the nailing strip and rolled edge on each end. Nail the replacement loosely, centered in the slots with a dime’s thickness under each nail head, then relock the course above with the zip tool.
Because vinyl fades in the sun, and a new panel matches the original color, not the faded wall. The best fix is to swap a faded panel from a hidden area of the house into the repair spot and put the new panel in the hidden spot, where the mismatch will not show. If no swap is possible, match by sample in daylight and judge the match from sidewalk distance.
For pinholes and hairline cracks, yes, as long as you use exterior-grade caulk or vinyl filler on a clean, dry surface and smooth it flush. Caulk will not hold a hole larger than about half an inch, and it will not hold a crack that is still travelling. Do not caulk panels to trim or J-channels, since that locks the panel against expansion and causes buckling.
Loose. Nails go through the center of the nailing slots with about the thickness of a dime between the nail head and the vinyl, so the panel can slide side to side as it expands and contracts. Nails driven tight are the most common cause of buckled, wavy vinyl siding, and they are also the first thing to check when a panel bows for no obvious reason.
You can, but vinyl turns brittle in the cold, so panels crack more easily when you unlock or cut them. If you must work in cold weather, go slower, support each panel along its full length, and avoid bending panels at all. When you have a choice, wait for a mild, calm day in the 60s or 70s.
Sources
- This Old House’s guide to repairing vinyl siding, with Tom Silva’s demonstration of the zip tool, the score-and-snip section replacement, loose nailing for expansion, and the faded-panel swap for color matching.
- The Vinyl Siding Institute’s installation manual, for nailing centered in the slots with a small gap under each nail head, and expansion gaps of 1/4 inch above 40 degrees and 3/8 inch below 40 degrees at trim and corner channels.
- Angi’s guide to repairing a hole in vinyl siding, for the patch method using a section cut from an inconspicuous area of the house and the limits of filler on larger holes.
- The Vinyl Siding Institute’s installation manual section on materials and tools, describing the zip lock tool motion for removing and relocking panels.
- Family Handyman’s tips for removing vinyl siding, covering cold-weather brittleness, the zip tool, the cat’s paw, and checking for mold and rot underneath.

1 Comment
Pingback: How to Remove Vinyl Siding Without Cracking It