

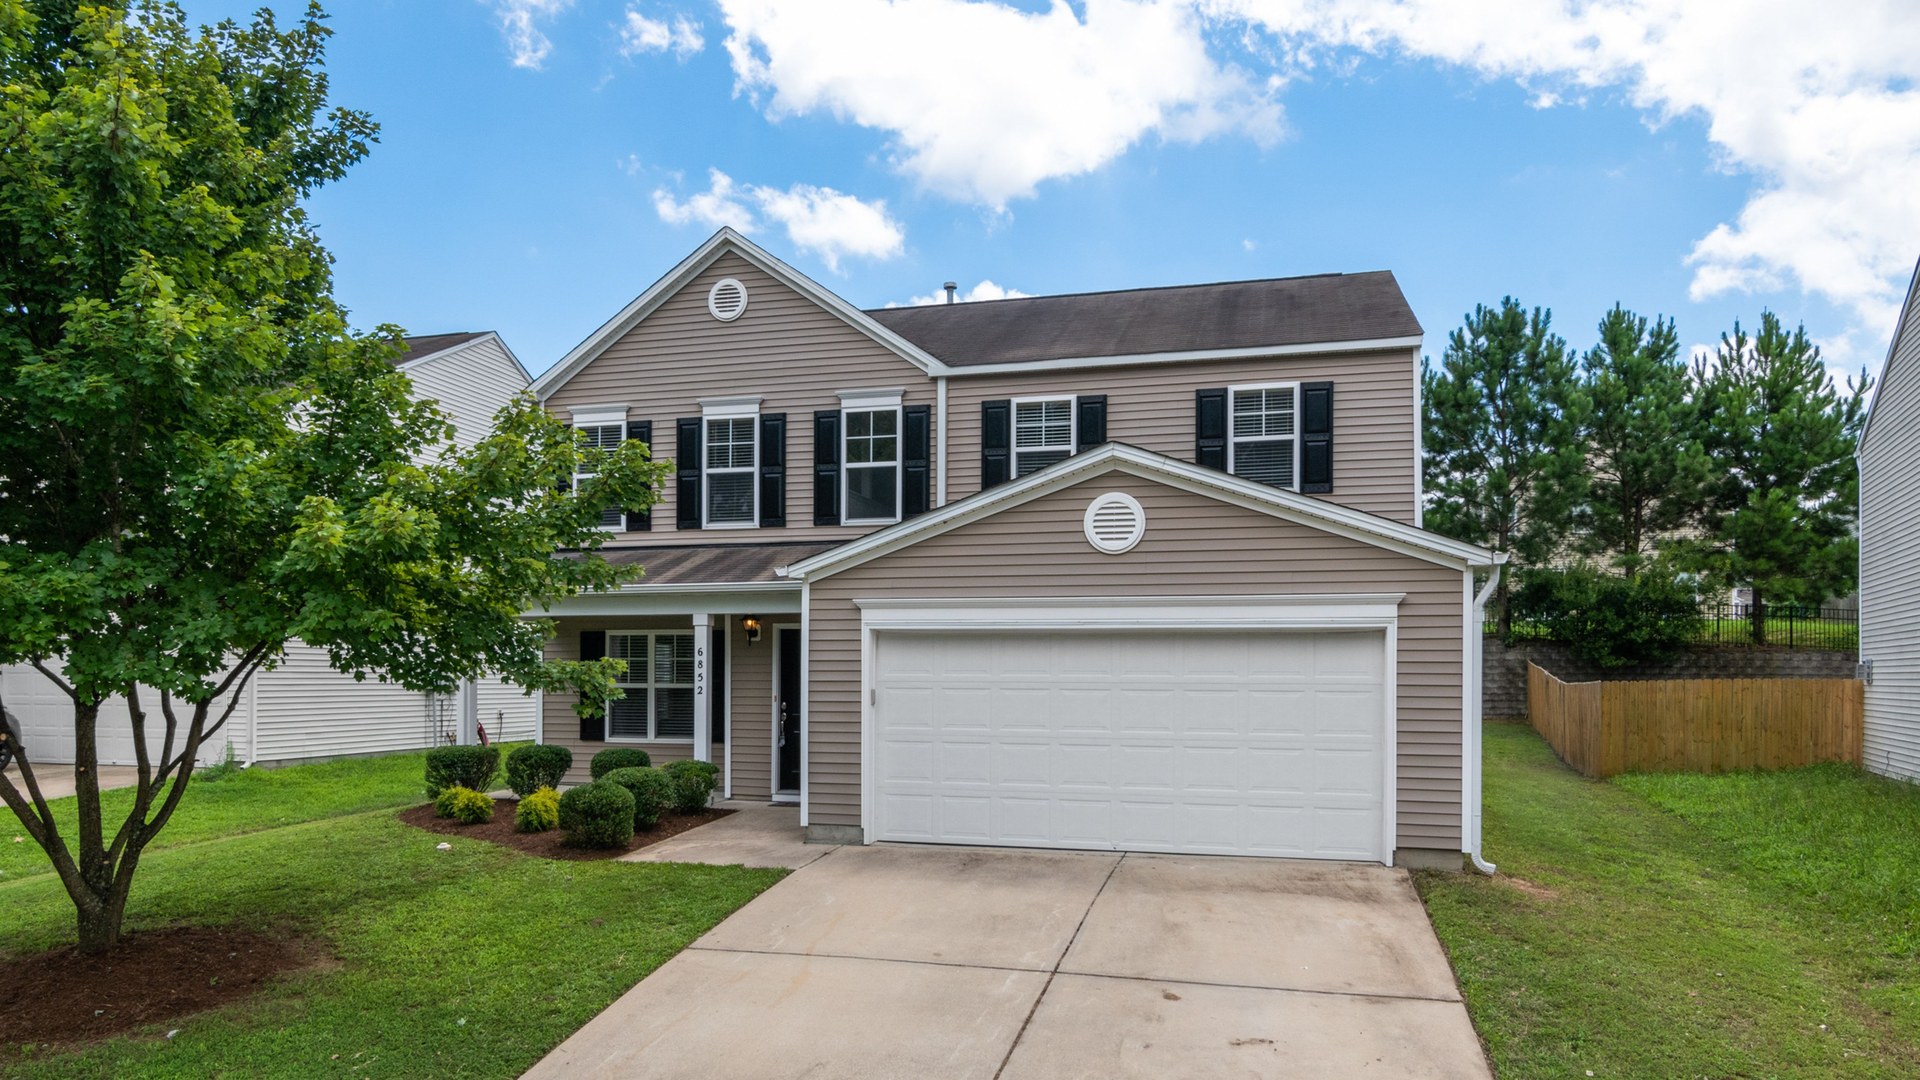
Vinyl siding comes off the same way it went on, in reverse. Panels lock together along a hidden seam, hang from a nailing strip at the top, and slide out of trim channels at the ends. If you unlock that seam first, pull the nails second, and slide the panel out third, a full wall can come down clean and ready to reuse. Pull in any other order, or yank a locked panel free by force, and you get the two failures this guide is built to prevent: a cracked lock that will not hold a replacement, and a warped panel that will never sit flat again.
Removing vinyl siding without damage is a method problem, not a strength problem. The tool that does most of the work costs a few dollars, fits in a pocket, and is called a zip tool or unlocking tool. The rest is patience: work top down for a full wall, work from the panel above for a single panel, and pick a warm, calm day. Cold vinyl turns brittle, wind turns a 12-foot panel into a sail, and both turn a simple job into broken plastic.
Last updated: October 24, 2026
On this page
- How vinyl siding hangs on your wall
- First, decide what you are saving
- The tools that matter, and the ones you can skip
- Pick your weather before you pick up a tool
- The removal sequence, step by step
- Removing one panel in the middle of a wall
- Windows, corners, and the top course
- When a panel will not unlock
- What you find underneath, and what to do about it
- Save it, reuse it, or recycle it
- DIY or hire a pro
- Frequently asked questions
- Sources
How vinyl siding hangs on your wall
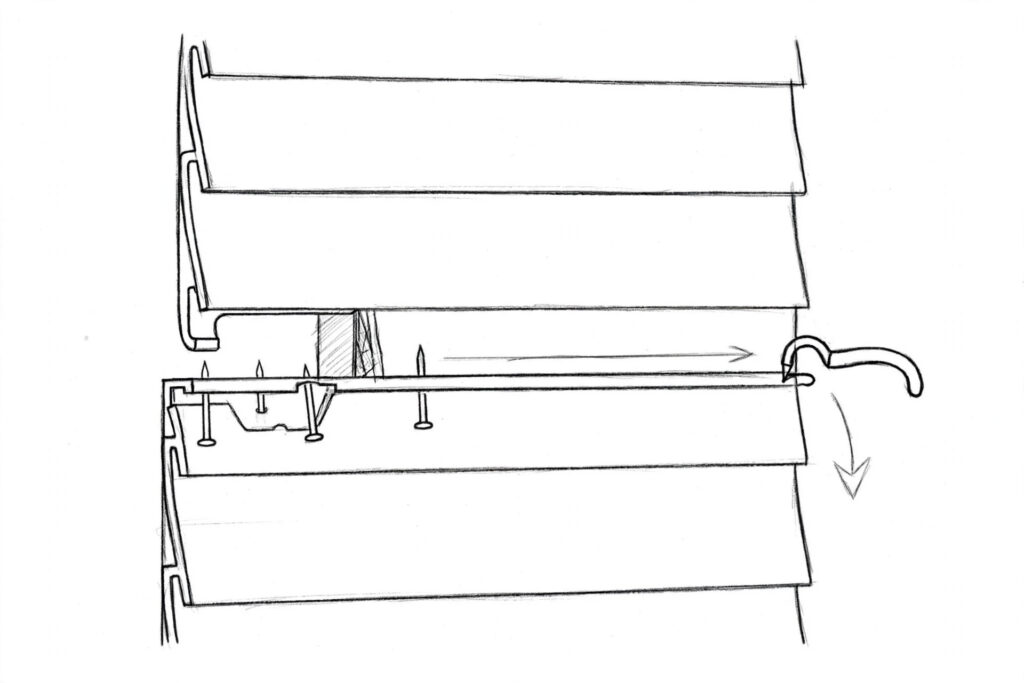
Vinyl siding is a system of thin, hollow panels that hang loosely on a wall so they can expand and contract with temperature. Each panel has three parts that matter for removal: a nailing hem at the top, a buttlock along the bottom edge, and a shaped face that gives the wall its profile. The buttlock of one panel snaps into the top edge of the panel below it, so every course is locked to the one beneath it and nailed only through its own top hem.
That is why removal runs top down: the top course is usually held by trim, not by another panel, so it comes free first and exposes the lock below it.
| Part | Where it sits | What it does during removal |
|---|---|---|
| Nailing hem | Flat strip along the top of each panel, with elongated slots | This is the only part fastened to the wall. Pull these nails, and the panel is free to slide out. |
| Buttlock | Curled lip along the bottom edge of each panel | Hooks into the top of the panel below. The zip tool catches this lip and pulls it down out of the lock. |
| J-channel | Trim around windows, doors, and wall ends | Panel ends slide into this channel. Panels come out sideways, toward the open end, never straight off the wall. |
| Starter strip | Bottom of the wall, first course only | Holds the bottom course. Leave it in place unless the whole wall is coming off. |
| Corner posts | Outside and inside corners | Panel ends tuck into these channels. Loosen the post before forcing a panel end out of it. |
The loose nailing is not sloppy work. It is the design. Nails sit centered in the slots with a small gap under the head, so the panel can slide side to side as it warms and cools. The Vinyl Siding Institute’s installation manual describes the zip lock tool the same way installers use it: insert the curved end under the panel end, hook the back lip of the buttlock, pull down, and slide along the length of the panel to disengage the lock. The same motion relocks a panel when you put it back.
If you are new to the parts, our guide to what vinyl siding is made of and how its profiles work lays out the profiles and the wall assembly before you touch a tool.
First, decide what you are saving
Before you unlock anything, decide whether the panels are coming off to be reused, to be replaced, or to make way for a different siding altogether. That one decision changes how careful you need to be, how much wall you open at once, and what you do with the pile at the end of the day.
Walk the wall first and sort it in your head. Panels that are faded but whole are reusable for a shed, a garage wall, or a repair patch. Panels with cracked locks, sun-baked brittleness, or heat warping near a grill or a reflective window are scrap, and no careful technique will save them. Note the worst panels now, because they are the ones most likely to break in your hands, and breaking one is fine when you already planned to replace it.
| What you see | What it usually means | What to do |
|---|---|---|
| Panel flexes and springs back | Healthy vinyl, still pliable | Save it. Unlock with the zip tool and stack it flat. |
| White stress marks at the lock | Panel has been forced before | Handle gently. The lock may snap on the next unlock, so plan a replacement for that course. |
| Cracks when you flex a corner | Sun-aged or cold-brittle vinyl | Treat as scrap. Work on a warm day if you must save any of it, and expect losses. |
| Wavy, buckled face | Panel was nailed tight, or overheated | Do not reuse it flat. It will not sit true again, and tight nailing caused the warp in the first place. |
| Loose panel that rattles in wind | Lock popped, or nails missed the studs | Often a simple relock. Unlock the course above, reseat the panel, and relock with the zip tool. |
The tools that matter, and the ones you can skip
You do not need a truck full of gear to remove vinyl siding. The short list below covers a full wall, and everything else on this list is either a convenience or a way to avoid a trip to the hardware store halfway through the job.
| Tool | Job it does | Can you skip it? |
|---|---|---|
| Zip tool (unlocking tool) | Hooks the buttlock and unzips the seam | No. This is the tool the whole method depends on. |
| Cat’s paw pry bar | Pulls nails out of the nailing hem without tearing it | Almost no. A hammer claw works, but it tears more hems. |
| Flat pry bar | Eases trim and corner posts loose | Only if every trim piece is already loose. |
| Utility knife | Scores old caulk and cuts panels that must come out in pieces | No. Caulked seams will crack a panel if you pull through them. |
| Aviation snips | Snips through a locked butt edge on a panel being scrapped | Yes, unless you are cutting panels out rather than unlocking them. |
| Work gloves | Protects hands from sharp cracked edges | No. Cracked vinyl cuts like a dull knife. |
| Stable ladder or scaffolding | Reaches the top courses safely | No for anything above comfortable reach. Do not work off a ladder’s top steps. |
| Bucket or nail pouch | Keeps pulled nails off the lawn and out of tires | Only if you enjoy finding nails later with a mower. |
Pick your weather before you pick up a tool
Work on a warm, overcast, calm day if you have any choice in the matter. Vinyl gets brittle as temperatures drop, and a panel that unlocks cleanly at 70 degrees can snap at 35. Family Handyman’s removal tips put it plainly: vinyl is brittle and breakable below freezing, and long, lightweight panels are hard to handle in wind. Rain is out for a different reason, because an open wall in rain soaks the sheathing and the house wrap you are trying to protect.
A mild day in the 60s or 70s, with little wind, is the sweet spot. Heat has its own problem: panels in direct summer sun get soft and floppy, which makes them harder to control and easier to kink. If the wall faces the afternoon sun, start on the shaded side in the morning and move around the house with the shade. When you cannot wait for good weather, work slower, support every panel along its full length, and accept that cold-weather losses will be higher. The job can be done in the cold, but the margin for a mistake shrinks to almost nothing.
The removal sequence, step by step
The sequence below covers a full wall, top down. The same steps apply to a smaller section, except you start at the top of the section instead of the top of the wall, and the single-panel method in the next section covers the case where only one panel needs to come out.
Unlock each course with a zip tool, pull the nails from the nailing hem, and slide the panel out of its trim channels, working from the top of the wall down so every lock is exposed before you touch it.
- Step 1: Clear the wall and kill power to fixtures on it
Move furniture and planters away from the wall. Turn off power to exterior lights and outlets on that wall at the breaker, then remove fixture covers and mounts that sit over the siding.
- Step 2: Score any caulk or paint sealing the seams
Run a utility knife along caulk lines at trim, corners, and J-channels. Vinyl should never be caulked to trim in the first place, but older jobs often are, and pulling through a caulked seam cracks the panel edge instead of freeing it.
- Step 3: Free the top course and its trim
Remove the trim covering the top course, usually a piece of undersill or J-channel under the eave or soffit. Pull the nails from the top panel’s hem. That panel should now slide down and out of the course below, or lift free once the trim is off, without needing the zip tool at all.
- Step 4: Unlock the next course with the zip tool
Slide the zip tool’s hook under the bottom edge of the panel above the one you want to remove, at one end of the wall. Hook the back lip of the buttlock, pull down gently, and slide the tool along the seam to the other end. The seam should open like a zipper. If it resists, work from the other end, not harder from the same spot.
- Step 5: Pull the nails, leaving the center nail for last
With the course above unlocked and flipped up, the nailing hem is exposed. Pull the nails with a cat’s paw, working from the ends toward the middle, and leave one center nail in place until the rest are out, so the panel drops into your hands instead of falling and kinking.
- Step 6: Slide the panel out of its trim channels
Slide the panel sideways, toward the open end of the J-channel or corner post, until the end clears the channel. Never pull a panel straight off the wall while its ends are still seated in trim, because the ends will bend, crease, or snap. If an end binds, loosen the trim piece rather than forcing the panel.
- Step 7: Stack the panel flat, face up, right away
Lay each panel flat, face up, supported along its full length. Panels left leaning against a wall warp in the sun, and panels stacked on uneven ground take a set that shows up on reinstall. Sort by length and profile as you go.
- Step 8: Repeat down the wall, one course at a time
Unlock, un-nail, slide out, stack. Do not skip ahead to a lower course to save time, because the lock above it is still holding it, and do not open more wall than you can close or cover before dark or rain.
- Step 9: Remove trim and starter strip last
Once the field panels are off, pull the J-channels, corner posts, and starter strip in the same order, saving trim you plan to reuse. Bag and label small pieces like undersill trim, because trim is hardest to match later.
- Step 10: Inspect the wall before you cover it again
Look at the house wrap, sheathing, and flashing while the wall is open. Note any soft spots, staining, or torn wrap, and photograph them. Fixing what you find now is far cheaper than discovering it after new siding is already nailed over it.
Watch the removal part of the video below before your first panel, even if you have read the steps twice. Tom Silva of Ask This Old House works through the same sequence on a damaged section: score, unlock with the zip tool, pull the nails, and slide the replacement in loose enough to move. Seeing the hand motion for the zip tool once is worth a page of description.
Tom Silva of Ask This Old House replaces damaged vinyl siding sections: score the panel face with a utility knife and speed square, unlock the courses with a zip tool, pull the nails from the hem, and nail the replacement loosely so it can expand and contract.
Removing one panel in the middle of a wall
Most removal jobs are not full walls. They are one cracked panel, one panel behind a new hose bib, or one panel hiding a leak. The method changes in one important way: you unlock the panel above the damaged one, not the damaged one itself.
Start by unlocking the seam above the damaged panel with the zip tool, along the full length of the panel above. Flip that upper panel up and prop it out of the way, or hold it with a helper. The damaged panel’s nailing hem is now exposed. Pull its nails, leaving the center nail for last as before, then unlock the damaged panel from the panel below it with the zip tool and slide it out sideways. The upper panel then drops back down and relocks over whatever goes in next, with a pull-down motion of the zip tool along the seam.
Two details make single-panel work go cleanly. Do not remove more panels than the job needs, because every extra panel is a lock you must reseat perfectly. If the damaged panel must come out in pieces, score the face with a utility knife against a square and snip through the locked butt edge with aviation snips, rather than prying shards out of the lock. Our guide to how to cut vinyl siding cleanly covers that scoring and snipping sequence.
Windows, corners, and the top course
Field panels in the middle of a wall are the easy part. The places where panels meet trim are where most cracks happen, because the panel is shorter, stiffer, and trapped on more sides.
Around a window, the panels above and below the opening sit in J-channel on three sides, and the short pieces beside the window are easy to kink because there is so little panel to flex. Free the J-channel nails on the side where you plan to slide the panel out, and slide toward that freed side. If a panel is nailed inside the channel, score the caulk first and ease the channel open with a flat bar rather than bending the panel out of it. The same rule holds at doors.
At corners, pull or loosen the corner post before you try to free the panel ends. Corner posts are nailed through their own hem, and a panel end trapped in a nailed post will crease before it slides. Loosening the post a few inches gives the panel the room it needs, and the post goes back with the same nails.
The top course under an eave or soffit is usually a ripped panel, cut narrower than the rest, and held by undersill trim instead of a normal lock. It often has snap-lock tabs punched along its cut edge. Lift it out of the undersill trim straight, without bending it down, because a ripped panel has less material to flex and cracks sooner than a full panel. If the tabs catch, work along the trim with a flat bar to release them one at a time.
When a panel will not unlock
Every removal job has one seam that refuses to open. The fix is almost never more force. Force is what breaks the lock, and a broken lock turns a removal into a replacement for the panel above as well.
| What is happening | Likely cause | What to try first |
|---|---|---|
| Zip tool slides but nothing opens | Hook is riding on top of the lock, not under it | Start at a panel end or corner where you can see the lock, seat the hook fully, then slide. |
| Seam opens a few inches, then stops | Nail, screw, or caulk is holding the seam at that point | Stop, find the fastener or caulk line, score or remove it, then continue. |
| Panel flexes but the lock will not release | Cold, stiff vinyl, or insulated siding | Warm the seam gently in sun, or wait for a warmer day. Insulated panels need the zip tool; fingers will not do it. |
| Lock opens, but the panel will not slide out | End still seated in J-channel or corner post | Loosen the trim on the slide-out side. Never pull the panel straight off the wall. |
| Lock snaps as you pull | Sun-aged vinyl, or the seam was forced before | Accept the loss for that panel. Check the panel above before reusing it, because its lock may be stressed too. |
What you find underneath, and what to do about it
Removal is also an inspection. Torn house wrap needs repair before new siding goes up, because the wrap is the wall’s drainage plane. Sheathing that feels soft, or shows dark staining around windows and at the bottom of the wall, points to a leak that siding alone will not fix, so find the leak’s path first, whether it is failed flashing or a window that was never flashed properly.
Mold on framing or on the back of the wrap is a sign of trapped moisture, not a cleaning job. If you are sensitive to mold, wear a respirator while the wall is open, and do not just cover it with new siding. Get a contractor or inspector to confirm whether the framing is sound before you spend money on new panels. Family Handyman’s removal tips make the same point: tap studs for softness, and pull the wrap back to check the framing.
While the wall is open, it is also the right time to clean what you plan to keep. Our guide to how to clean vinyl siding safely covers the wash methods for panels going back on the wall, so they do not go back dirty.
Save it, reuse it, or recycle it
Vinyl siding that comes off whole has three good destinations, and the dumpster should be the last resort. Reuse is the simplest: keep straight, matching panels for repairs, for a shed or garage wall, or for patching the same house later. Faded panels will not match new stock, but they match the wall they came from, which makes them valuable as repair stock for that house.
Recycling is the second option. Vinyl siding is rigid PVC, and it can be recycled into new siding, fencing, and decking products. The Vinyl Institute’s post-consumer recycling program describes the Revinylize Recycling Collaborative, which connects installers, recyclers, distributors, and manufacturers to collect post-consumer rigid vinyl. The Vinyl Institute also maintains a directory of PVC recyclers, which is the practical starting point for finding a drop-off near you.
Prepare siding for recycling the way a recycler wants it: pull the nails, strip off foam backing and trim pieces, and keep the load clean of wood, metal, and other debris. Mixed loads get rejected, and a rejected load ends up in landfill anyway. Call ahead before hauling, because some recyclers take contractor volumes only, while others accept homeowner drop-offs. If no recycler is near you, a local building-materials reuse store or an online listing for free used siding will often move good panels faster than a dumpster run, and keeps them out of landfill.
DIY or hire a pro
Removing a few panels at ground level is solid DIY work. Removing a whole house, or working high up, is where the job changes character. Use the table below as a plain guide, not as a challenge.
| Situation | DIY or pro? | Why |
|---|---|---|
| One or two panels at ground level | DIY | Low height, small panels, easy to control. |
| Full wall, single story | DIY with a helper | Panels are long and awkward alone. A second pair of hands prevents kinks. |
| Second story or steep slope below | Pro, or scaffolding | Handling long panels on a ladder is where injuries happen. |
| Whole-house removal for residing | Pro crew | Speed, staging, and disposal at scale. A crew does in days what takes weekends. |
| Rot, mold, or soft framing found underneath | Pro assessment | The siding is not the problem anymore. The wall is. |
| Asbestos siding or pre-1978 paint underneath | Stop, get testing | Regulated work. Do not disturb it until you know what it is. |
| Insulated vinyl siding | DIY with care, or pro | Stiffer and heavier than hollow vinyl. The zip tool is essential, and panels kink if bent. |
A pro is also the right call when the panels must come off on a deadline in bad weather, or when matching discontinued siding matters. A siding contractor can tell you honestly whether the existing panels are worth saving, and if you are planning to put new siding up, our step-by-step installation walkthrough shows what that job looks like from the other side, so you can judge a quote with open eyes.
Frequently asked questions
Yes, if the vinyl is still pliable and you unlock it before pulling anything. Use a zip tool to open the seam, pull the nails from the hem, and slide the panel out of its trim channels. Cold, sun-aged, or previously forced panels may still crack, so work on a warm day and expect some losses on old walls.
Top down for a full wall, because panels are installed bottom up and each course locks into the one below it. Starting at the top exposes each lock in turn. For a single panel, unlock the panel above it first, then pull that panel’s nails and slide it out.
A zip tool, also called an unlocking tool, is a small hooked hand tool that catches the buttlock lip and pulls it down out of the lock as you slide it along the seam. For most panels you need it, and for stiff or insulated panels you cannot do without it. Lightweight panels in warm weather can sometimes be opened by hand at one end, but the tool is cheap and it prevents cracked locks.
Usually one of three causes: the vinyl is cold and brittle, the seam was pulled before it was unlocked, or the panel end was forced out of a nailed J-channel or corner post. Work on a warm day, unlock first, loosen trim before sliding panels out, and pull nails with a cat’s paw instead of a hammer claw.
You can, but the risk of cracking rises sharply below freezing, because vinyl turns brittle in the cold. If you must work in cold weather, go slower, support each panel along its full length, and avoid bending panels at all. When you have a choice, wait for a mild, calm day.
Score any caulk at the J-channel first, then loosen the J-channel on the side you plan to slide toward. Slide the panel sideways out of the channel rather than pulling it straight off the wall. Short pieces beside windows kink easily, so support them and do not force them out of a nailed channel.
Save straight, matching panels for future repairs on the same house. For the rest, pull the nails, strip off foam and trim, and take clean loads to a PVC recycler, which you can find through the Vinyl Institute’s recycling directory. Cracked or warped panels go to construction debris disposal under your local rules, not household trash if your area requires a construction facility.
Sources
- This Old House’s guide to repairing vinyl siding, with Tom Silva’s demonstration of the zip tool, score-and-snip technique, and loose nailing for expansion.
- Family Handyman’s tips for removing vinyl siding, covering permits, disposal, cold-weather brittleness, the zip tool, the cat’s paw, the center-nail trick, and checking for mold and rot underneath.
- The Vinyl Siding Institute’s installation manual section on materials and tools, describing the zip lock tool motion for removing and relocking panels.
- CertainTeed’s vinyl and polymer siding installation guide, for the panel system, nailing-hem rules, and expansion clearances that govern removal.
- The Vinyl Institute’s post-consumer recycling update, describing the Revinylize Recycling Collaborative and its pilot results for rigid vinyl siding.

1 Comment
Pingback: How to Install Vinyl Siding (Step-by-Step DIY Guide)