

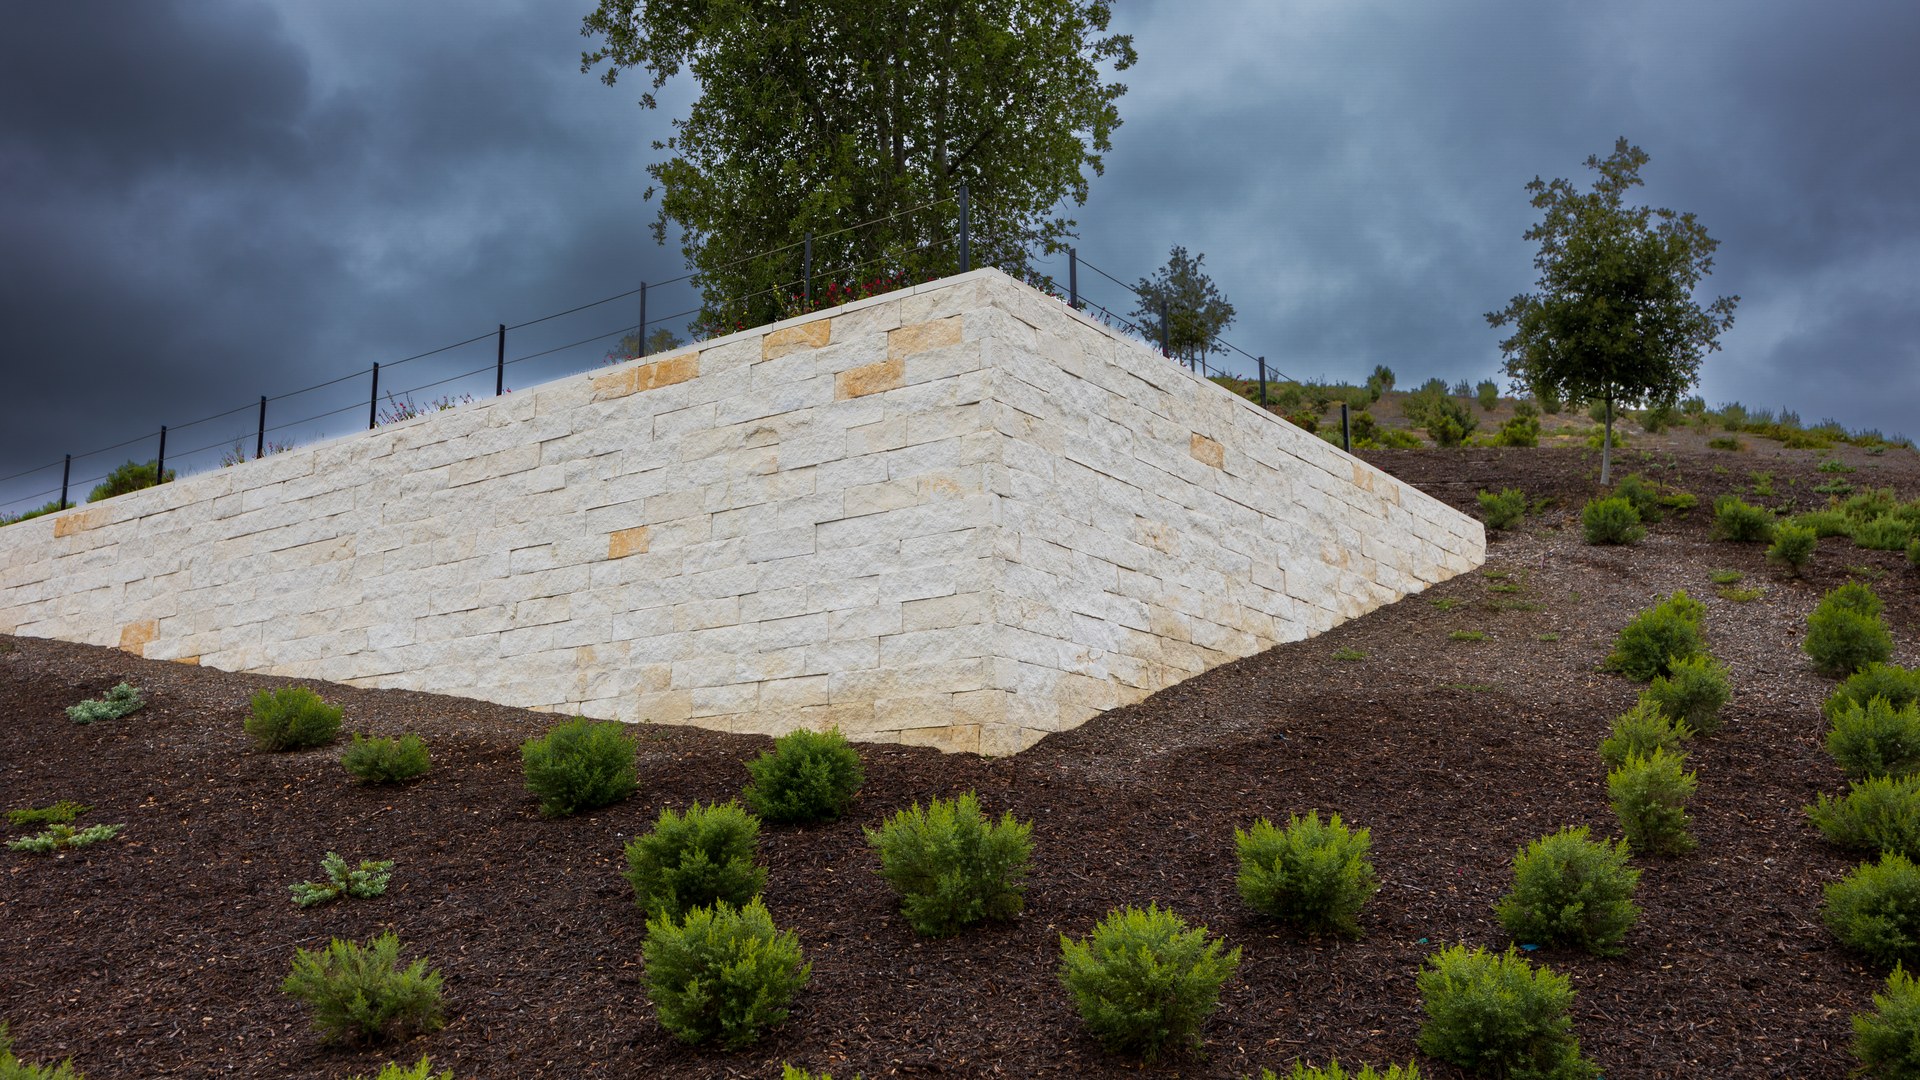
The short answer: Mulch washout happens when rain and gravity pull loose mulch downhill faster than it can settle. It is not one problem, but three working together: falling rain smashes mulch loose, sheet flow carries the pieces downhill, and gravity slowly drags the rest. Fixing it means matching your mulch type and hold-down method to how steep your slope actually is.
Contents
- How mulch leaves a slope: the three forces
- Measure your slope before you spend a dollar
- The usual reasons mulch will not stay put
- Mulch types, ranked for slopes
- What actually keeps mulch in place
- When mulch alone will not cut it
- After the next storm: the 20-minute check
- Frequently asked questions
- Sources
How mulch leaves a slope: the three forces
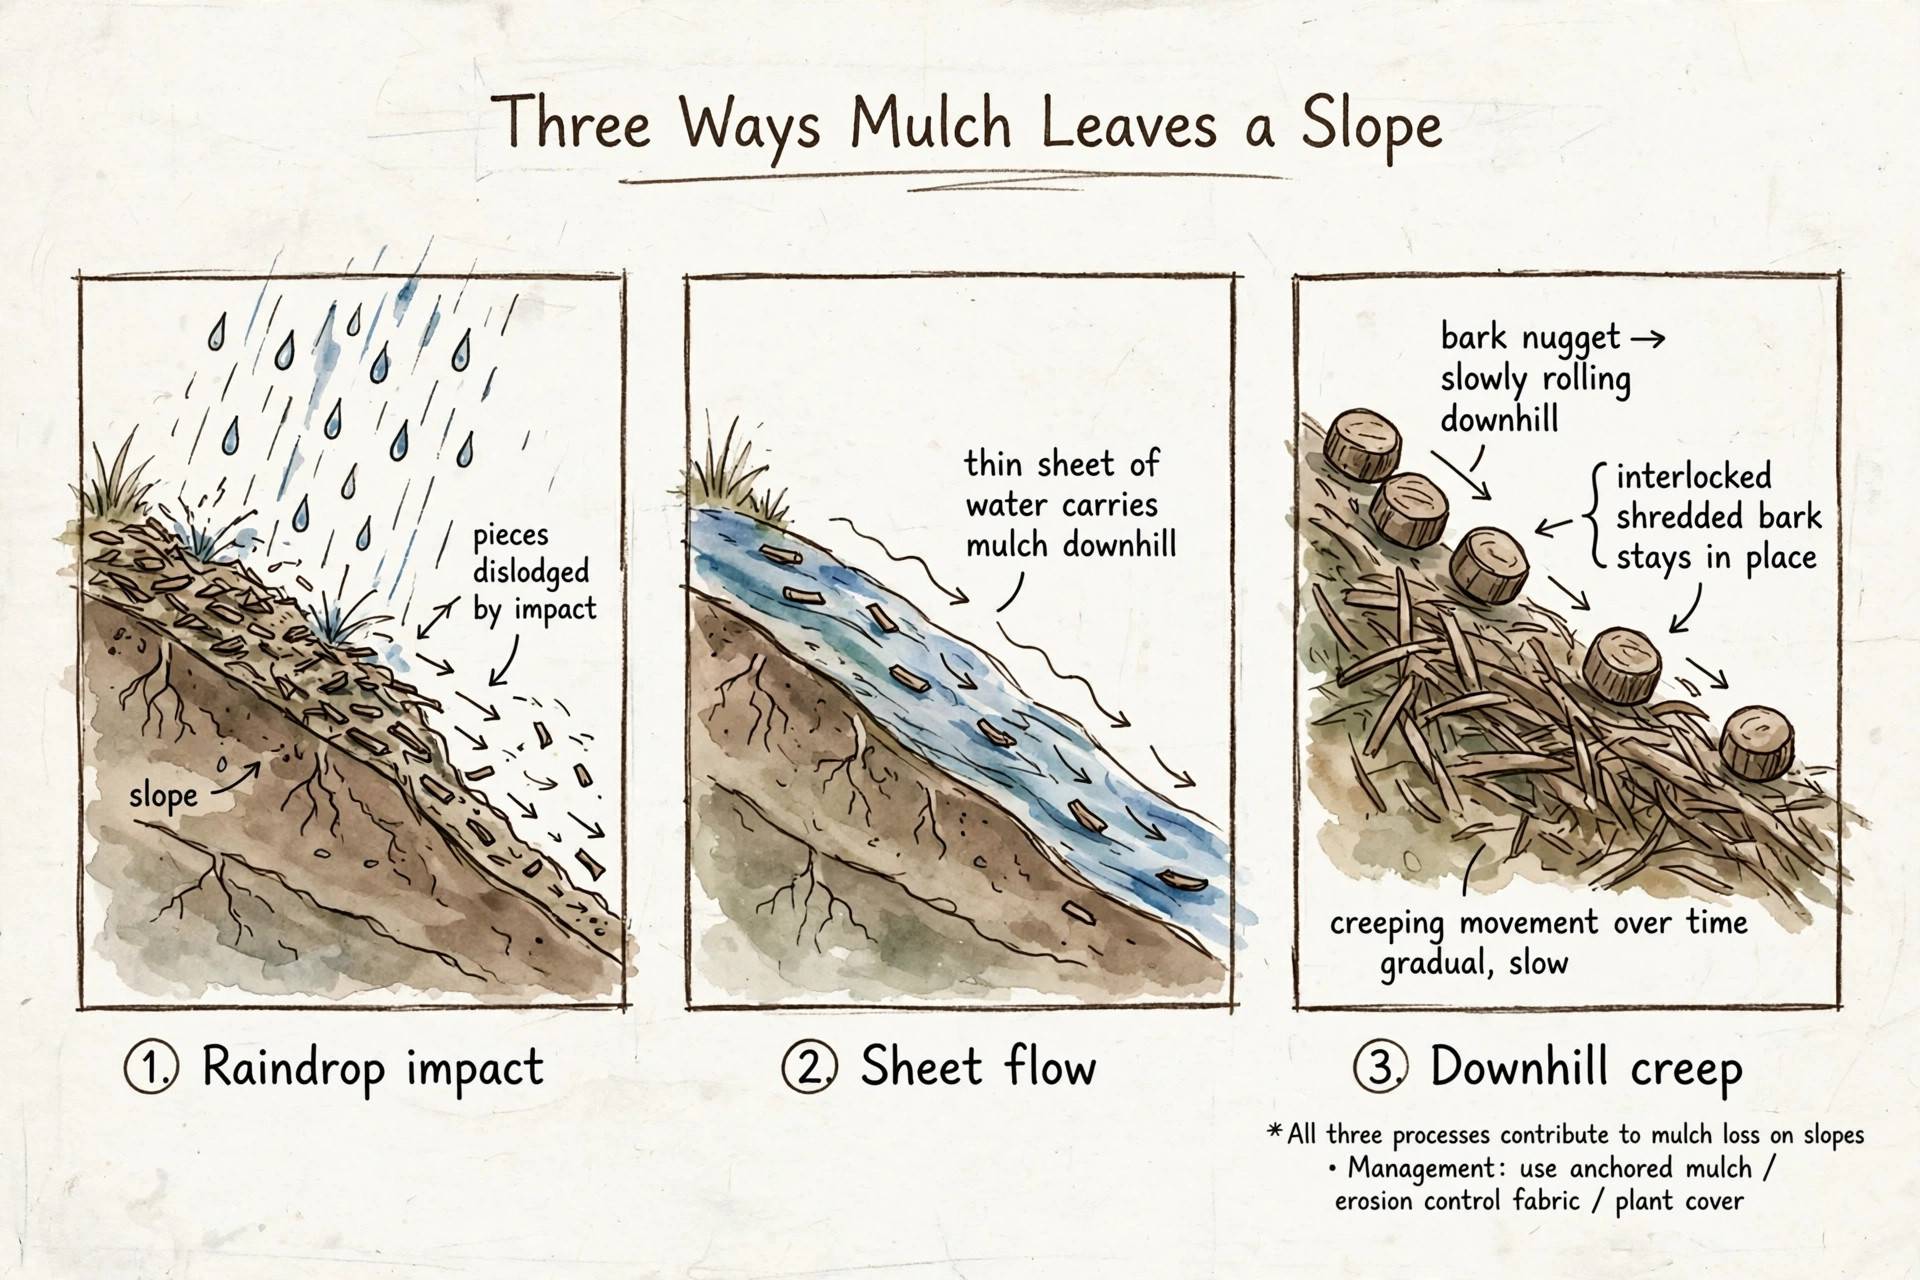
Once mulch starts moving, it rarely moves for one reason. Watch a slope during a hard rain and you will see three things happen, usually in this order.
Raindrop impact. A single raindrop hits the ground with surprising force. On flat beds, that is mulch’s job: the pieces take the hit so the soil does not. University of California Master Gardeners explain that mulch reduces erosion by absorbing the impact of raindrops and slowing water as it moves downhill. But every hit also knocks loose pieces upward and outward. On a slope, “outward” usually means downhill.
Sheet flow. Once rain accumulates, water stops soaking in and starts sliding across the surface. This thin sheet of moving water is the main carrier. It picks up anything light and loose and transports it downhill, exactly the way a river moves gravel. The steeper the slope, the faster the sheet, and the bigger the pieces it can carry.
Downhill creep. Even on dry days, gravity keeps working. Smooth, round mulch pieces, like bark nuggets, never really lock together. They rest on each other at an angle, and vibration from wind, mowing, or foot traffic lets them creep downward a little at a time. That is why a slope can look fine after mulching in spring and half-bare by fall without a single dramatic storm.
The practical takeaway is simple: if your mulch washes away, you do not have a “bad mulch” problem or a “bad luck” problem. You have a mismatch between your slope and your setup. And slopes are measurable, which brings us to the step most people skip.
Measure your slope before you spend a dollar
Every fix below costs something, either money or weekends. Spend five minutes measuring first, because the right fix for a gentle grade is useless on a steep one, and the fix for a steep one is overkill on a gentle grade.
The string-and-stakes method takes two sticks, a length of string, a tape measure, and a small line level:
- Drive one stake at the top of the slope and one at the bottom.
- Tie the string to the top stake at ground level, pull it taut, and level it before tying it to the bottom stake.
- Measure the run, the length of string between the stakes.
- Measure the rise, the distance from the level string straight down to the ground at the bottom stake.
- Divide rise by run and multiply by 100. That is your slope as a percent. A slope that rises 1 foot over 4 feet of run is a 25 percent grade.
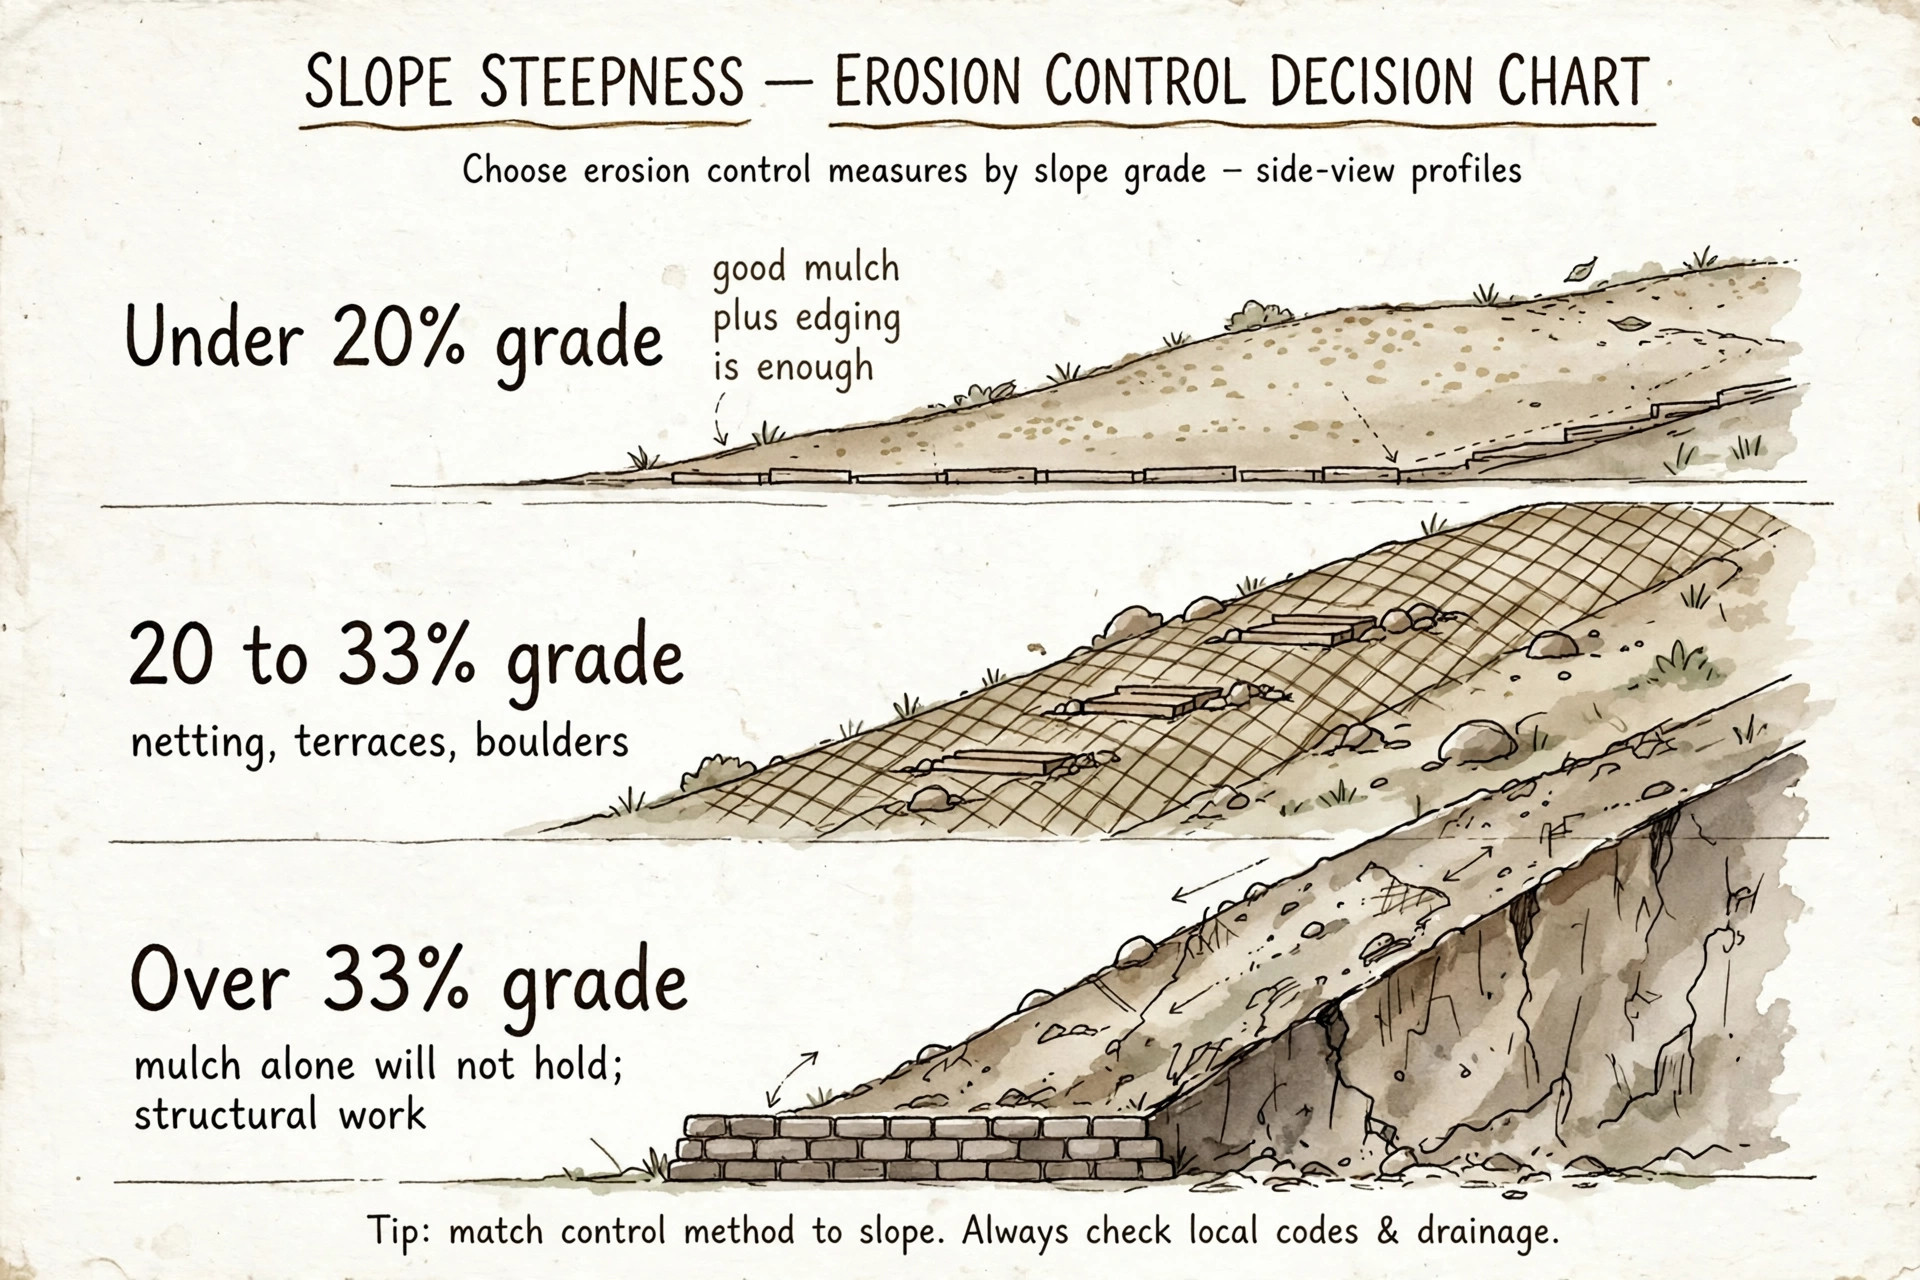
Here is what the number means for your mulch:
| Slope grade | What it is like | What your mulch needs |
|---|---|---|
| Under 20% | A gentle hill you can walk up easily | The right mulch type plus simple edging is usually enough |
| 20 to 33% | A noticeable grade you lean into when mowing | Long-fiber mulch, netting, terraces, or boulders to break the run |
| Over 33% | Steep enough that loose soil slides when you step on it | Mulch alone will not hold; think erosion blankets, deep-rooted plants, or a retaining wall |
These bands come from how landscapers size up slope jobs. Do not guess the grade. A slope that “looks fine” is often steeper than 20 percent, and that is exactly where the common mistakes start.
The usual reasons mulch will not stay put
Most washout stories trace back to one or more of these seven causes. Work through them like a checklist, because the fix for each one is different.
1. The mulch itself cannot lock together. Smooth, round pieces roll. Bark nuggets are the worst offender: they look great in the bag and head downhill with the first serious rain. Fine, dusty mulches have the opposite problem. They are light enough that sheet flow floats them off. Shredded hardwood, shredded cedar, and pine straw behave better because the fibers knit into a loose mat.
2. Plastic sheeting underneath. This one surprises people. If there is solid plastic under your mulch, rain cannot soak into the soil. All of it becomes surface flow, running fast right underneath the mulch and carrying it along. Avoid solid plastic weed barriers on any slope. Breathable landscape fabric or biodegradable jute netting lets water through while giving mulch something to grip.
3. The layer is too thick. More mulch is not more protection on a slope. Past about three inches, a thick dry layer has no cohesion. It sits heavy, slides as one slab under its own weight, and keeps plant roots from anchoring into the soil below, which makes the whole situation worse over time. Two to three inches is the sweet spot. University of Illinois Extension puts the standard recommendation at two to three inches of mulch, and that ceiling matters even more on a grade.
4. A downspout is aimed at the bed. This is the hidden cause in a huge number of mulch-migration cases. A single downspout can dump hundreds of gallons onto one spot during a storm, and if that spot is a mulched bed on a slope, no mulch type survives it. The fix is not better mulch, it is moving the water. Getting the discharge point far enough from the bed matters, and if the outlet itself keeps ponding, that is a separate problem to diagnose.
5. The soil is smooth and compacted. Mulch spread over hard, glassy soil has nothing to grab. Water runs off compacted ground instead of soaking in, and the mulch rides that runoff downhill. Roughing up the top inch or two of soil with a hard rake before mulching, and cutting shallow horizontal grooves across the slope, gives both water and mulch something to hold onto.
6. No edging at the bottom. Edging at the base of a slope acts like a tiny dam. It catches the pieces that migrate and stops them from ending up in the lawn or driveway. The bottom edge matters more than the top one, because everything travels downhill.
7. One long, unbroken run. A slope that runs twenty feet without interruption gives water twenty feet to build speed. Breaking it into shorter sections with terraces, boulder clusters, or even shallow hand-raked ridges across the grade cuts the water’s speed and its carrying power.
Mulch types, ranked for slopes
Not every mulch belongs on a hill. Here is how the common options behave once rain starts, from most to least likely to stay put.
| Mulch type | How it holds | Trade-offs |
|---|---|---|
| Shredded hardwood bark | Fibers interlock into a mat; the best all-around choice | Breaks down in 1 to 2 years; needs topping up |
| Pine straw (pine needles) | Needles knit together and flex with soil movement | Can be hard to find outside the Southeast; shorter life |
| Arborist wood chips | Mixed piece sizes knit together; often free from tree services | Chunky look; can tie up nitrogen at the soil surface as they decompose |
| Shredded cedar or cypress | Long fibers lock tightly; slow to break down | Costs more; cypress sourcing has sustainability concerns in some regions |
| Bark nuggets | Smooth and round; roll downhill easily | Fine for flat beds; poor choice for slopes |
| Pea gravel or river rock | Smooth stones shift and roll | Heavy and permanent, but heat stress near plants and no soil benefit |
| Rubber mulch | Light and slick; slides unless strongly edged | Does not decompose, so it never improves soil |
Two patterns to notice. First, shape beats weight: interlocking fibers hold better than heavy round pieces. Second, organic mulches feed the soil as they break down, which is the long game on a slope, because better soil grows the plants that eventually hold everything together.
What actually keeps mulch in place
Knowing the cause points at the fix. Here is what is worth considering, roughly in order of effort.
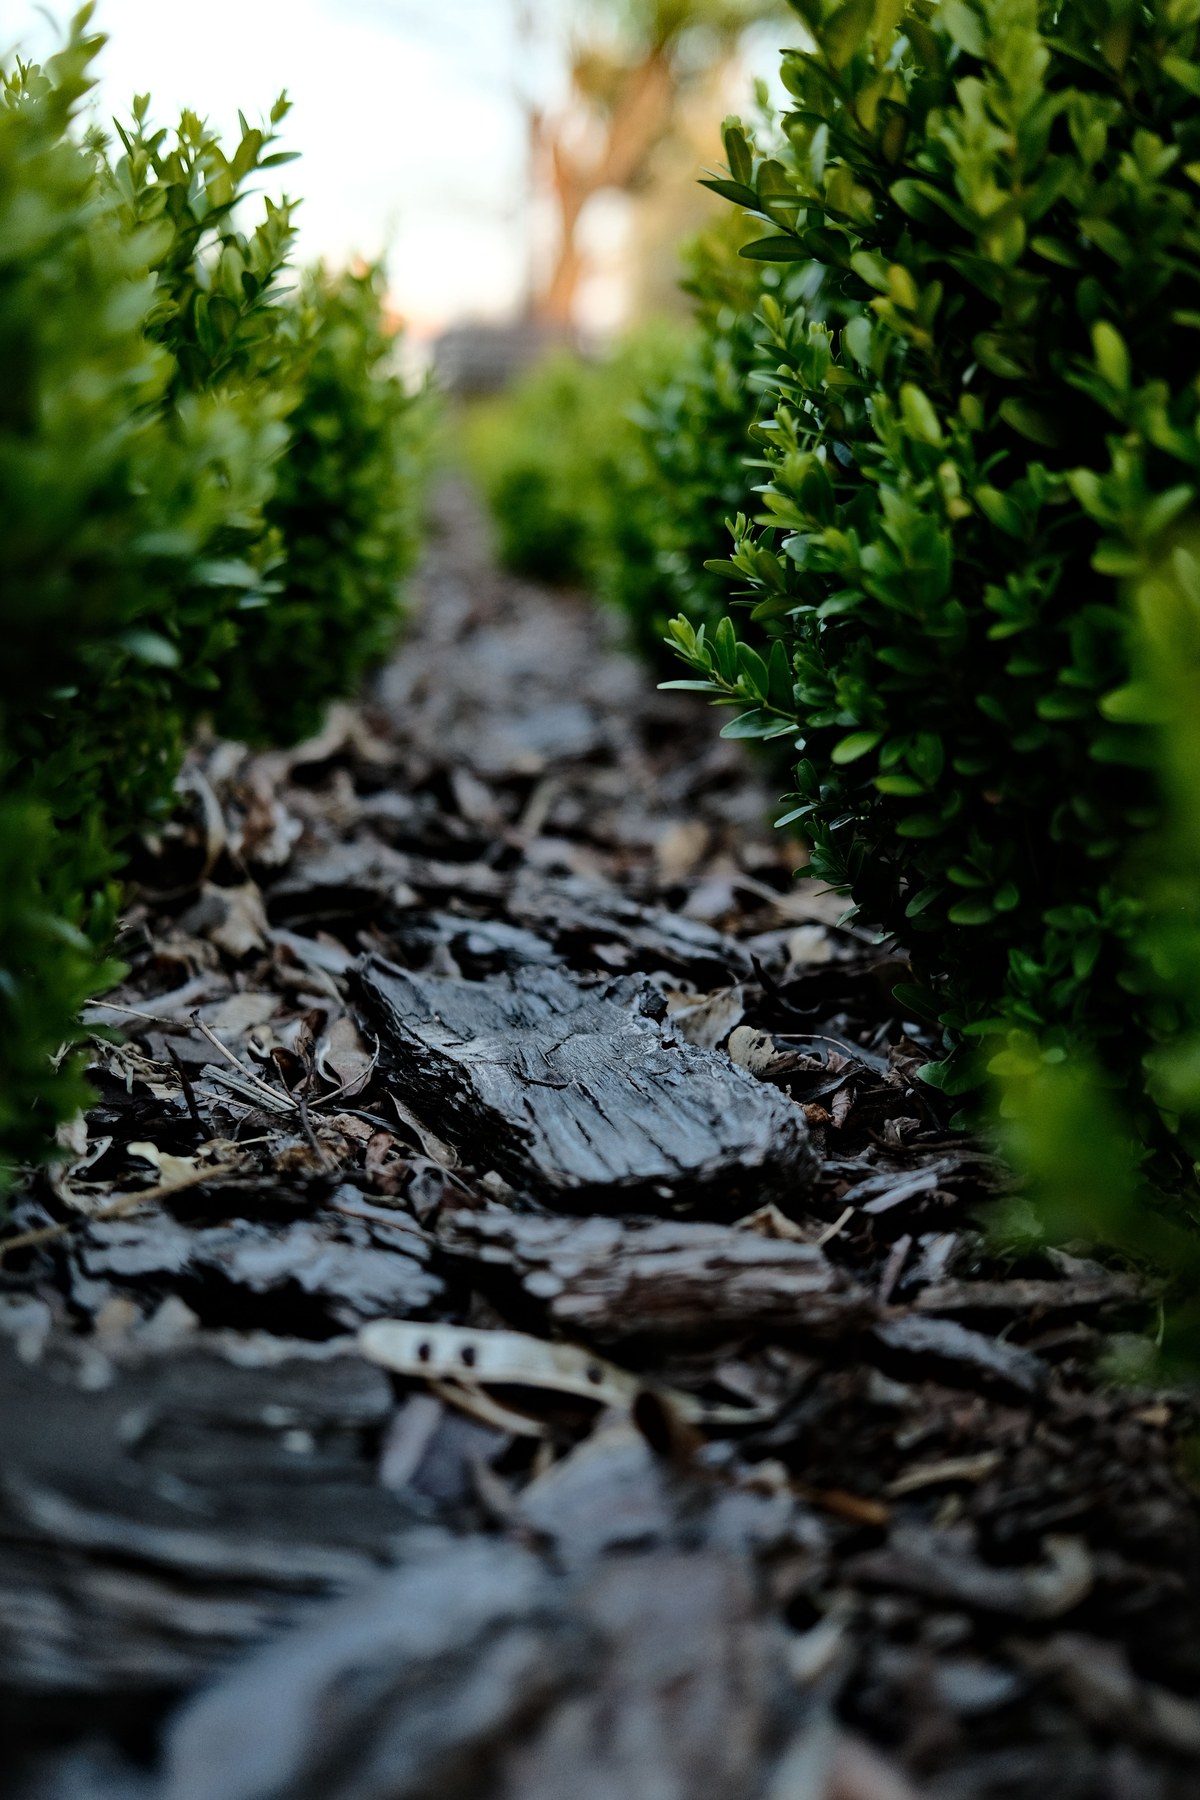
Start with the mulch itself. If you currently have nuggets or fine mulch on a slope, switching to shredded hardwood or pine straw is the cheapest meaningful change. Apply it in two thin one-inch layers, watering lightly between them so the pieces settle and pack together instead of sitting as one loose mass.
Add jute netting on moderate slopes. Biodegradable jute or coir netting, laid over the soil and pinned with landscape staples, holds mulch flat against the grade. It rots away in a year or so, by which time plant roots should be doing the job. Overlap the edges and staple generously where runoff runs fastest. For a trouble spot that keeps failing, some landscapers staple a second layer over the finished mulch for the first season.
Edge the bottom of the slope. Steel, stone, or timber edging set a few inches above the mulch line catches migrating pieces. Push it several inches into the ground so it cannot wash out itself.
Break the slope into terraces. On longer or steeper runs, low terraces built from landscape timbers, logs, or stacked stone turn one fast slope into several slow ones. Each level slows the water and gives mulch a flat place to sit. This is real construction work, not a Saturday project, once the slope gets serious.
Plant the living solution. Groundcovers and ornamental grasses with dense, fibrous roots are the long-term fix. Their stems physically trap mulch, their roots bind the soil, and their leaves soften raindrop impact before it reaches the mulch at all. Plant more densely than you would on flat ground so the coverage closes in fast.
Consider stabilizer sprays last. Liquid mulch tackifiers glue the top layer of mulch together. They help on gentle slopes with light erosion, but the bond breaks down after a few hard rains, so treat them as a seasonal touch-up, not a solution. Follow the product directions exactly, since some need a light misting of water to activate.
One more thing worth knowing: if you are planning a fresh mulch job on a slope, work out how much material you actually need before the delivery truck arrives. Two to three inches over a slope adds up fast, and ordering right saves a second delivery charge. A mulch calculator that converts your bed’s length, width, and depth into cubic yards takes about a minute and beats guessing.
When mulch alone will not cut it
Be honest about the slope you have. Mulch is a surface treatment. It cannot fix structural problems, and throwing more of it at a failing slope is how people end up re-mulching every spring. If the slope is only one symptom of a wider wet-yard problem, our guide to yard drainage problems helps you read the whole yard’s wet pattern.
Call a professional, or at least get a site visit, when any of these apply:
- The grade is over 33 percent and the slope is long. Erosion blankets, engineered drainage, or terracing with proper footings are beyond DIY.
- You see signs the slope itself is moving: leaning fence posts, cracked soil, exposed roots, or sediment piling up at the bottom after every rain. That is soil erosion, not mulch erosion, and it needs a different plan.
- You are considering a retaining wall. Walls above a few feet tall typically need engineering and permits, and a poorly built wall fails worse than no wall.
- Water is coming from somewhere you cannot control, like a neighbor’s uphill lot draining onto your slope. Grading and drainage law gets complicated fast.
The University of California’s Master Gardener program lists the same escalation path for hillside erosion: mulch and blankets for mild cases, terracing and drainage systems like French drains, dry creeks, or swales for serious ones. Mulch sits at the mild end of that spectrum. Respect where your slope falls on it.
After the next storm: the 20-minute check
No slope setup is maintenance-free. The people whose mulch stays put are the ones who walk the hill after big rains. Make it a habit:
- Walk the slope from top to bottom and look for bare patches where soil is showing.
- Rake migrated mulch back uphill before it travels far. It is much easier to move it back now than to replace it later.
- Check that edging is still upright and netting is still pinned. Restaple anything the water lifted.
- Clear sediment out of any terraces or drainage channels so water keeps moving the way you designed.
- Once or twice a year, top up with a thin one-inch layer to replace what decomposed or migrated.
Ten minutes in spring and ten after the worst storm of the season will do more for your slope than any product. Dealing with soggy ground beyond the slope too? Our breakdown of yard drainage problems covers the nine common causes and how to tell them apart.
Frequently asked questions
Because rain and gravity team up against it. Raindrops knock pieces loose, surface runoff carries them downhill, and gravity slowly drags the rest. Slopes over 20 percent grade make all three forces noticeably stronger.
Shredded hardwood bark is the most reliable choice for most slopes, because its fibers interlock into a mat. Pine straw is a close second where it is available. Avoid smooth bark nuggets and fine, dusty mulches on any grade.
Two to three inches, applied in two thin layers with a light watering between them. Deeper layers slide under their own weight and keep plant roots from anchoring, which makes erosion worse over time.
Breathable fabric or jute netting helps, because it gives mulch something to grip and lets water soak through. Solid plastic sheeting does the opposite: water runs across it and carries the mulch away faster. Never use solid plastic on a slope.
Yes, at minimum along the bottom of the slope. Edging acts as a small dam that catches migrating mulch. Set it a few inches above the mulch line and push it several inches into the ground.
They help on gentle slopes with minor erosion by gluing the mulch surface together, but the bond typically breaks down after a few hard rains. Use them as a seasonal touch-up alongside edging or netting, not as the only fix.
When the grade is over 33 percent, when you see signs the soil itself is moving (cracks, leaning posts, exposed roots), or when you are considering a retaining wall or drainage system. Those are structural problems, and mulch cannot solve them.
Sources
- University of California Master Gardeners: erosion control on hillsides: mulch absorbs raindrop impact and slows water moving downhill; biodegradable erosion control blankets protect soil while vegetation establishes.
- University of Illinois Extension: mulch depth guidance: two to three inches is the standard; deeper layers cause excess moisture and root problems.
- Lawn Love: how to mulch on slopes: measuring grade with the string-and-stakes method, slope bands, mulch type rankings, and the case against plastic sheeting under mulch.
- Mile High Landscaping: slope mulch methods: shredded over nuggets, hand-raked mini-terraces, jute netting, and dense planting to trap mulch.
- The Bulb Society: protecting new mulch from water damage: thin layered application, terracing, diversion channels, and tackifiers for rainy sites.

2 Comments
Pingback: How Far Should Downspouts Drain? Distance Guide | Home Exterior Lab
Pingback: Yard Drainage Problems: 9 Causes of Soggy Ground